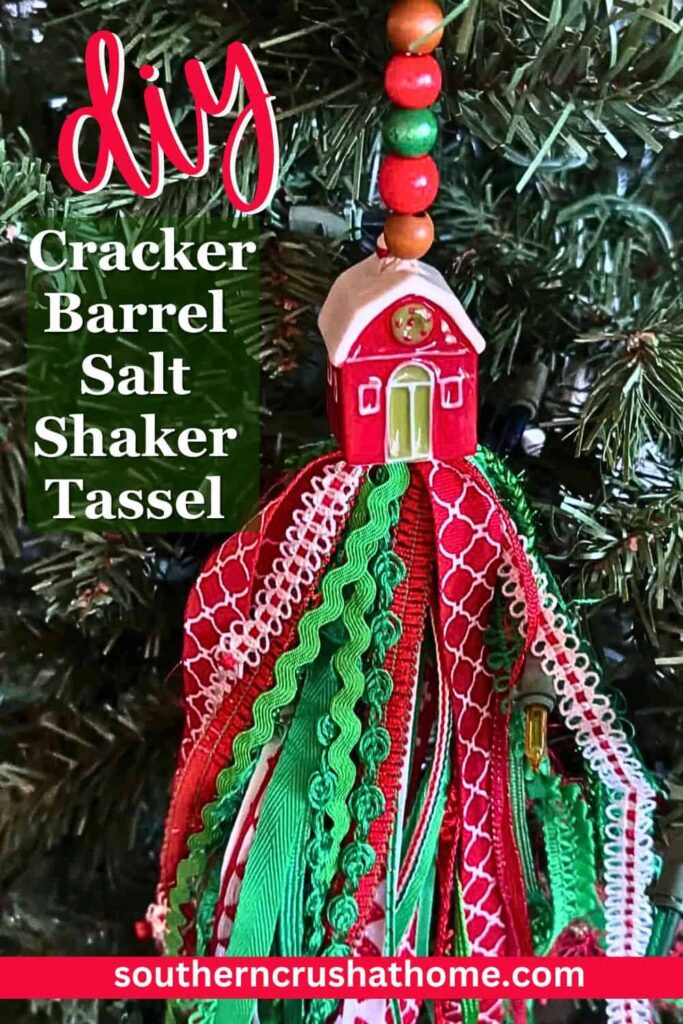
How to Make an Easy Salt Shaker Tassel
Looking for a creative and unique way to add some charm to your home decor? This Easy Salt Shaker Tassel project is such a fun DIY!
Whether you’re decorating for Halloween, Fall, Christmas, or any other holiday, this viral tassel craft using a salt shaker is so much fun to make.
PIN this for later!
Using just a few simple supplies like a salt or pepper shaker, assorted ribbons, and some embellishments, you can create a decorative tassel that’s great for hanging on doorknobs, adding to a tiered tray, or as a festive accent for your seasonal decor.
This blog post contains affiliate links. The opinions are wholly my own from my own experience. I may earn a small commission from clicks through to the websites that end in a purchase.
Supplies You’ll Need:
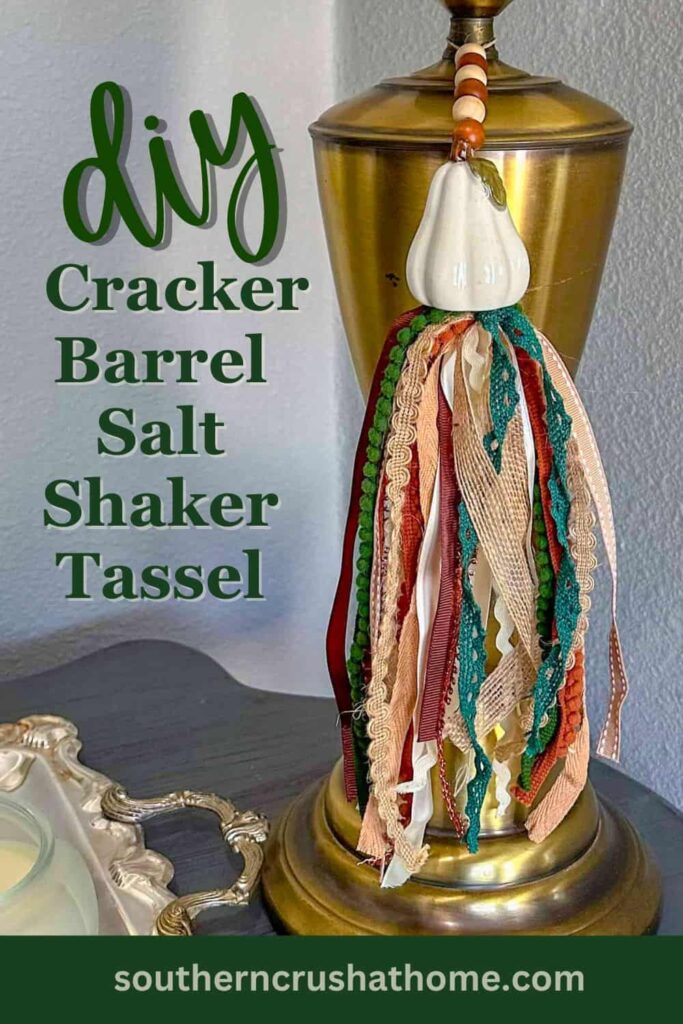
- Salt shaker or pepper shaker (from Cracker Barrel, Dollar Tree, or any thrift store)
- Assorted ribbons (I used a pre-bundled ribbon sets from Michaels)
- Floral wire or hemp twine
- Beads or other embellishments (optional for extra detail)
YouTube Shopping Video
If you want to see all of the fun shakers I found, watch this YouTube video!
Step-by-Step Instructions for Making a Salt Shaker Tassel
In this tutorial, I’ll guide you step-by-step on how to create your own salt shaker tassel. I’ll be sharing versions for Fall and Christmas, but feel free to get creative and make one for any occasion!
YouTube Video Tutorial
Step 1: Pick Your Salt Shaker
Start by selecting a salt or pepper shaker for the base of your tassel. You can find affordable options at places like Cracker Barrel or Dollar Tree, or use a vintage one you already have at home.
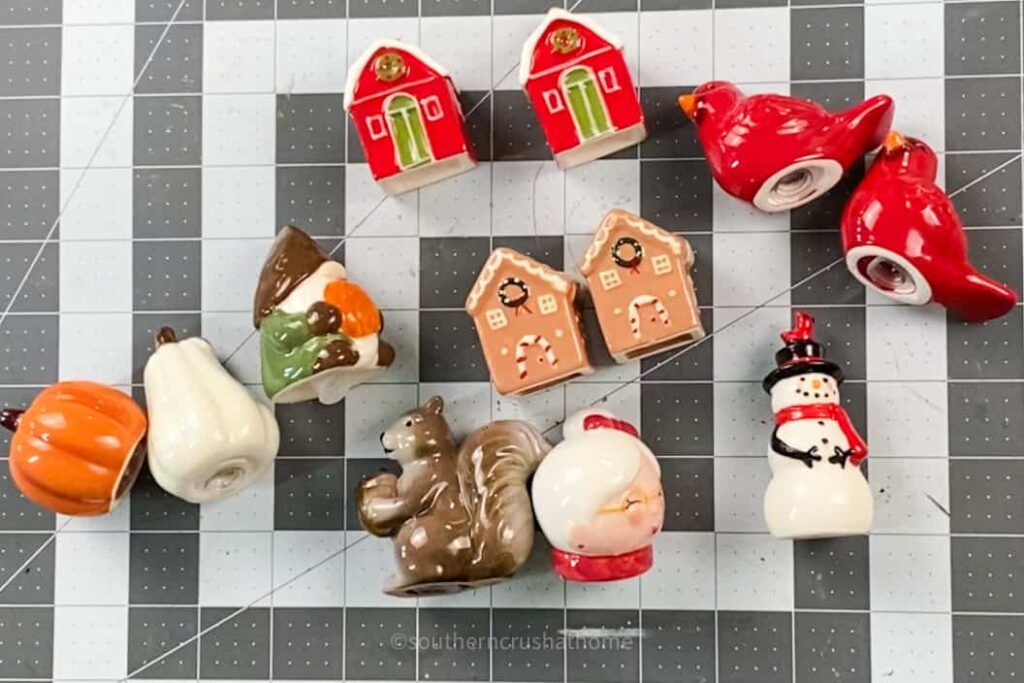
Look for shakers with interesting textures or shapes to make your tassel stand out even more!
Step 2: Choose Your Ribbons
For the tassel part, you’ll need a selection of ribbons in varying colors and textures. I found a beautiful pre-bundled set of assorted ribbons at Michaels, but you can mix and match ribbons that suit the theme you’re going for.
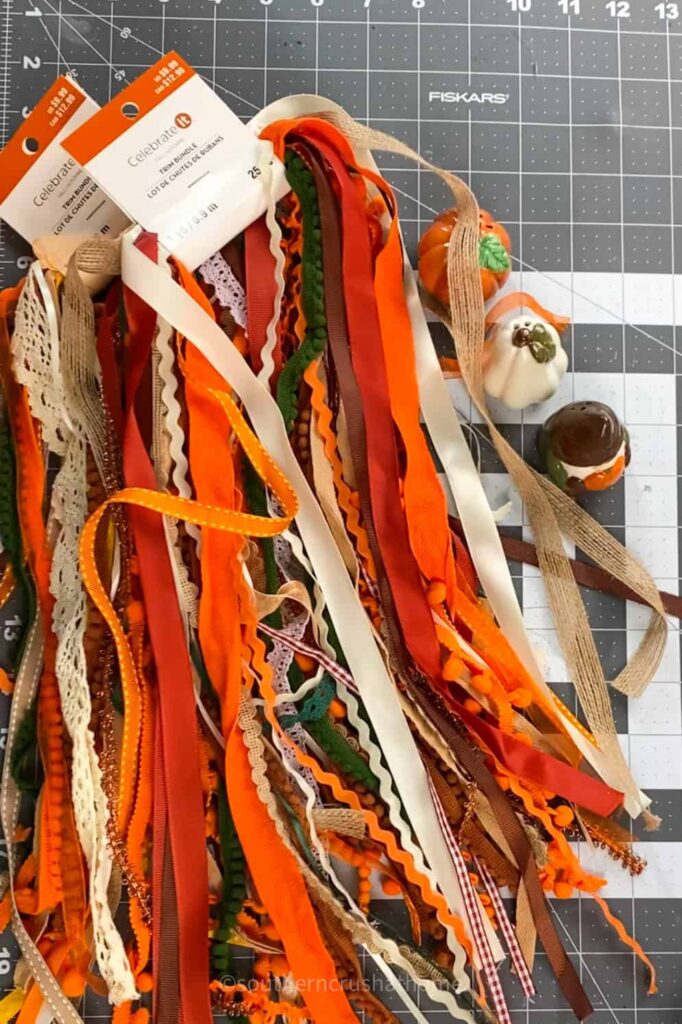
For a Fall tassel, think warm tones like burnt orange, burgundy, and golden yellow. For a Christmas tassel, go with festive reds, greens, and metallics like gold or silver.
Step 3: Cut Your Ribbons
Once you’ve chosen your ribbons, cut several pieces to your desired tassel length. The length of the ribbons should be about double the final length you want the tassel to be, as you’ll fold them in half when you attach them to the shaker.

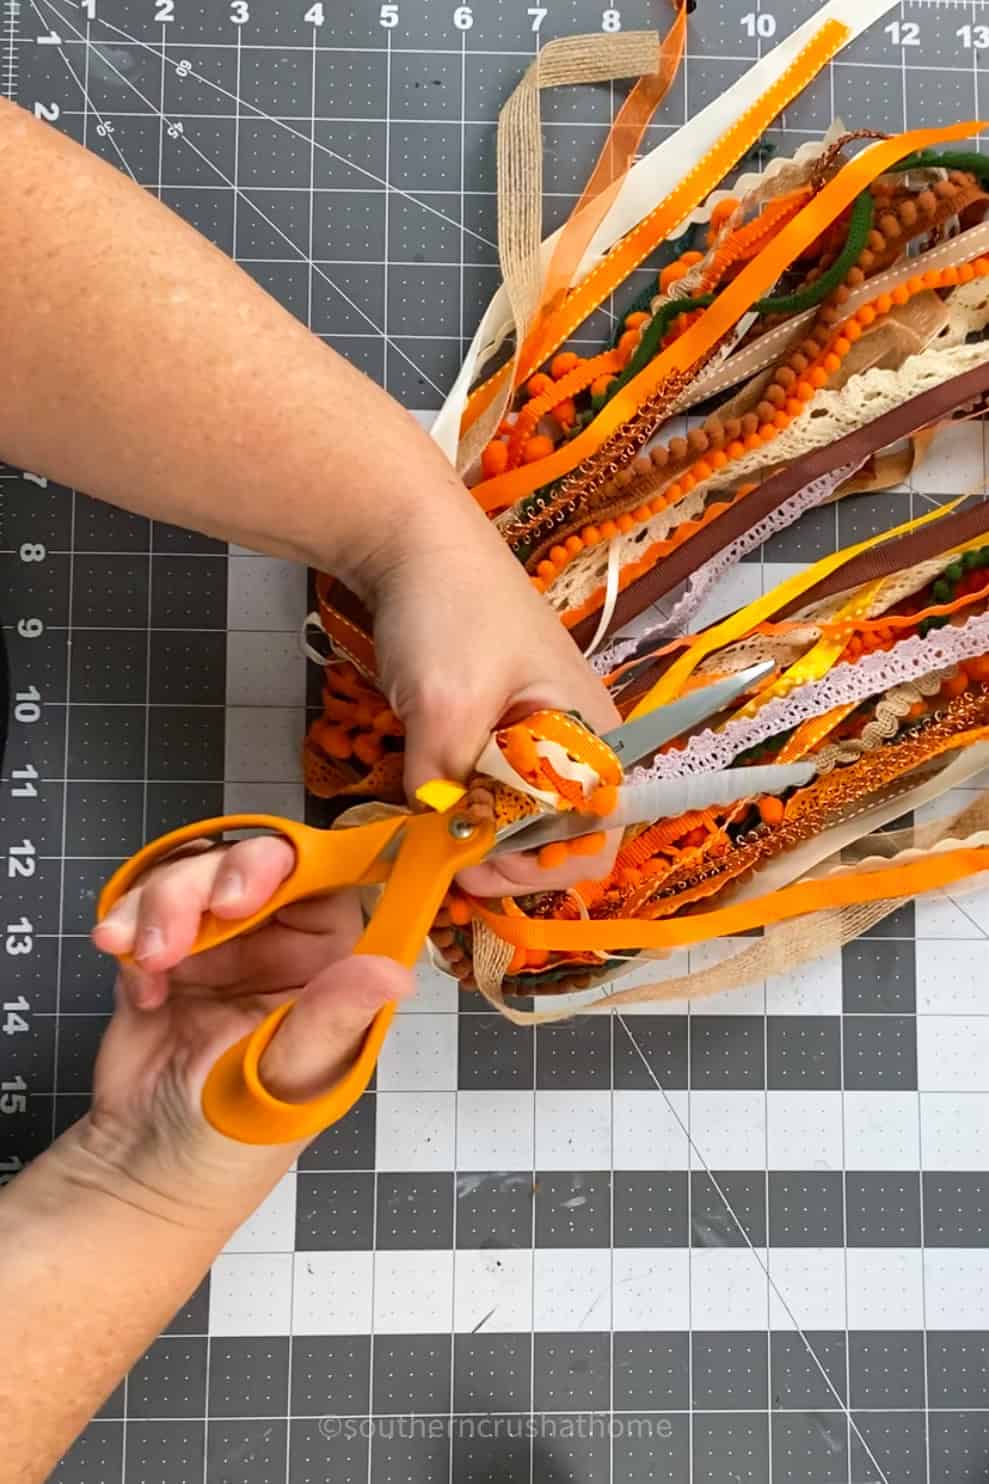
For example, if you want your tassel to be 6 inches long, cut each ribbon about 12 inches long.
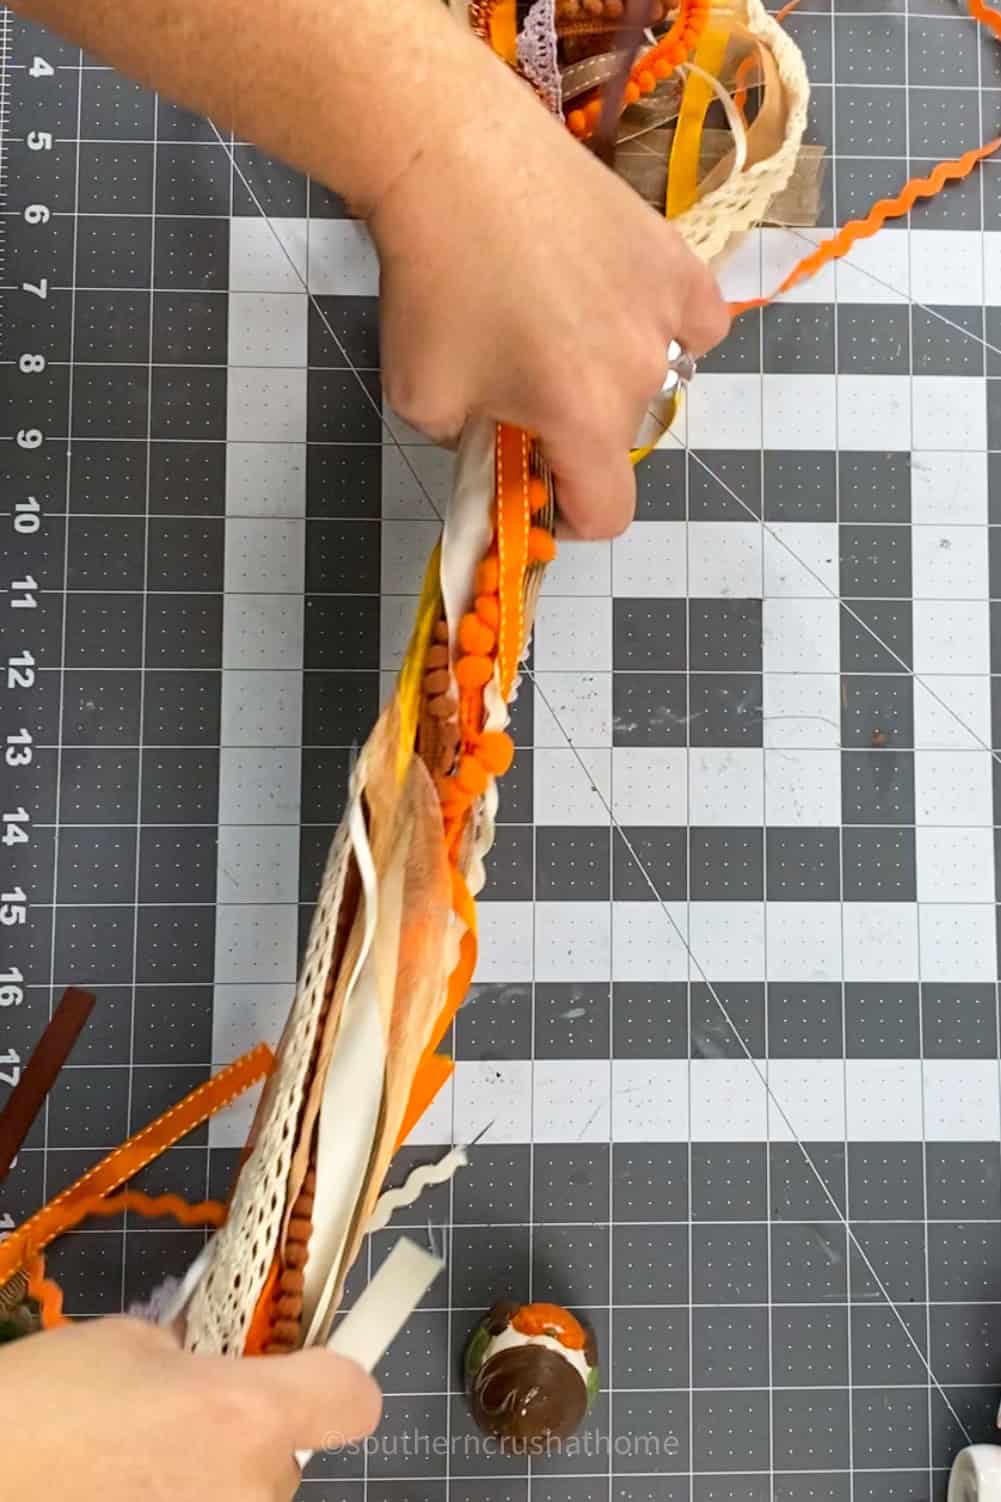
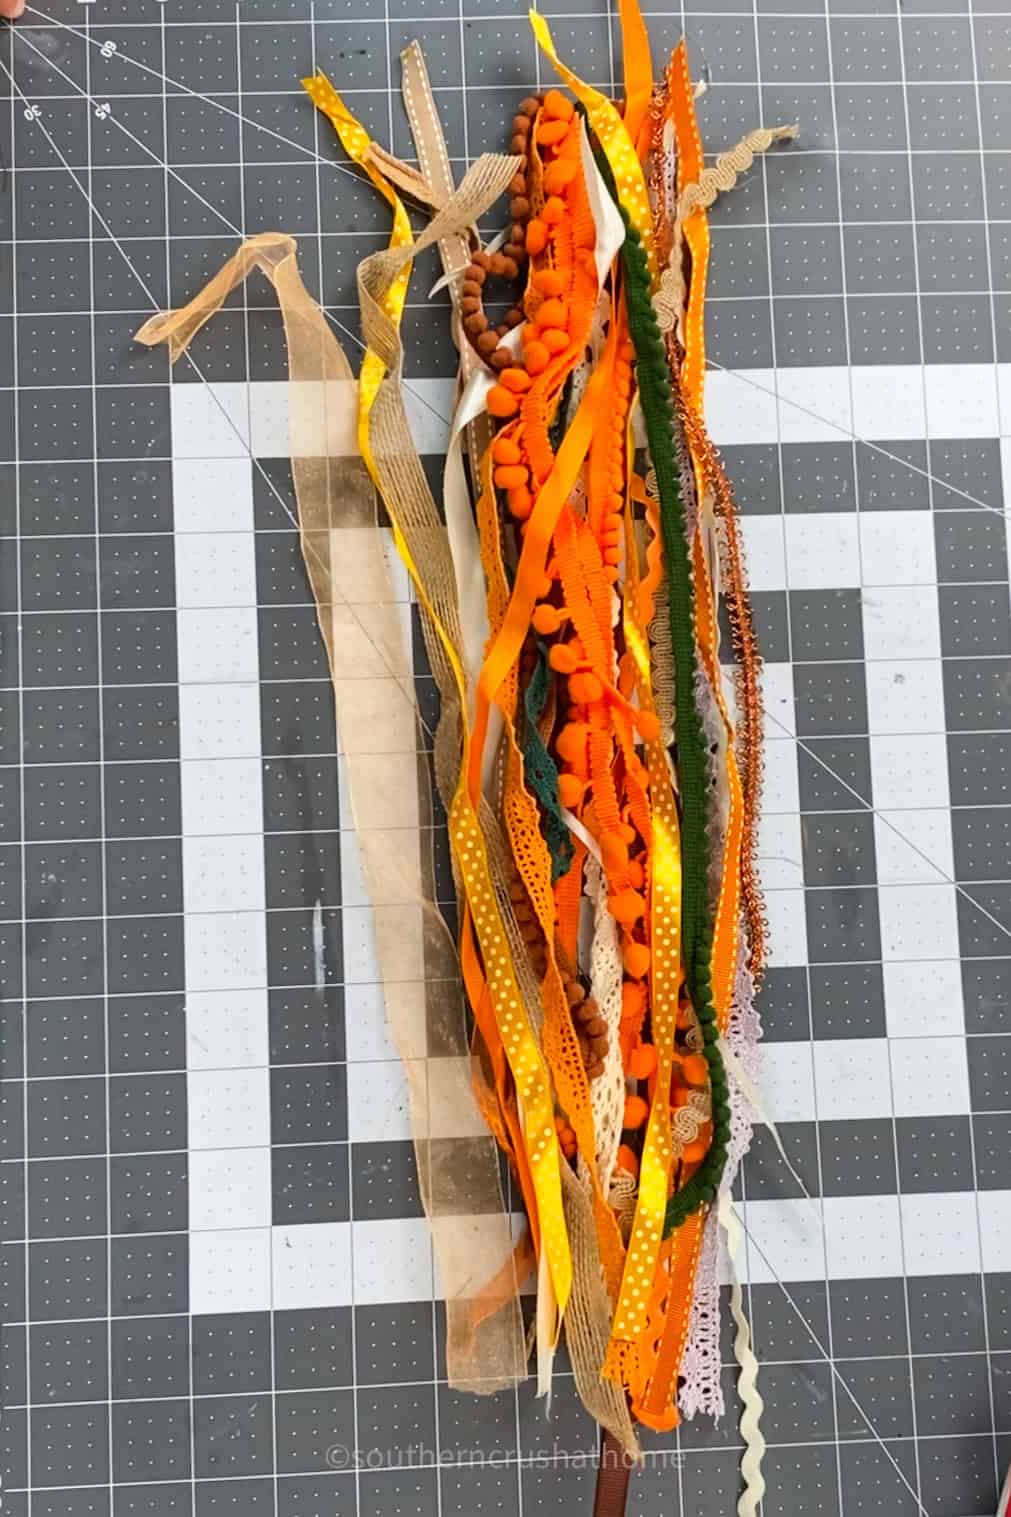
Step 4: Create the Tassel
Take the bundle of ribbon pieces and fold them in half. Secure the folded end with a piece of floral wire, twisting it tightly around the ribbon to hold everything together.

Make sure the wire is tight enough to keep the ribbons secure, but not so tight that it bunches the ribbons awkwardly.
If you’re using the hemp twine, follow the same procedure and tie a knot.
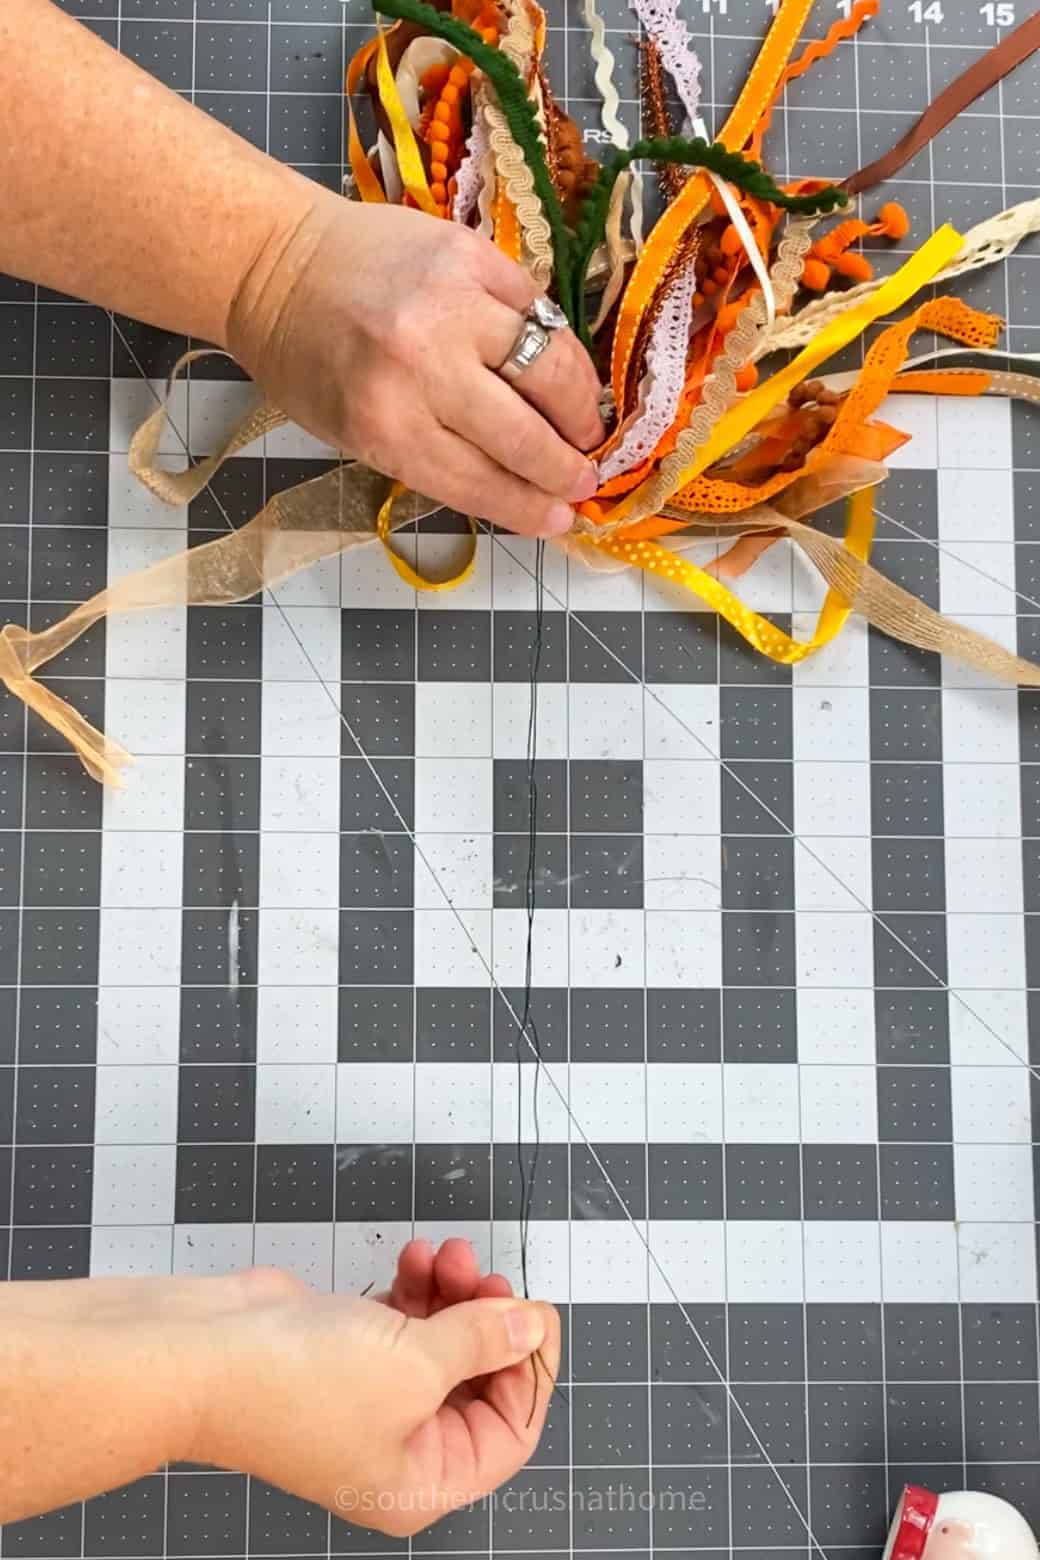
Step 5: Attach the Tassel to the Shaker
Choose the salt shaker you want to use that coordinates with the ribbon and remove the rubber stopper from the bottom.
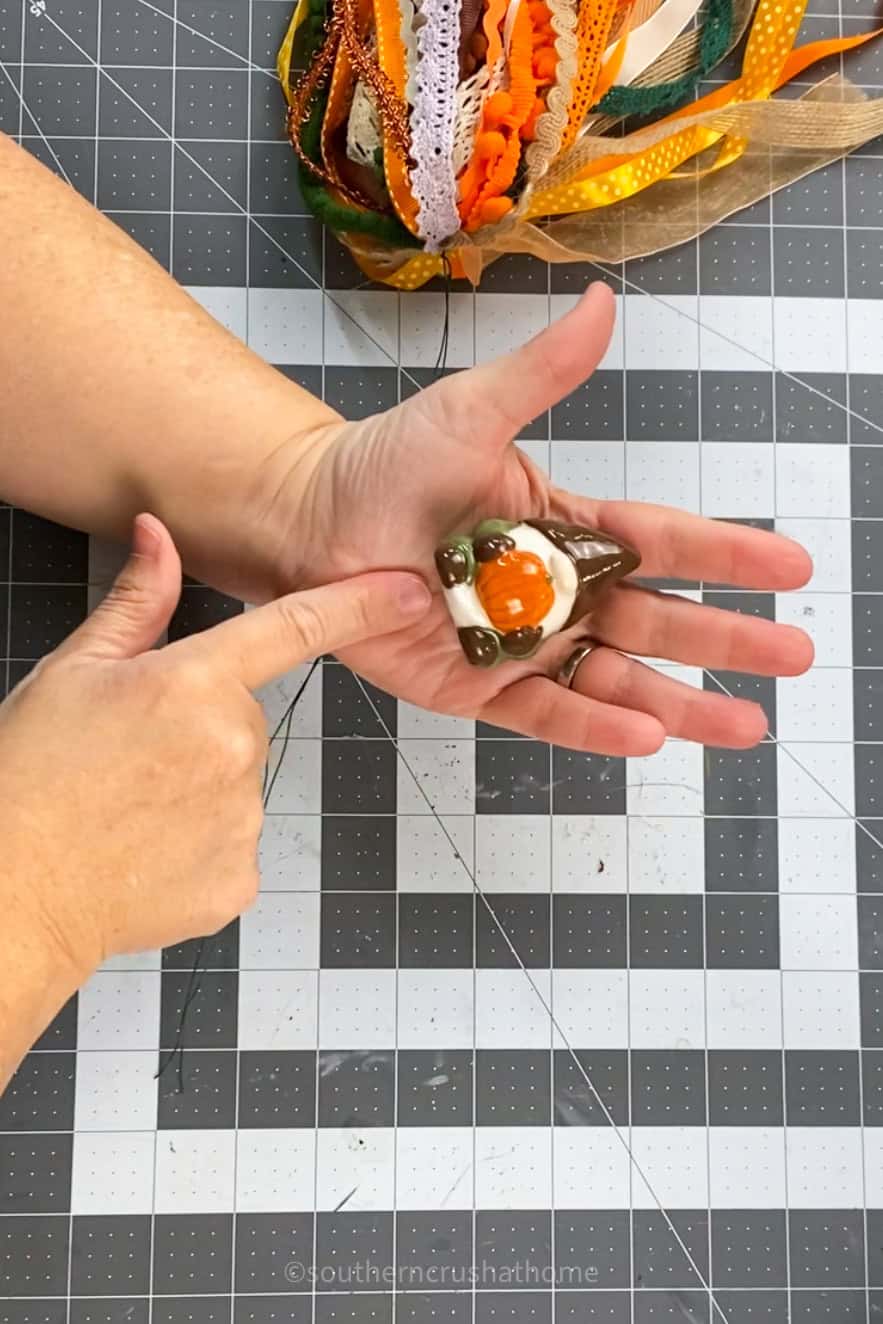
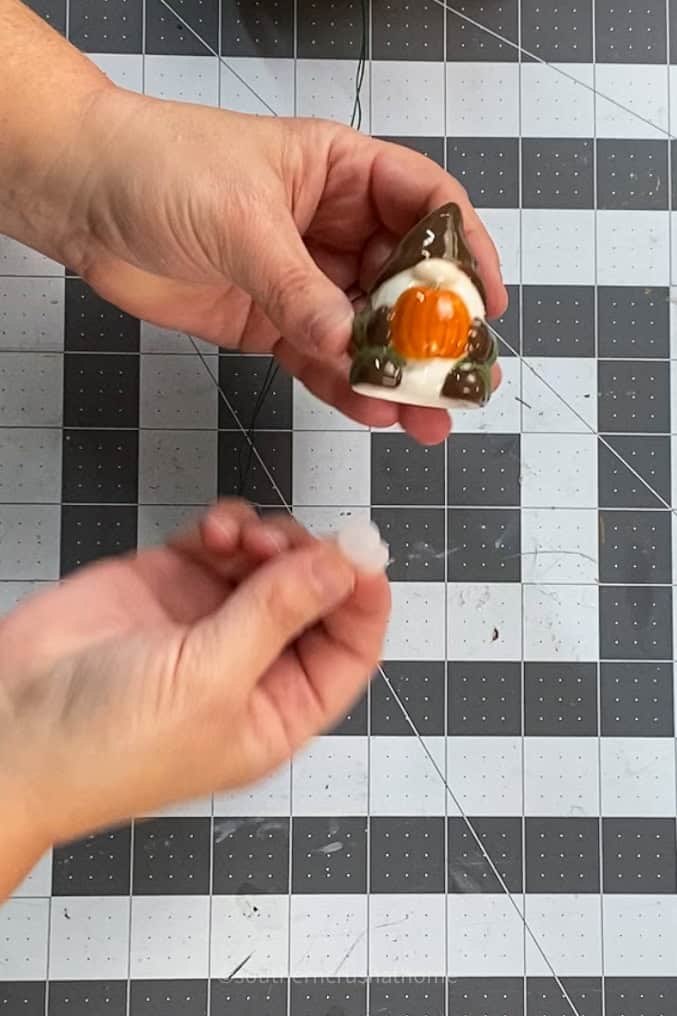
Feed the floral wire through one of the holes in the salt shaker lid, pulling the tassel through the opening so that it hangs freely.
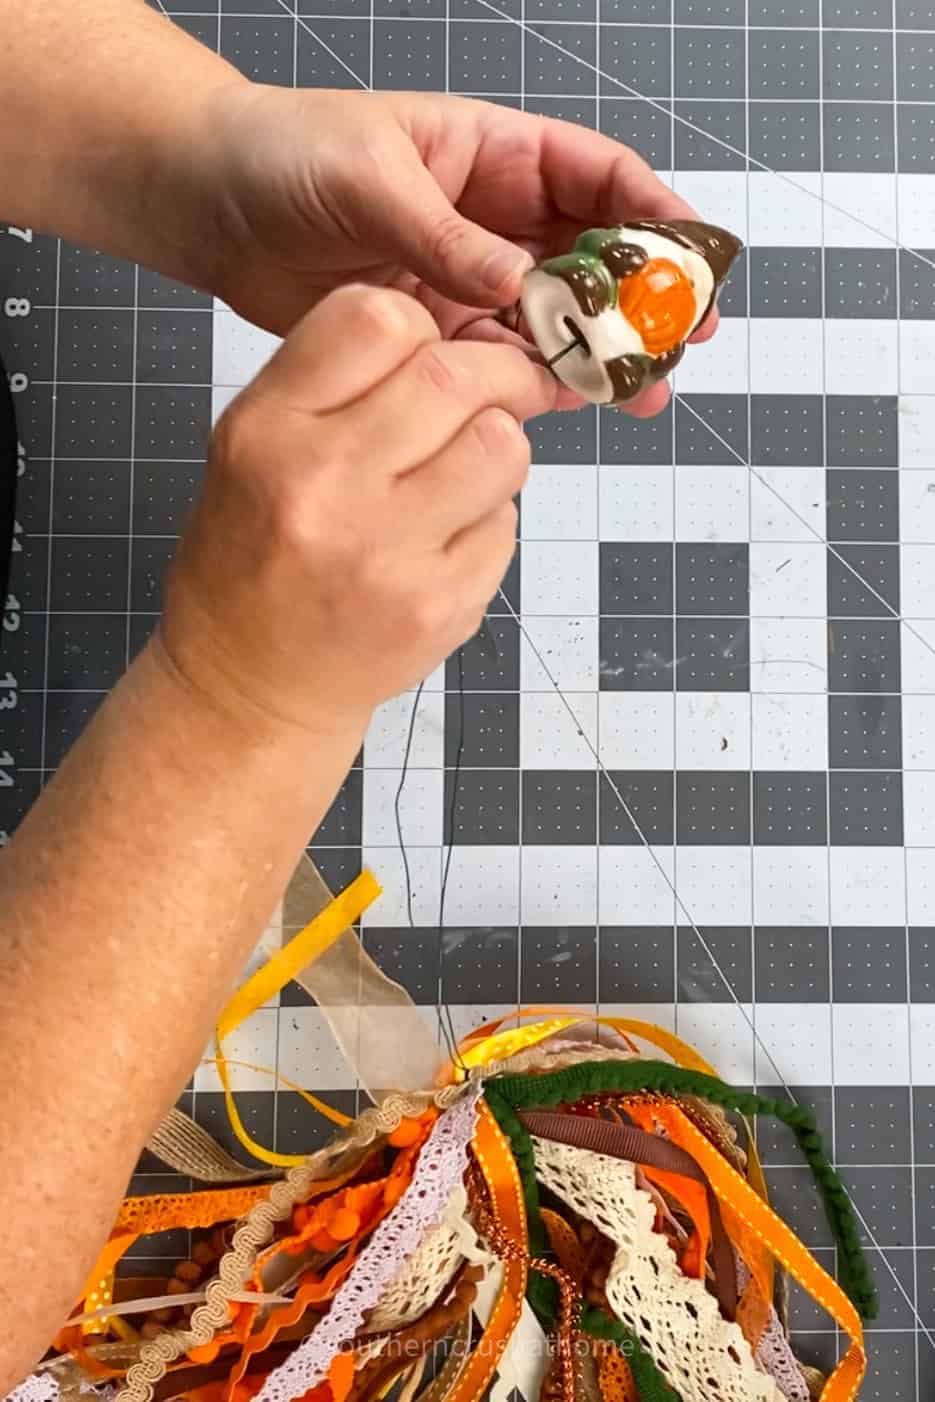
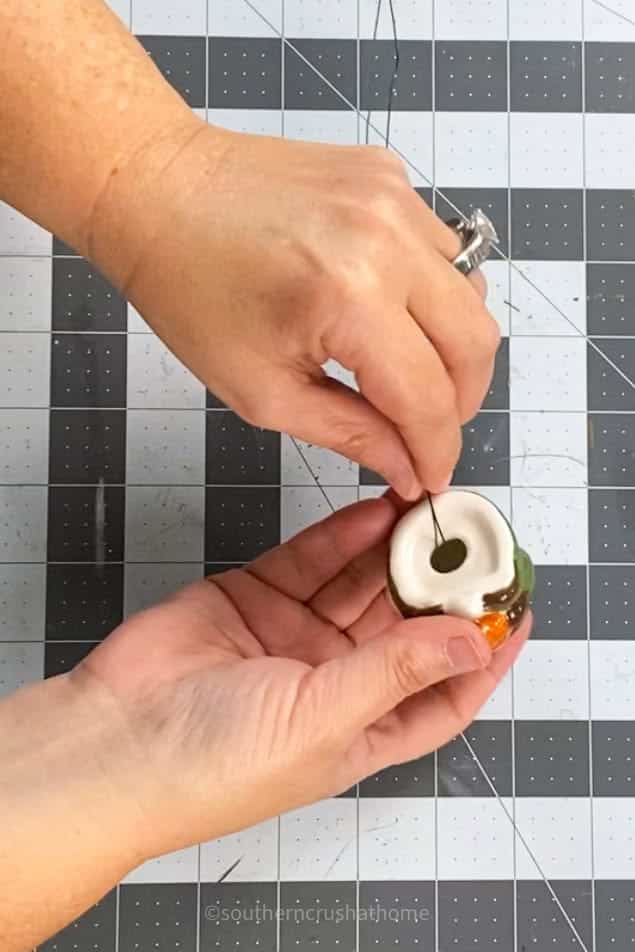
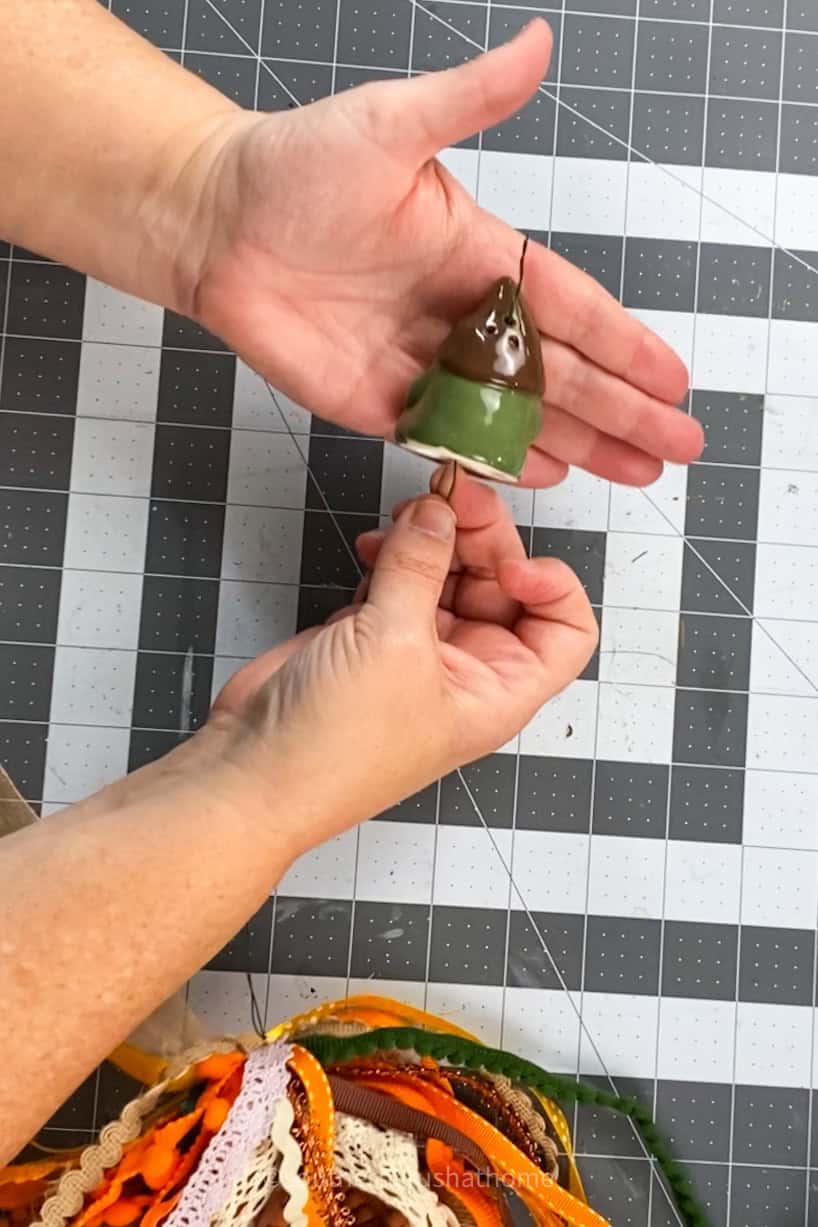
Twist the ends of the wire inside the shaker to hold the tassel in place. If needed, use a hot glue gun to further secure the wire inside the shaker.
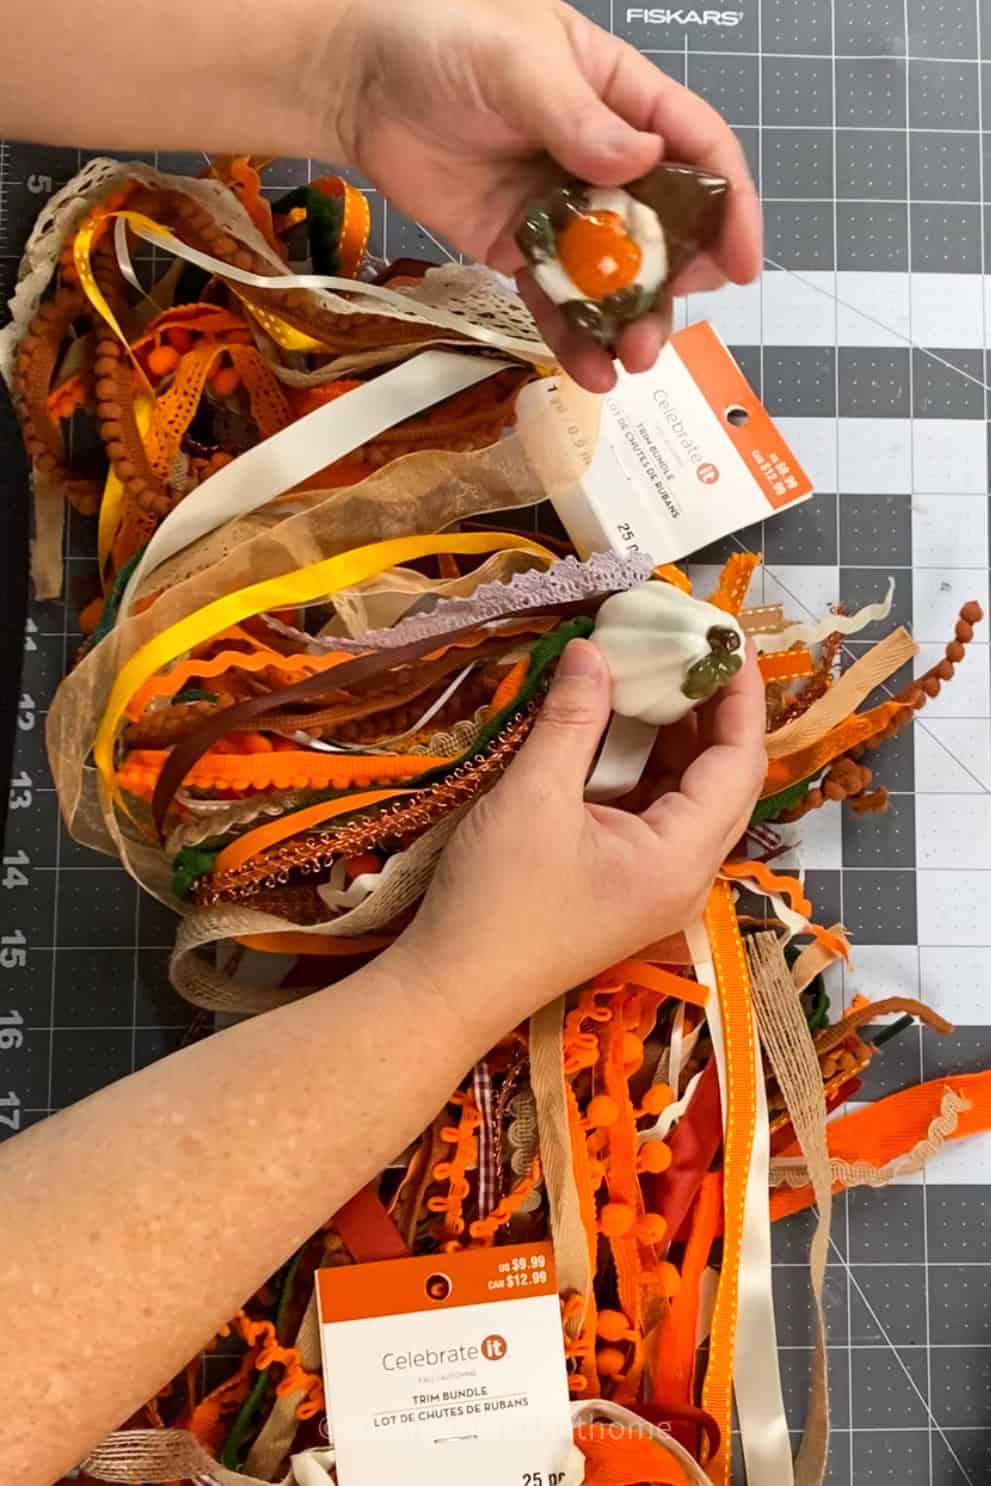
Step 6: Add Beads or Embellishments (Optional)
To add a little extra flair to your tassel, string beads or other embellishments onto the floral wire before attaching it to the shaker.
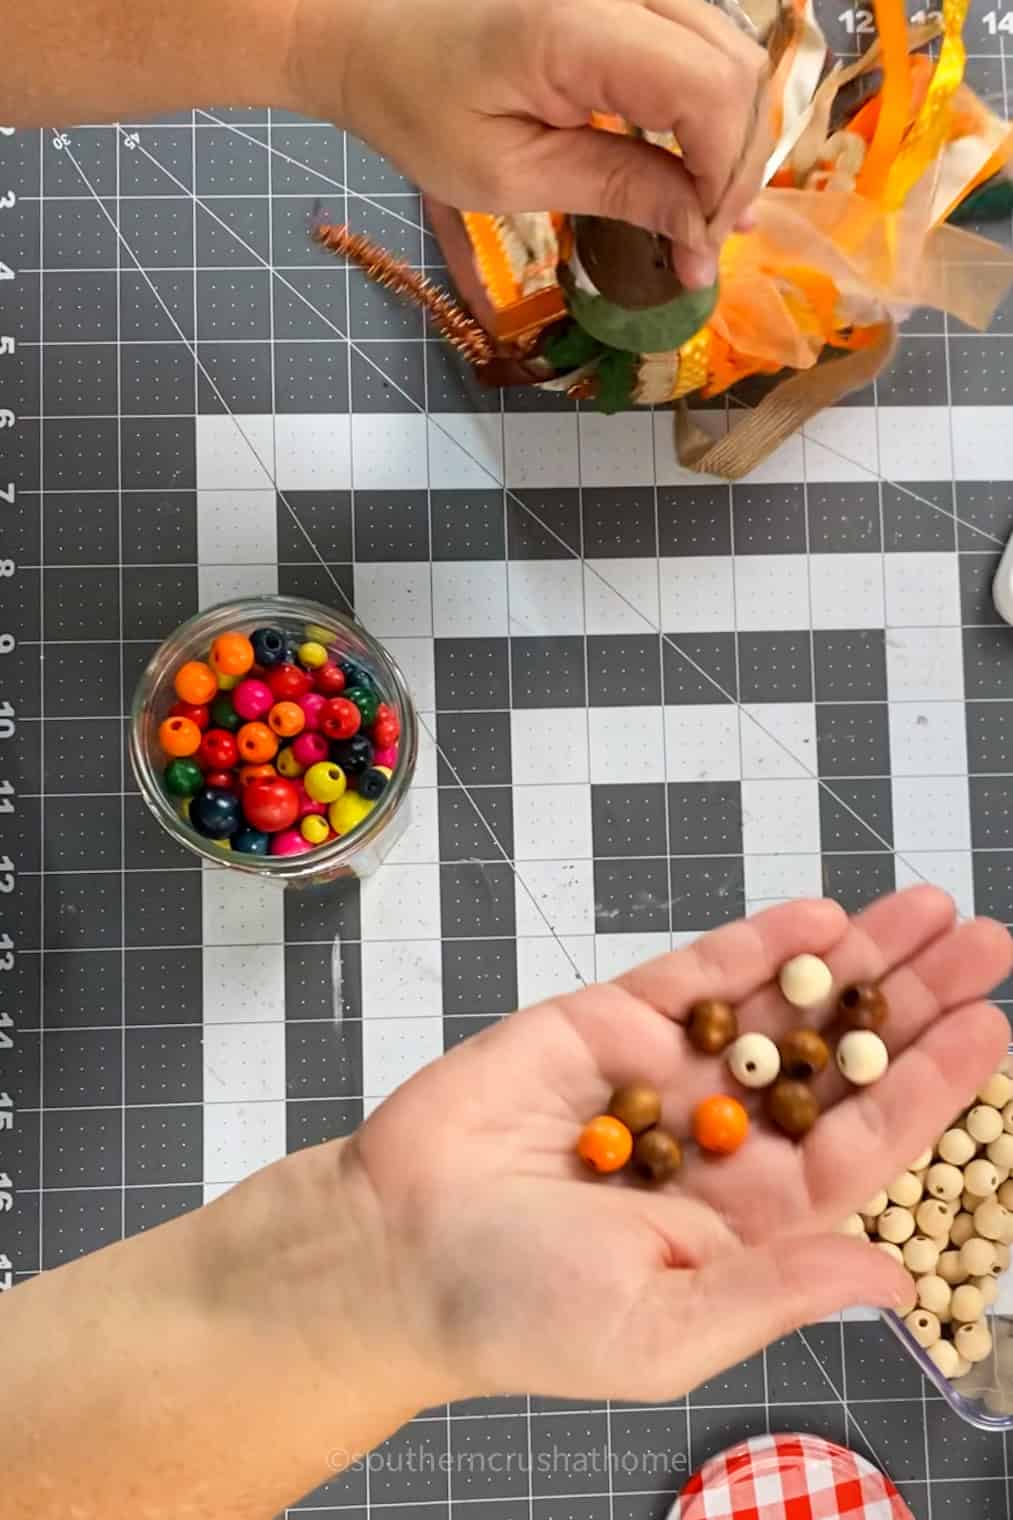
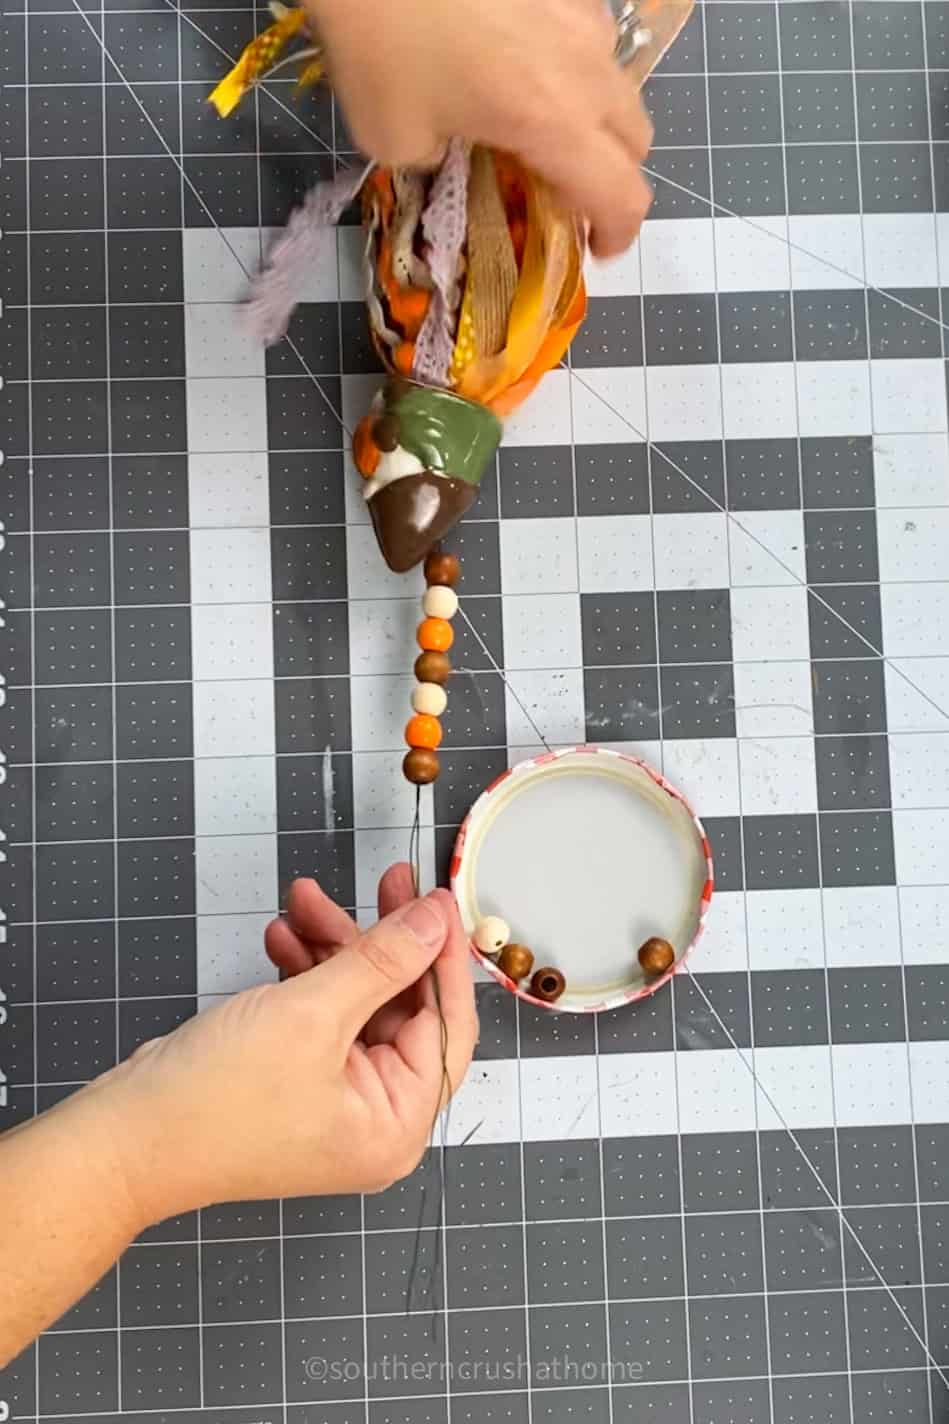
You can choose colors and materials that match the season—wooden beads for fall or sparkly metallic ones for Christmas.
Step 7: Style Your Tassel
Now that your tassel is complete, it’s time to display it!
Hang it on a doorknob, add it to a tiered tray, or use it as a decorative accent in your seasonal vignettes.

The possibilities are endless, and this project is so easy to customize that you can make different tassels for every holiday or season.
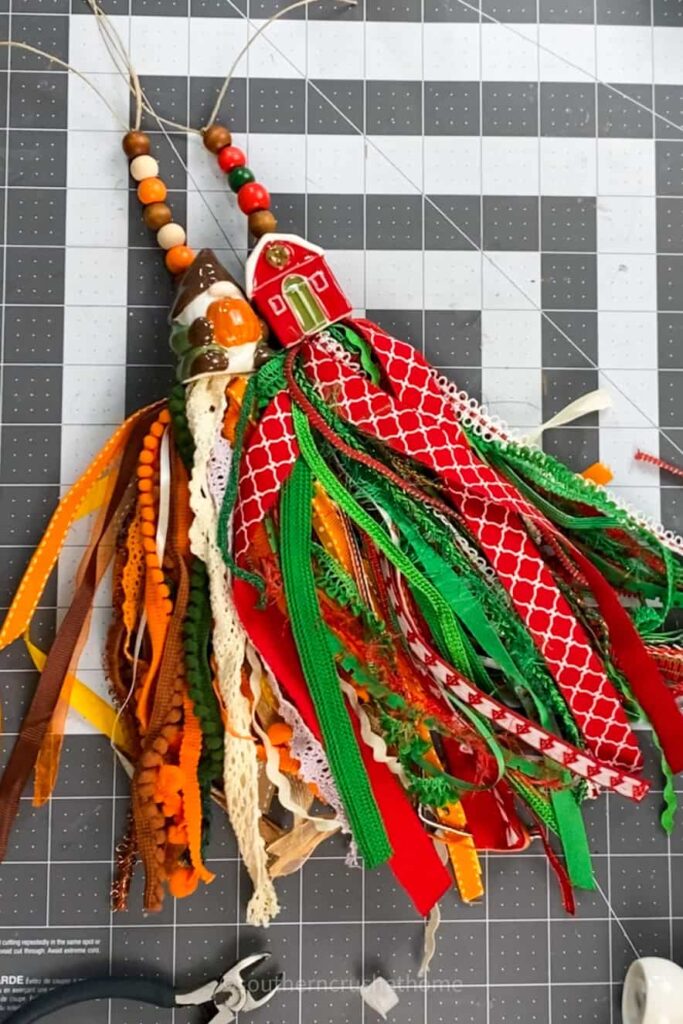
Ideas for Seasonal Salt Shaker Tassels
Fall Tassels:
- Use ribbons in warm, earthy tones like burnt orange, mustard yellow, deep red, and brown.
- Add embellishments like mini pinecones, acorns, or small wooden beads for a rustic autumn look.
- Display your fall tassel on a wreath, tiered tray, or mantel alongside pumpkins and leaves.

Christmas Tassels:
- Choose festive ribbons in shades of red, green, gold, and silver.
- Incorporate bells, snowflakes, or tiny ornaments as embellishments for a festive touch.
- Hang your Christmas tassel on a doorknob, Christmas tree, or use it to decorate a gift.

This Easy Salt Shaker Tassel is a fun, affordable, and customizable craft that works for any season.

Whether you’re creating a cozy fall tassel or a festive Christmas tassel, this project adds a charming, handmade touch to your home decor.

It’s quick to make and can be easily updated for each season—simply swap out the ribbon colors and embellishments!

So grab a salt shaker, gather your ribbons, and start creating your own personalized tassel to decorate your home with seasonal charm!
Which DIY tassel was your favorite? Let me know in the comments below.
PIN this for later!