How to Stencil a Thrifted Tarnished Vase Using Silver Polish
Today I’m sharing how to stencil a thrifted tarnished vase using silver polish. Transforming tarnished treasures from the thrift store into stylish, personalized decor can be a fun and rewarding DIY project.
Recently, I found a beautiful but tarnished sterling silver vase for just $2.50 at Goodwill and decided to give it a makeover using a stencil, silver polish and a little elbow grease.
The result was a stunning monogrammed piece that added a touch of elegance to my home. Here’s how I did it!
This blog post contains affiliate links. The opinions are wholly my own from my own experience. I may earn a small commission from clicks through to the websites that end in a purchase.
Materials You’ll Need
- Thrifted tarnished piece of silver
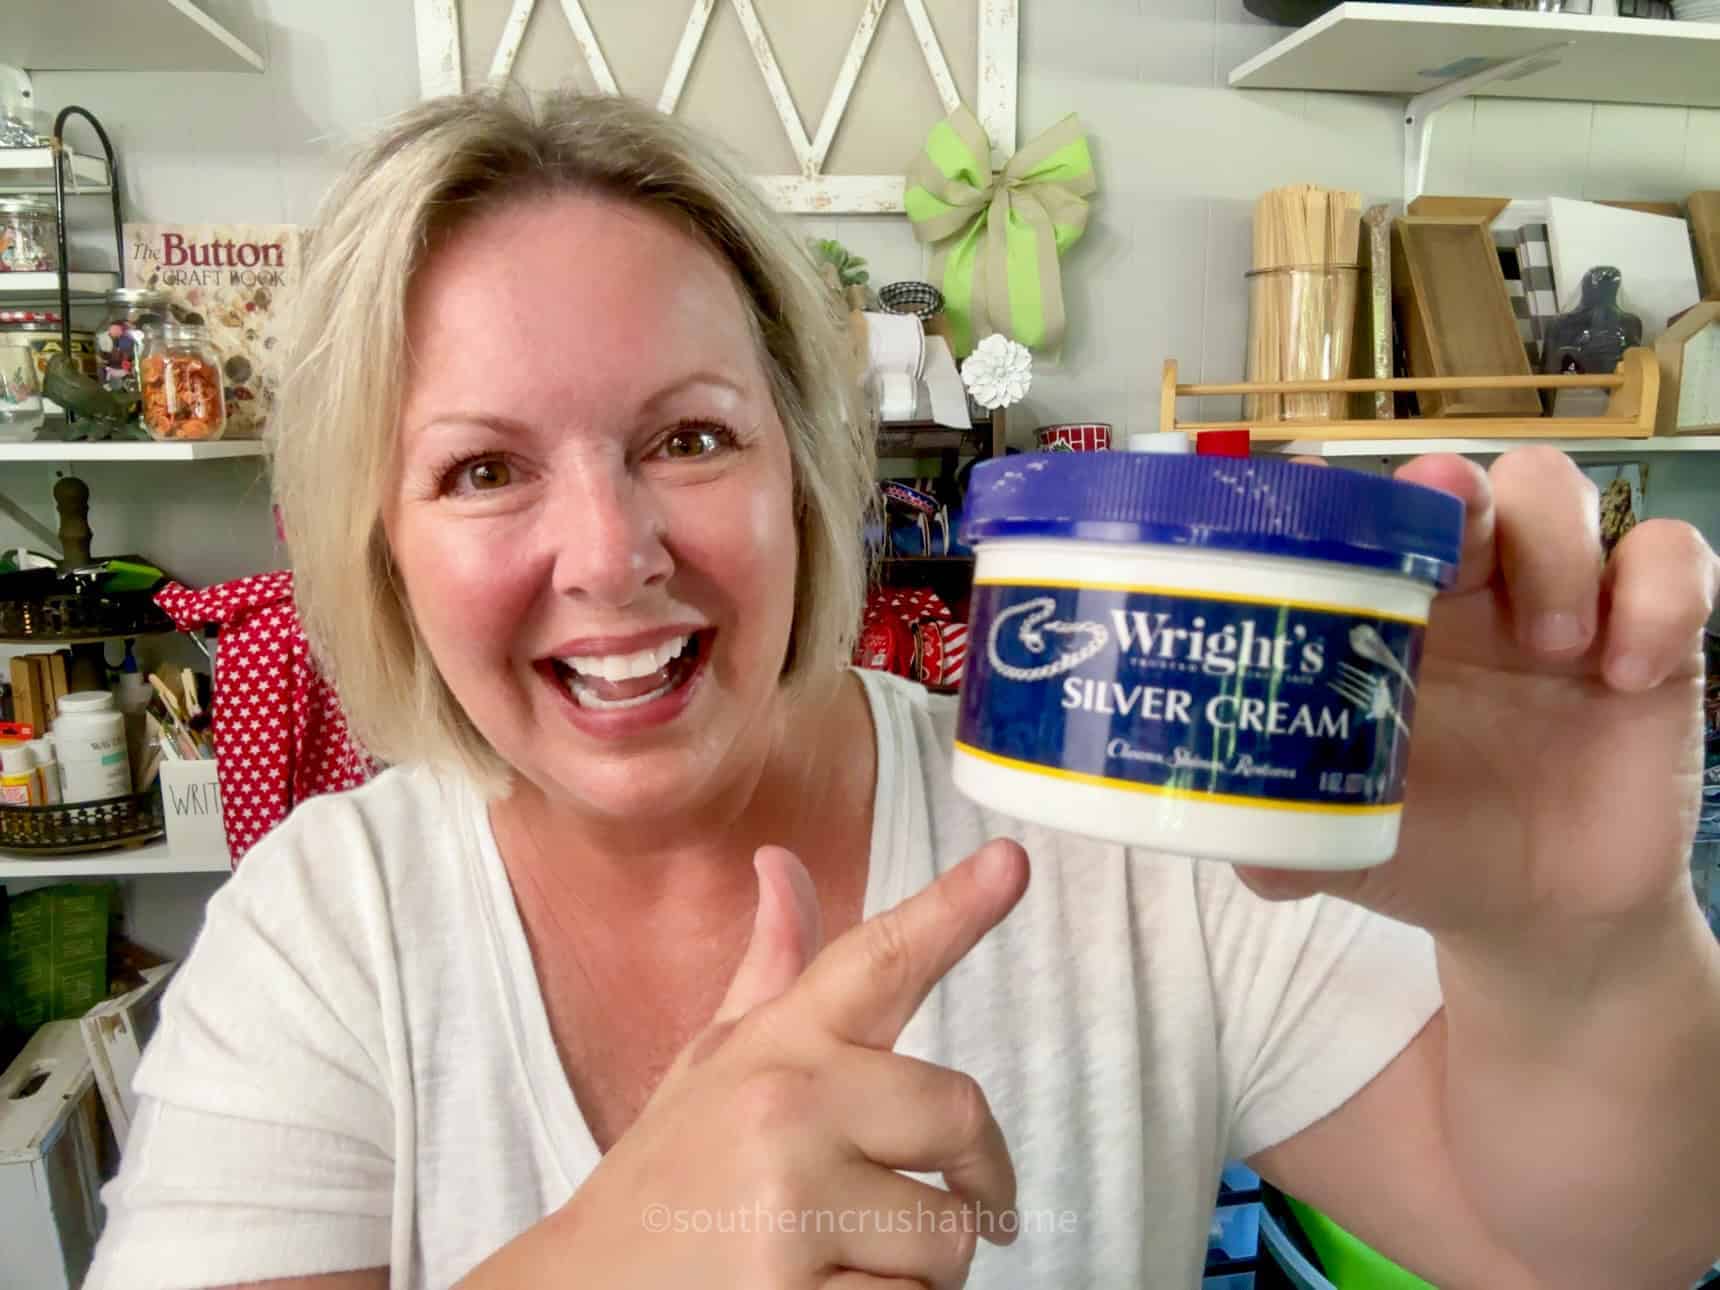
- Wright’s Silver Cream
- Cricut Joy machine (or any stencil)
- Permanent white vinyl
- Transfer tape
- Burnishing tool
- Scissors
- Flowers for styling (I used blue hydrangeas and white lilies from Trader Joe’s)
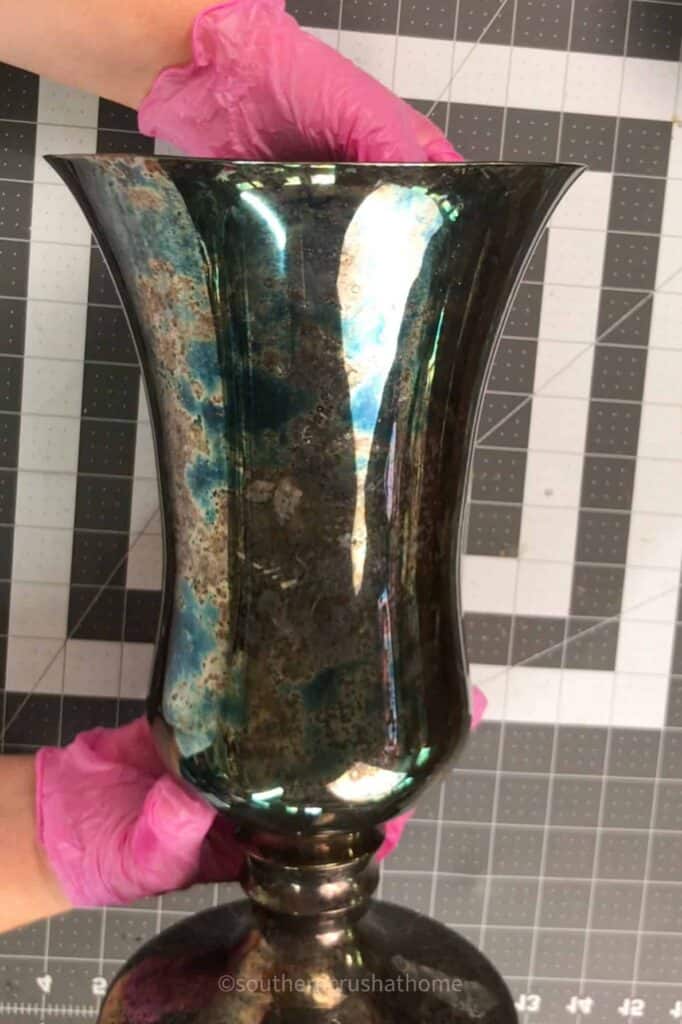
I love the look of this particular tarnish ~ a gorgeous blue and gray marbled look, reminiscent of the popular Wedgewood blue.
Step-by-Step Tutorial for Stenciling with Silver Polish
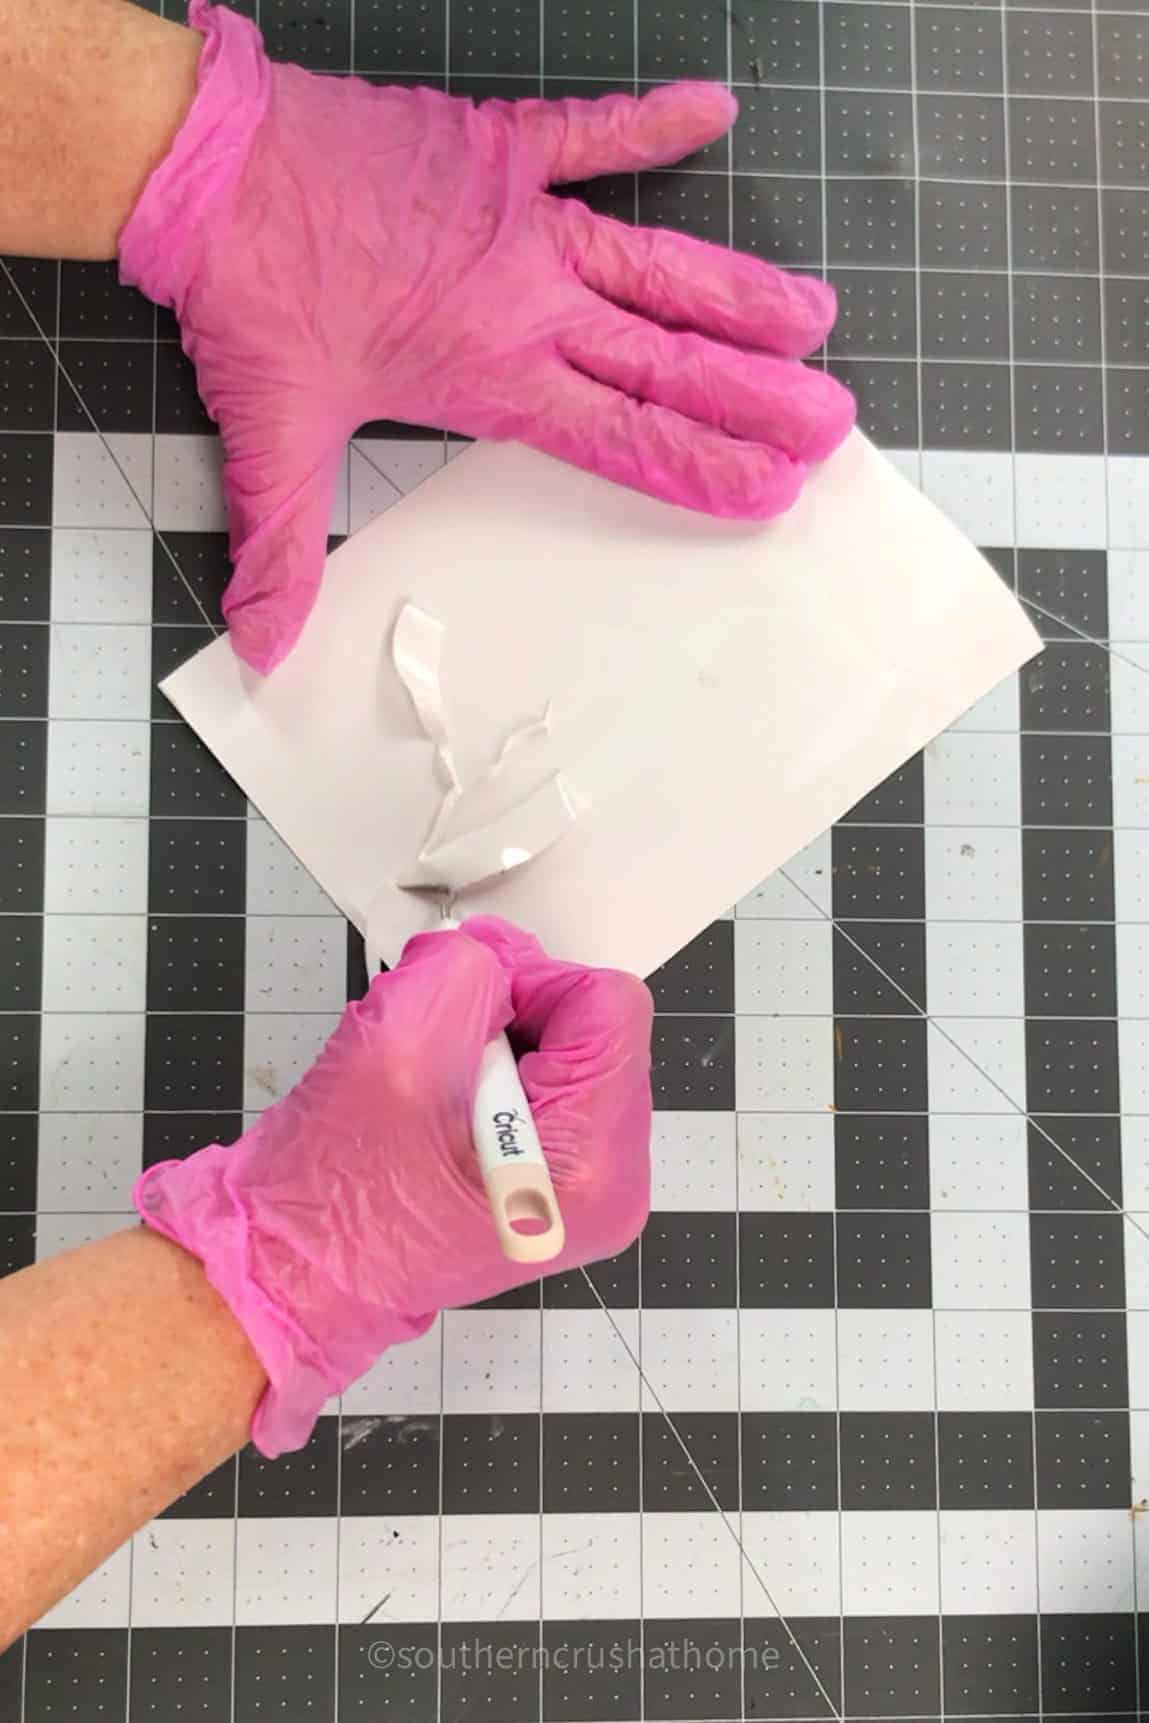
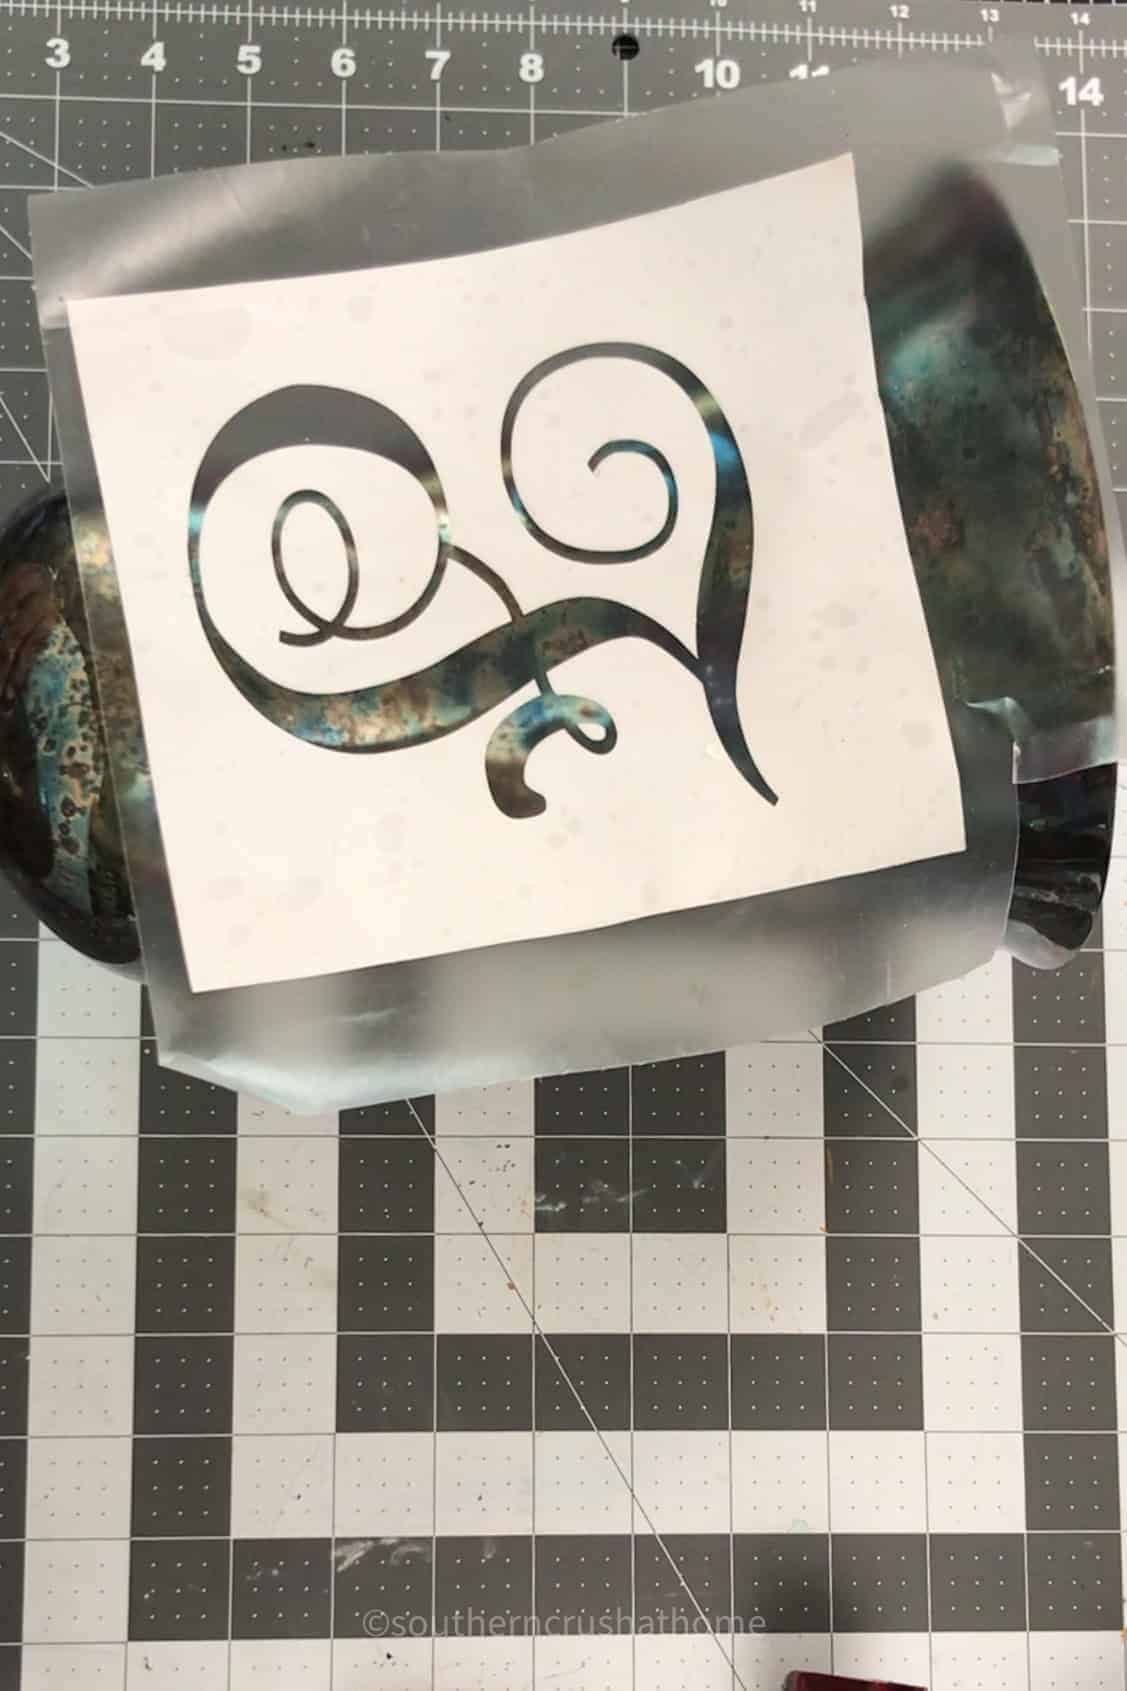
Step 1: Create Your Stencil
Using my Cricut Joy machine, I cut out a simple stencil of the letter “F” for my last name initial. This monogrammed design matches my monogrammed dining chairs and adds a personal touch.
If you don’t have a Cricut Joy, you can use any stencil, but make sure to choose one without intricate details that are tiny and hard to see for easier application.
Step 2: Prepare the Vase
Before applying the stencil, give the vase a good clean with a lint-free cloth to remove any loose dirt.
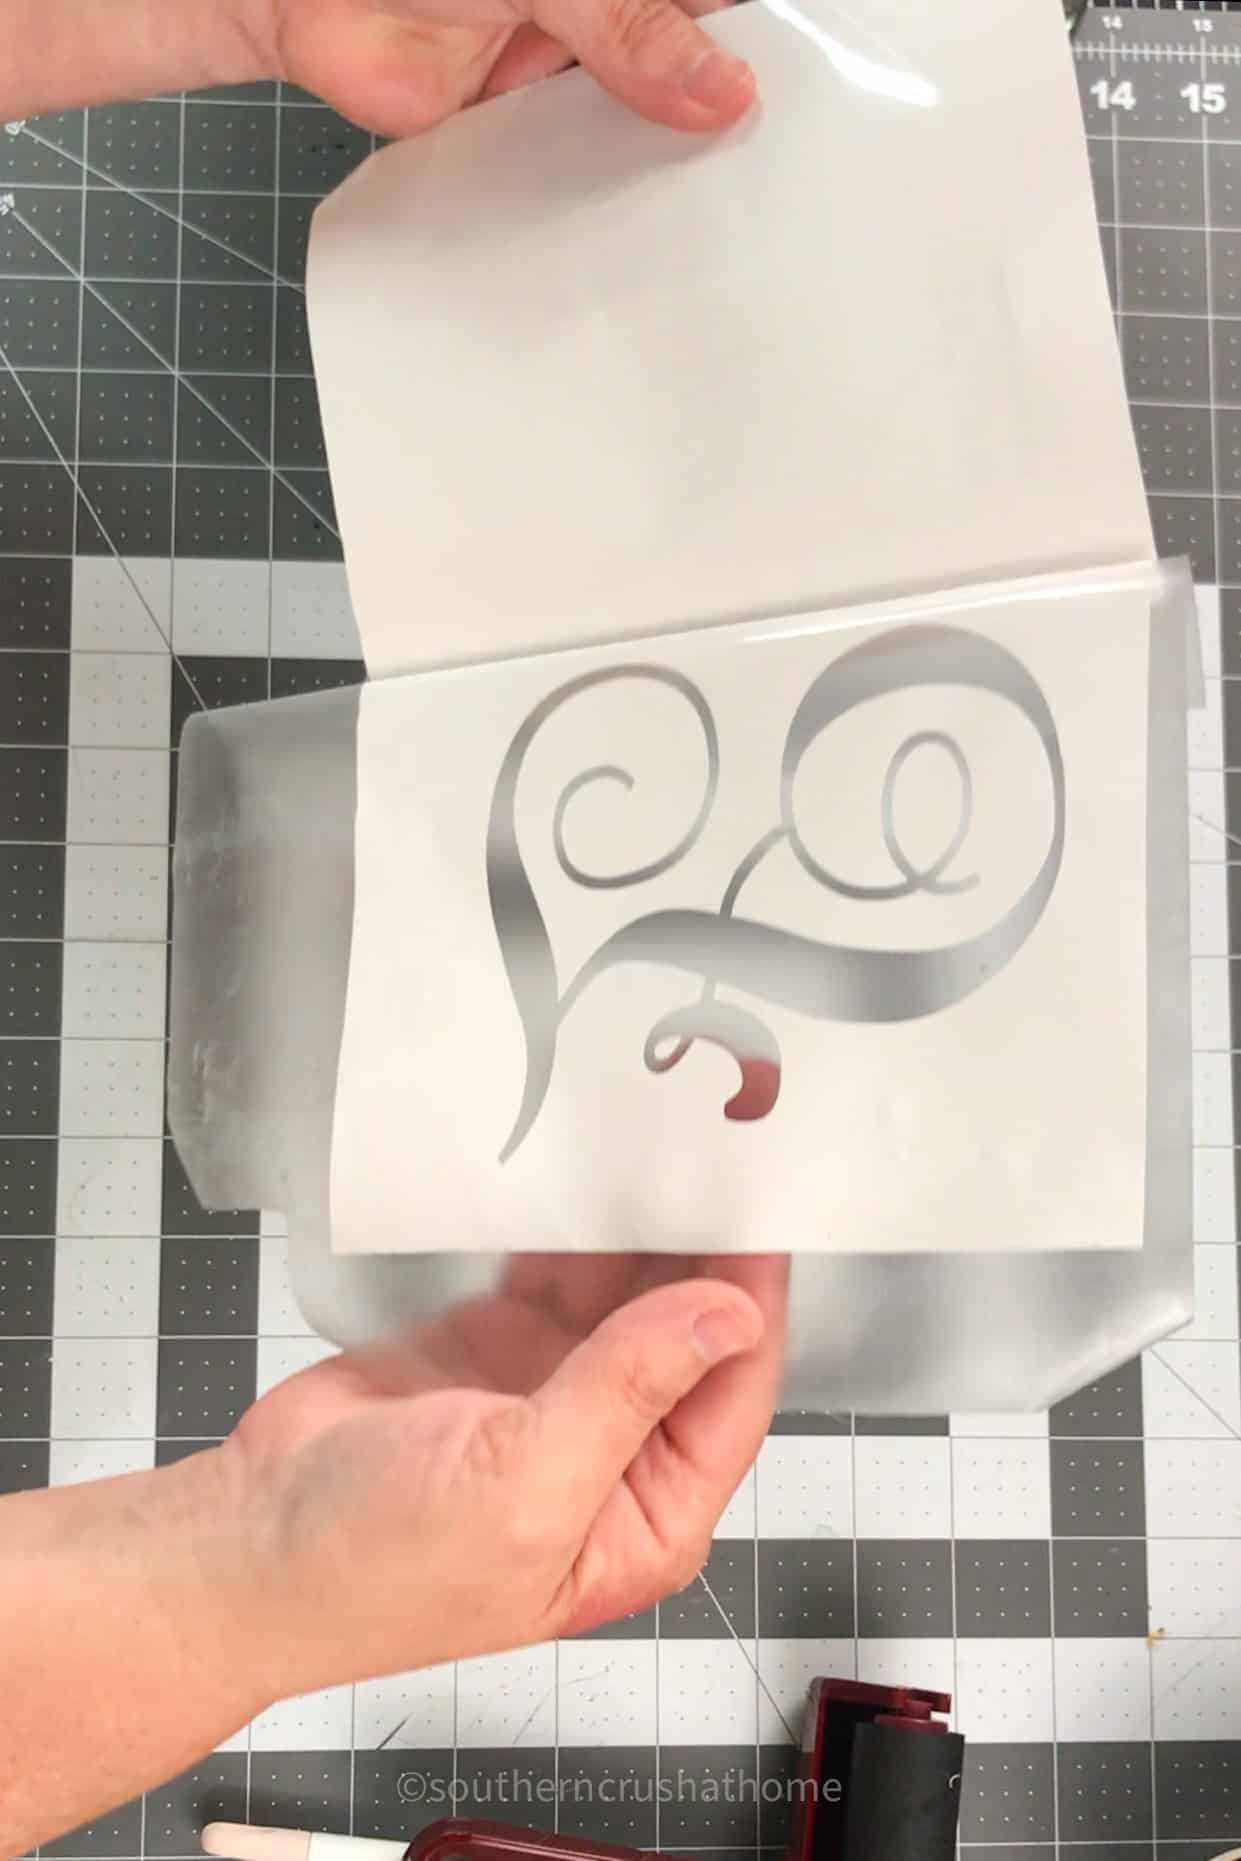
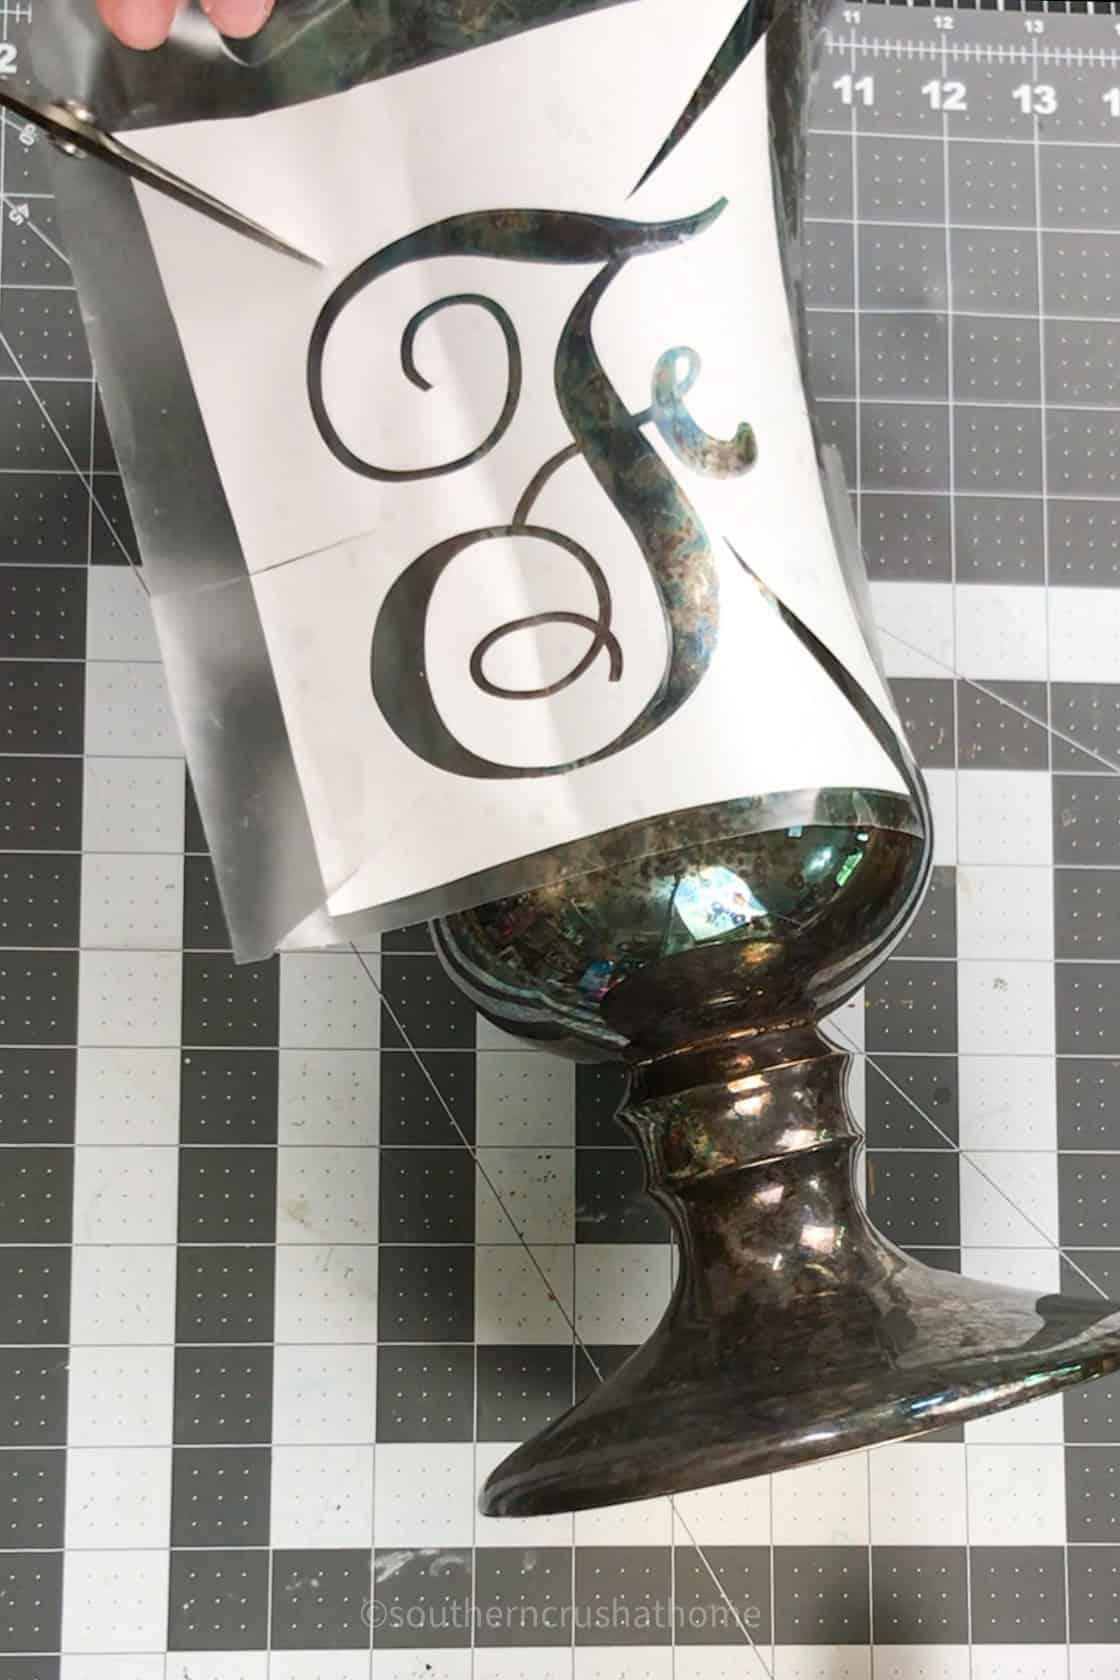
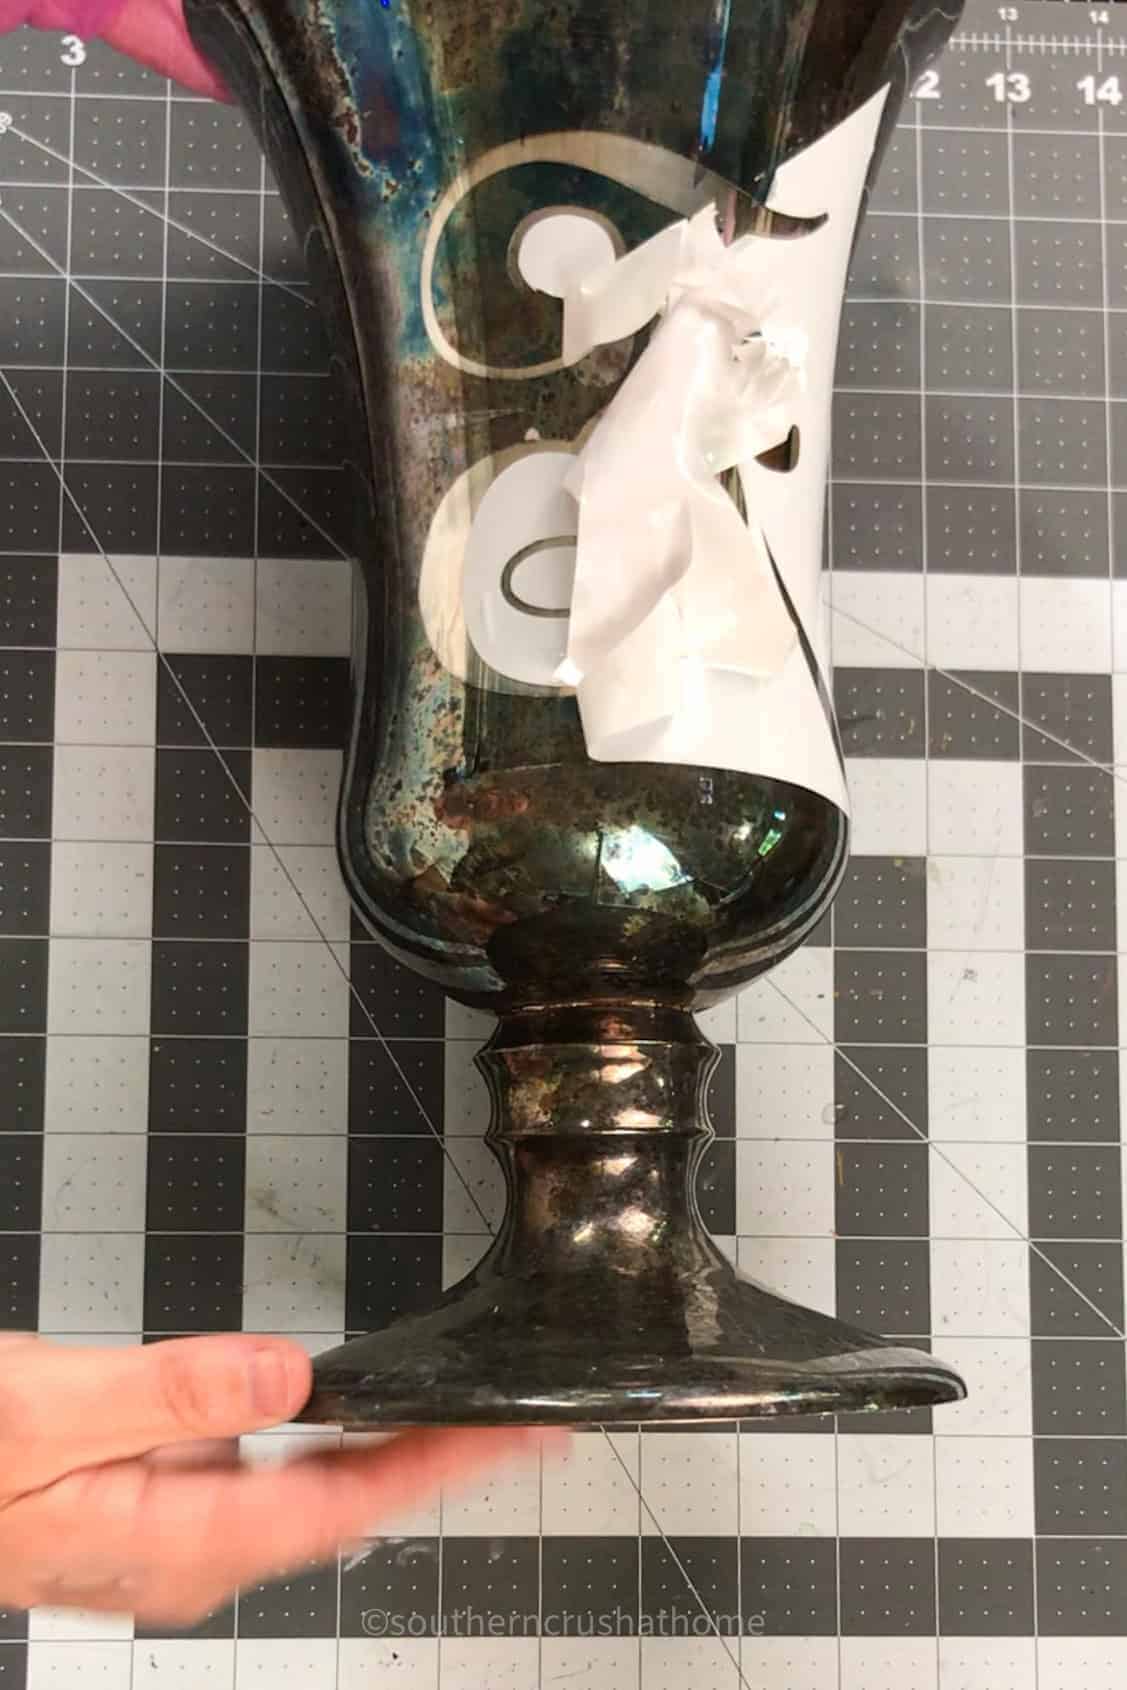
Step 3: Apply the Stencil
Place the stencil on the vase using transfer tape to help position it correctly. Make sure it’s securely adhered to the vase, especially around the edges, to prevent any polish from seeping under the stencil.
Since the vase is cylindrical, I had to cut notches out of the stencil to make it lay flat on the surface. This step ensures that the stencil adheres properly and doesn’t bunch up.
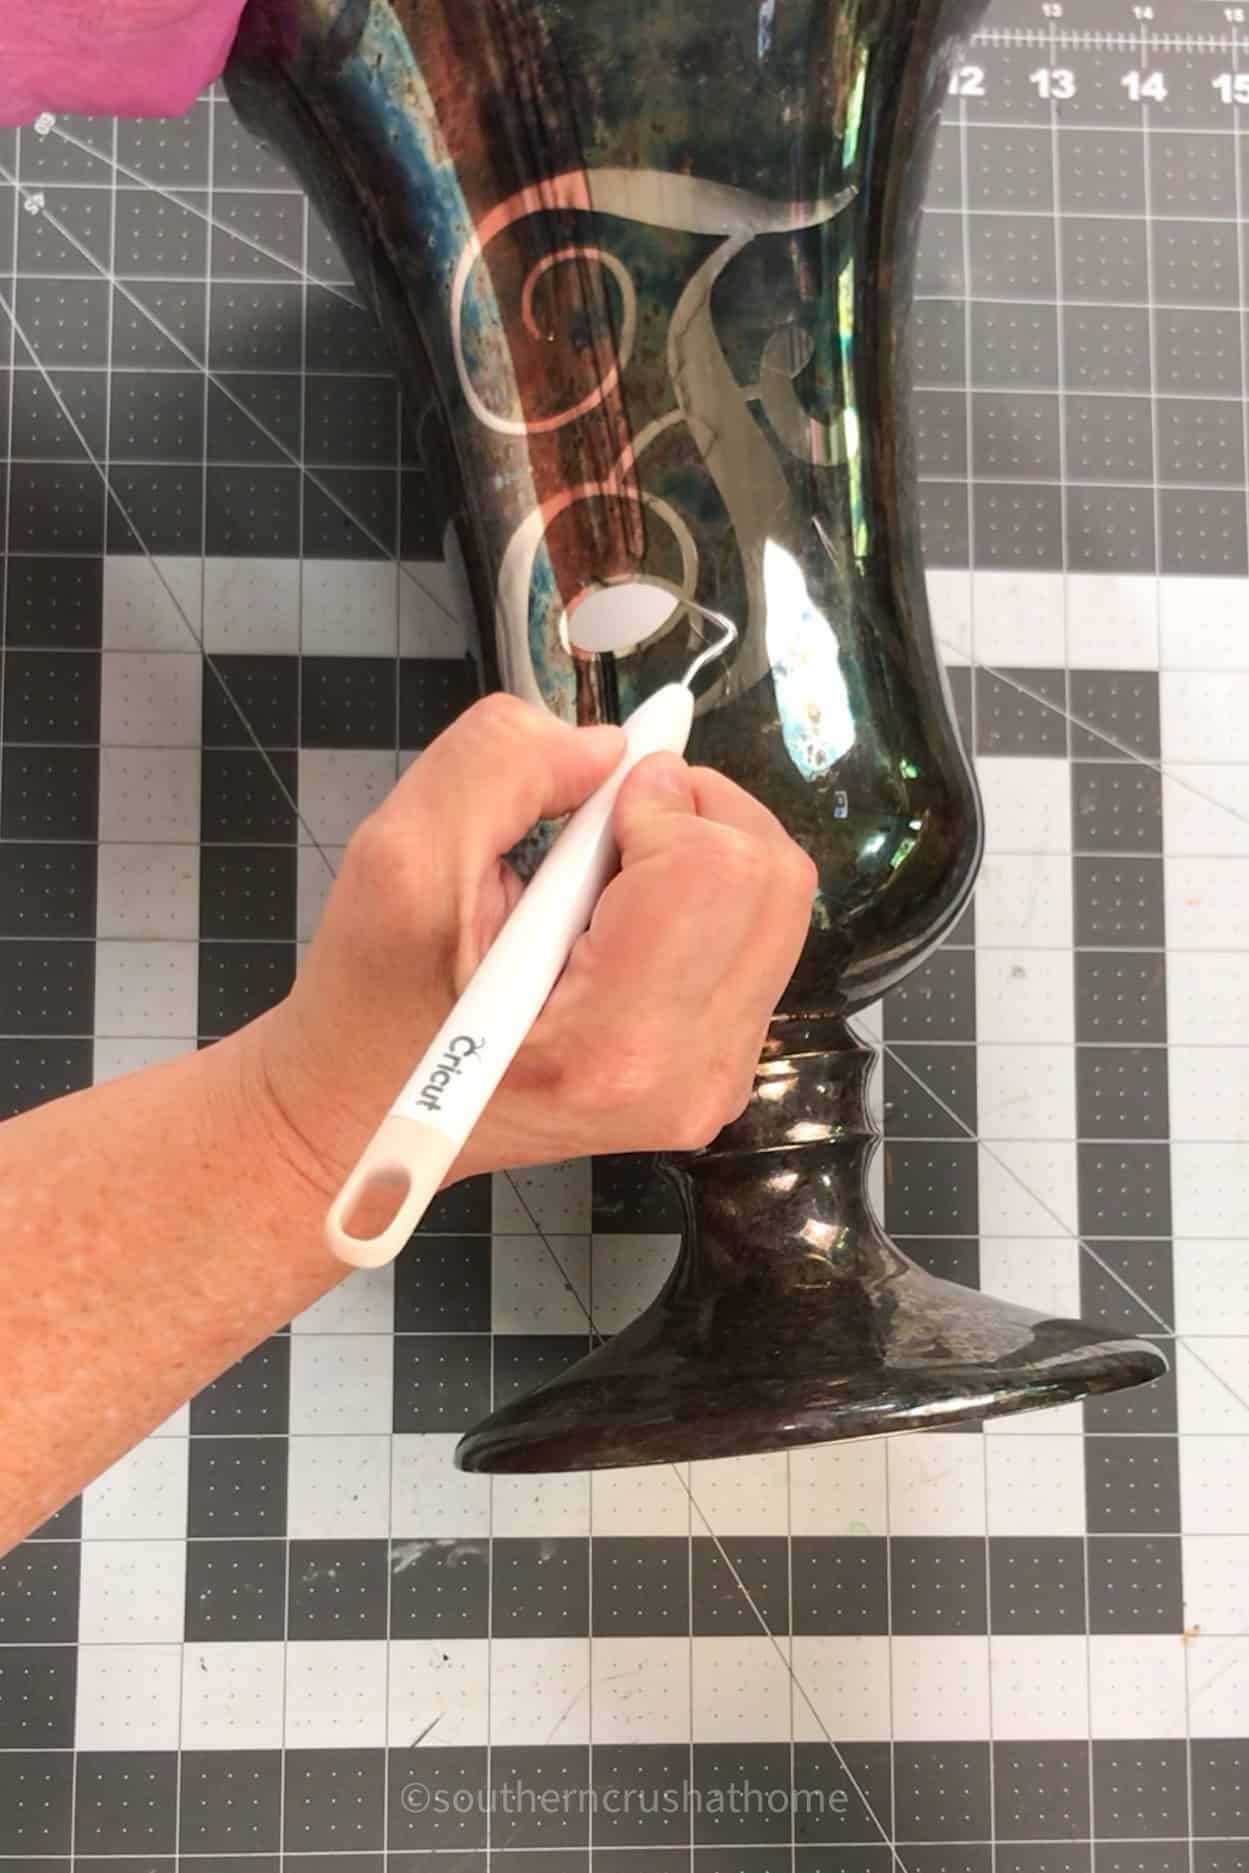
Step 4: Polish the Vase
Now for the fun part! Apply Wright’s Silver Cream to the vase, focusing on the area within the stencil. Use a the included sponge to rub the cream in small circular motions.

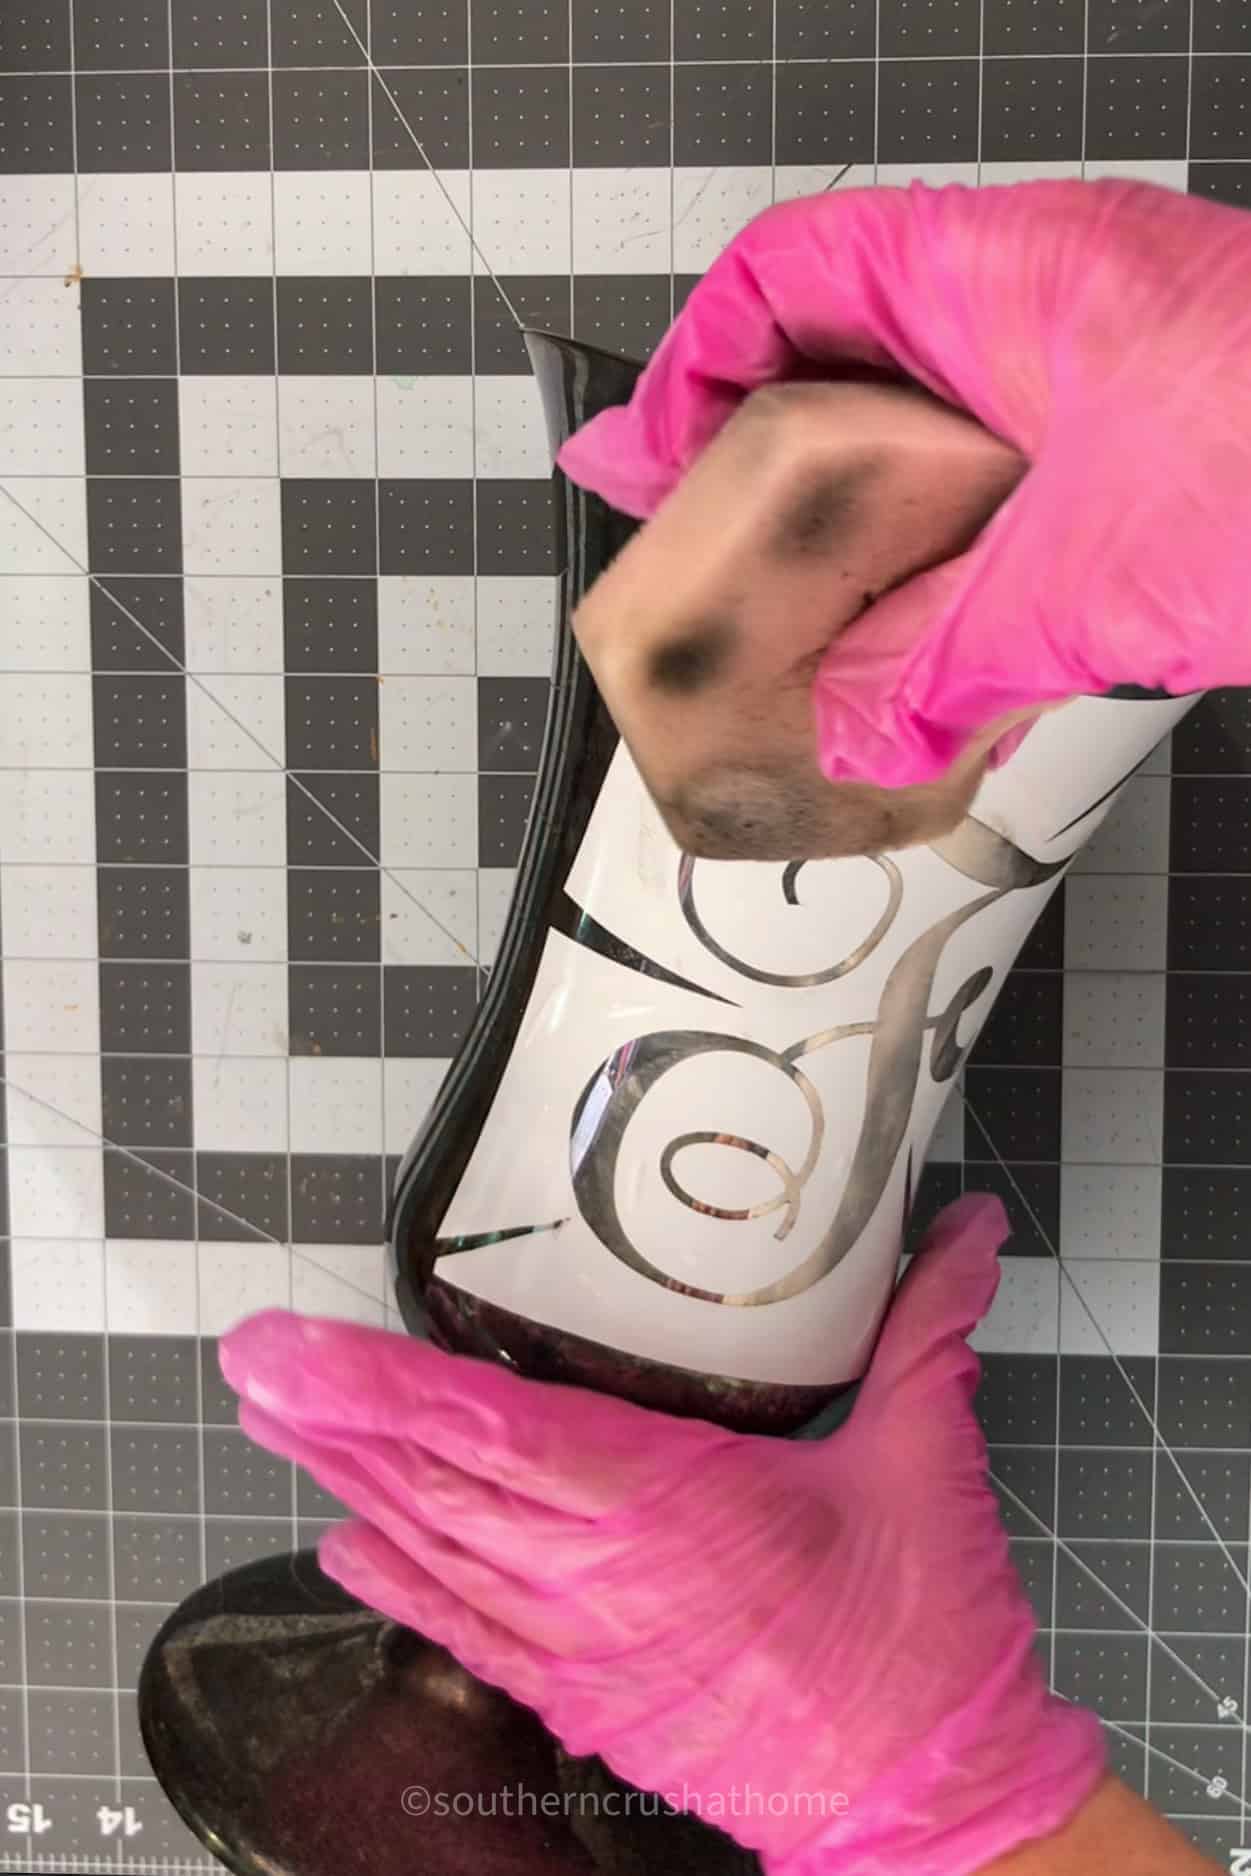
It took a bit of elbow grease to remove the tarnish, and at first, I wasn’t sure it was going to turn out, but the results were worth it.
Step 5: Remove the Stencil
Before removing the stencil, I used some spray water and wiped the surface clean with a paper towel.

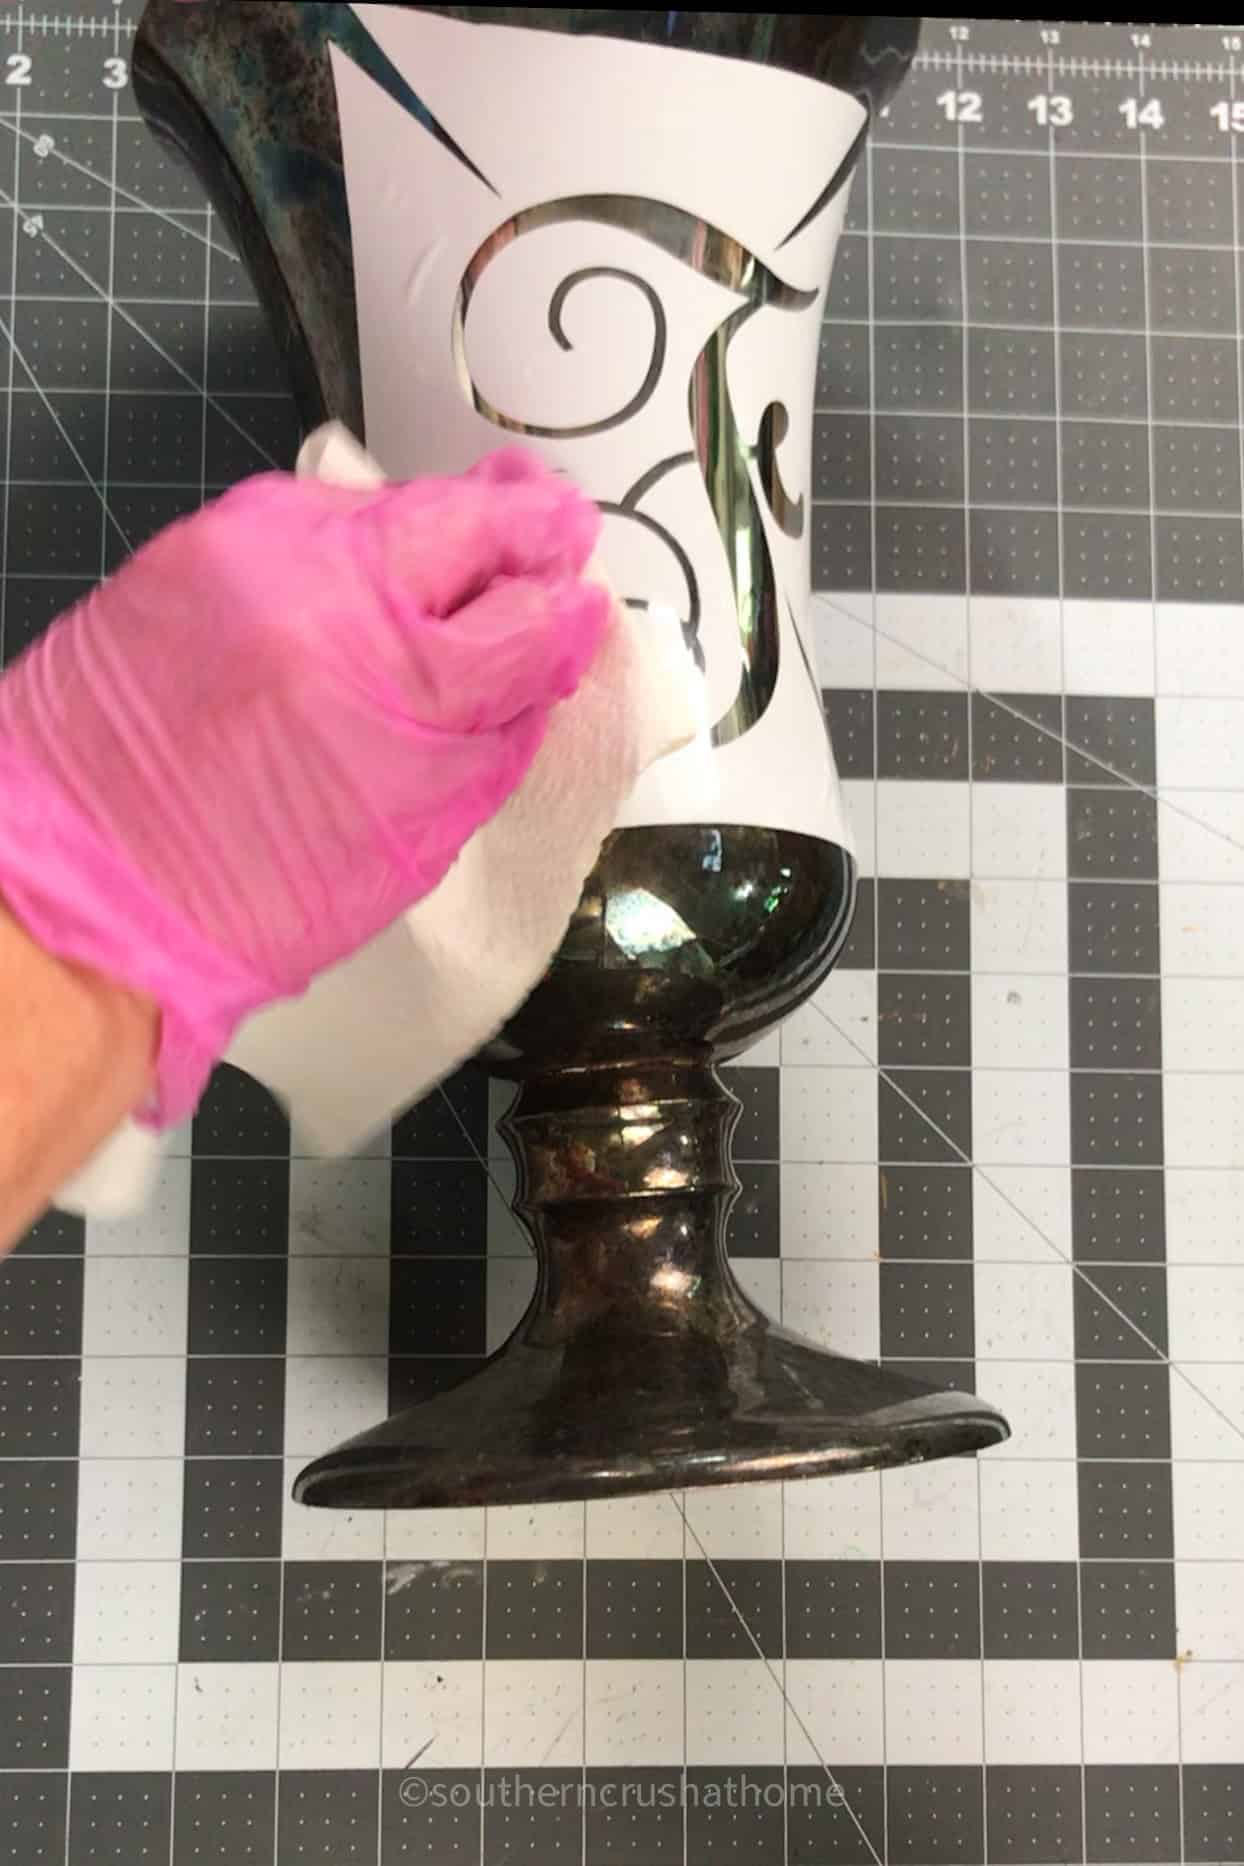
Carefully peel off the stencil to reveal the polished silver monogram.
Step 6: Style Your Vase
To complete the look, I added beautiful blue hydrangeas and fragrant white lilies from Trader Joe’s.

The fresh flowers contrasted beautifully with the polished silver, making the vase a stunning centerpiece.

Pro Tips:
- Stencils: When choosing or creating your stencil, avoid intricate designs with tiny details as they can be hard to apply and polish around.
- Elbow Grease: Be prepared to put in some effort while polishing. The tarnish might be stubborn, but persistence pays off.
- Notched Stencil: Cutting notches into your stencil can help it lay flat on cylindrical surfaces, ensuring a cleaner application.
Why This DIY Project is So Rewarding
This DIY stenciled tarnished vase project was super budget-friendly and incredibly satisfying.
The end result was a beautiful, personalized piece that added charm and elegance to my home decor.

Plus, the process was so enjoyable that I’m already looking forward to stenciling other tarnished silver pieces I find at thrift stores.
With a little creativity and effort, you can turn overlooked thrifted items into stunning decor.

Understanding Tarnish and Sterling Silver
Tarnish is a thin layer of corrosion that develops on metals like silver and copper over time. It’s caused by a chemical reaction between the metal and sulfur-containing substances in the air.
This reaction forms a dull, often black or bluish, film on the surface of the metal, which can obscure its shine and beauty. This vase had a gorgeous tarnish in an obvious blue shade.

Sterling silver is particularly susceptible to tarnish because it contains 92.5% silver and 7.5% other metals, usually copper. The copper in sterling silver reacts with sulfur compounds, leading to tarnish.
While tarnish can be unsightly, it’s not harmful to the metal and can be easily removed with the right cleaning techniques, as we’ve done with this vase.
Tips for Preventing Tarnish
- Storage: Store your silver items in a cool, dry place. Consider using anti-tarnish strips or cloths to help absorb moisture and sulfur in the air. Check out my favorite Silver Storage Solution
- Regular Cleaning: Regularly clean your silver pieces with a gentle silver polish to keep them looking their best and prevent tarnish buildup.
- Handling: Handle your silver items with clean, dry hands to avoid transferring oils and dirt that can contribute to tarnish.

PIN this for later!