DIY Easter Egg Topiary +15 Ideas for Dollar Tree Stackable Eggs
This project was so fun and didn’t take long at all~so if you’re looking for an affordable way to decorate for Easter you need to try this DIY Easter Egg Topiary! It is the perfect seasonal craft that looks high-end but is made with Dollar Tree stacked eggs!
PIN this for later!
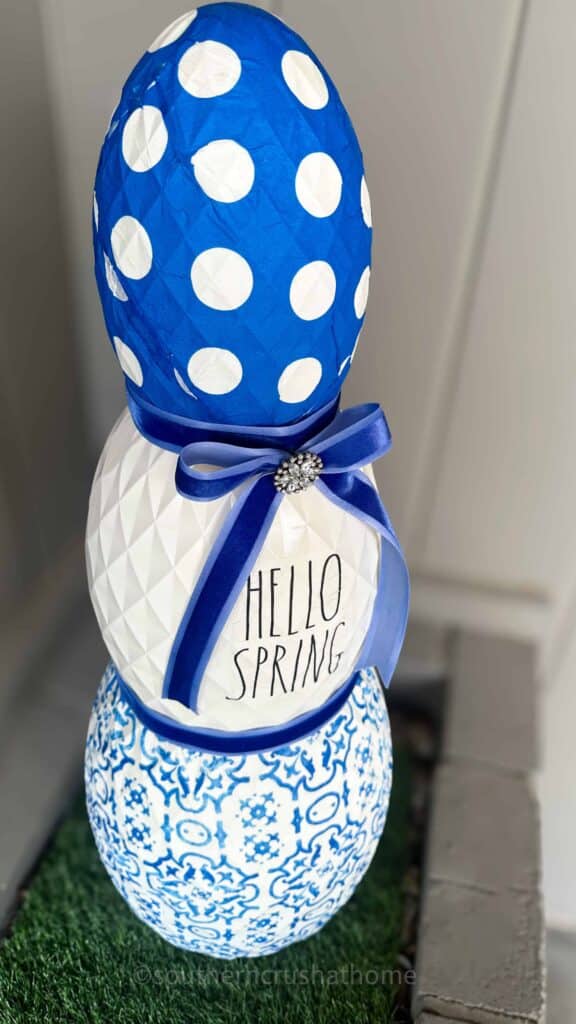
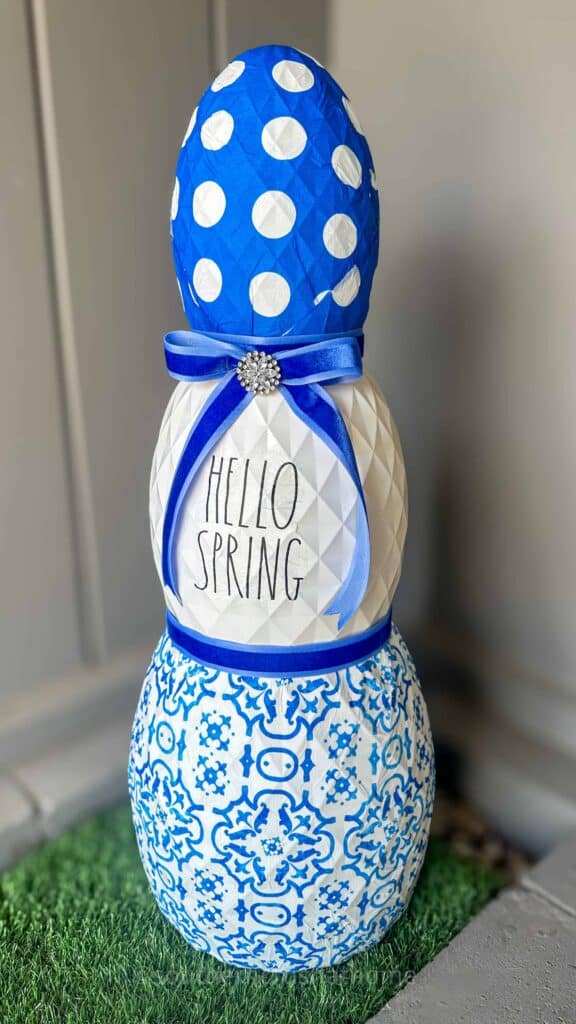
Using their stackable plastic eggs, some pretty napkins, and Mod Podge, you can create a custom Easter piece that fits your style and color scheme—whether you’re going for farmhouse charm, pastels, or vibrant spring hues.
Plus, I’m sharing 15 more creative ideas from other talented crafters at the end of this post, so you’ll be bursting with inspiration for your Dollar Tree stacked egg crafts this season!
This blog post contains affiliate links. The opinions are wholly my own from my own experience. I may earn a small commission from clicks through to the websites that end in a purchase.
DIY Easter Egg Topiary
This project is beginner-friendly, completely customizable, and a great way to repurpose simple materials into something beautiful.
Let’s get started with the step-by-step tutorial for this Easter Egg Topiary.
Supplies You’ll Need
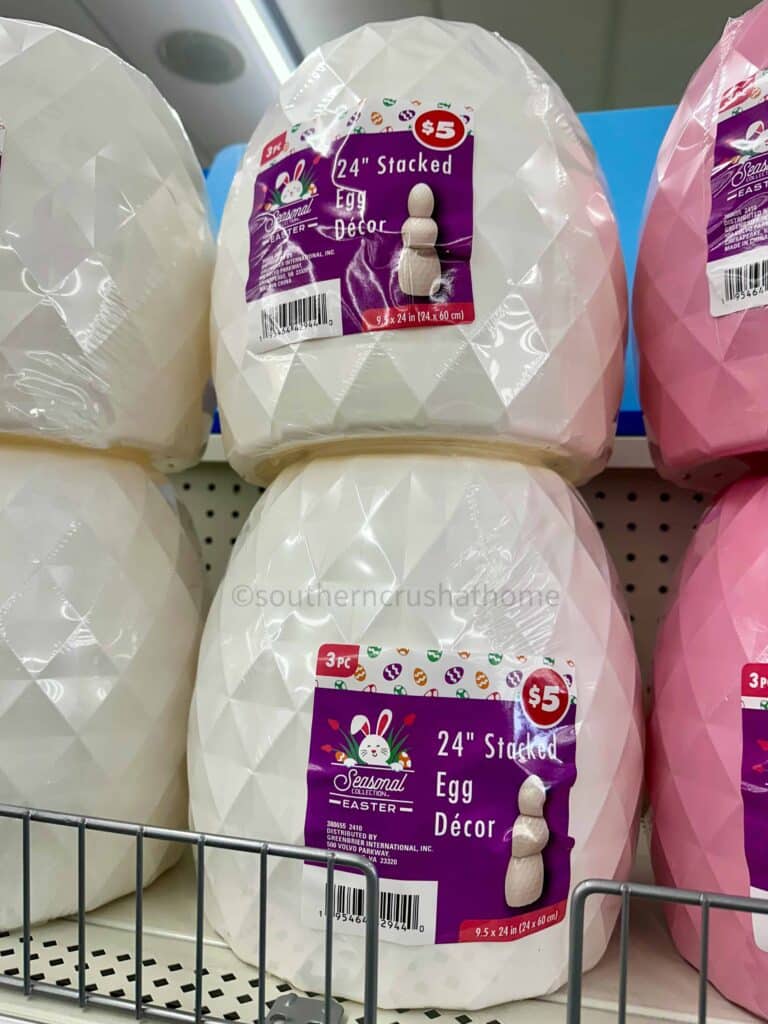
- Dollar Tree stackable plastic eggs (3 sections per egg)
- Mod Podge (matte or glossy—your choice)
- Foam brush
- Assorted napkins (look for fun spring or Easter patterns)
- Ribbon (for a bow)
- Rhinestone embellishment (optional)
- Scissors
- Hot glue gun and glue sticks
DIY Easter Egg Topiary Instructions
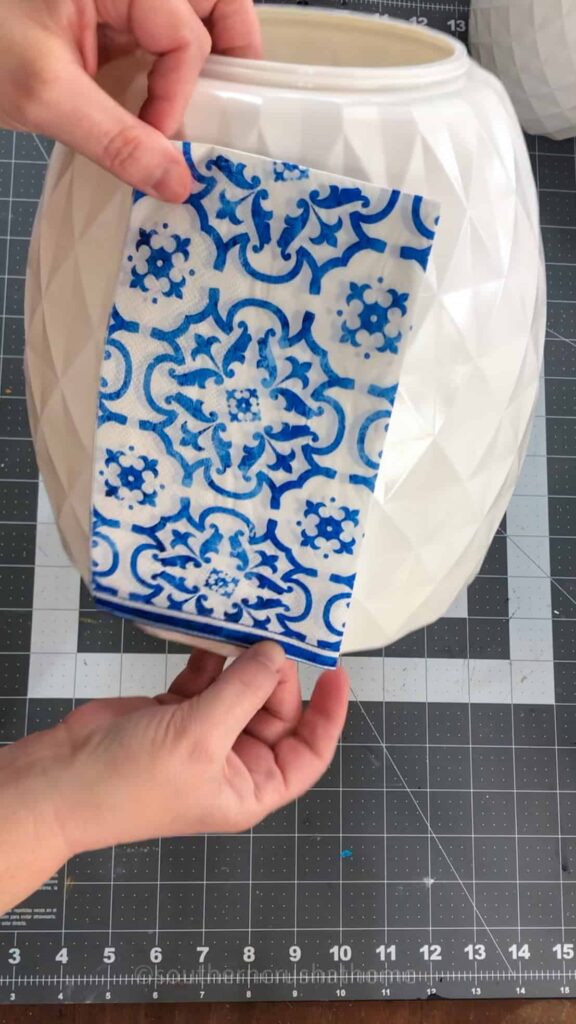
Step 1: Separate the Layers of the Napkin
Most decorative napkins are 2-3 ply. Carefully peel the layers apart, keeping only the top printed layer.
This will make the napkin thinner and easier to adhere smoothly to the egg’s surface.
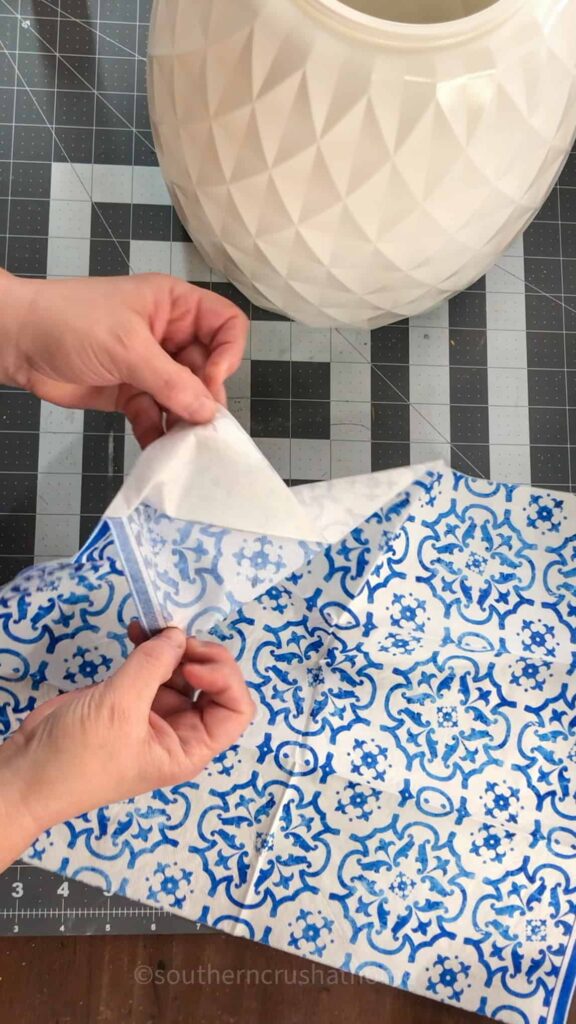
Step 2: Apply Mod Podge to a Section of the Egg
Using a foam brush, apply a thin, even layer of Mod Podge to one section of the plastic egg.
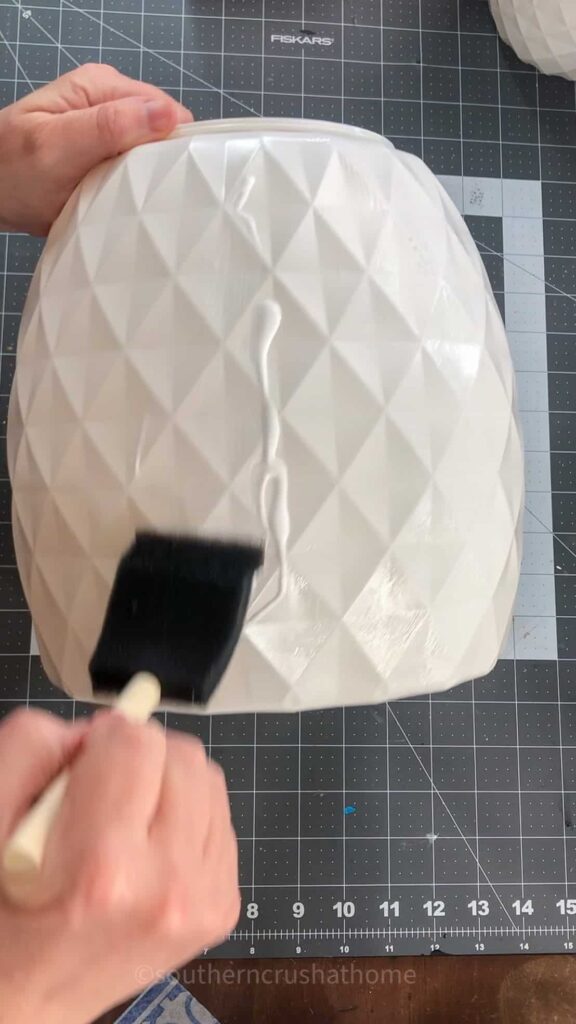
Start with a smaller area so the glue doesn’t dry too quickly before you apply the napkin.
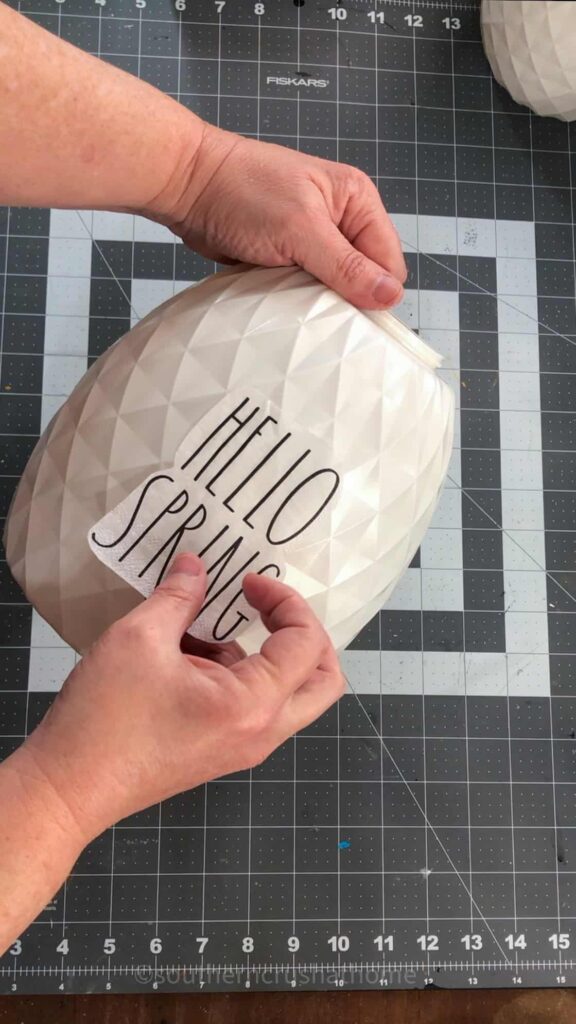
Step 3: Add the Napkin
Lay the napkin over the Mod Podge-coated area and gently press it down, smoothing it into the egg’s surface.

Use your fingers or a clean brush to press the napkin into the grooves and design of the egg. Be very gentle to avoid tearing. Trim any excess around the edges with scissors if needed.
Step 4: Repeat on All Egg Sections
Repeat the process for the other two sections of the stacked egg.
You can use the same napkin print for a cohesive look or mix and match different patterns for a whimsical touch.
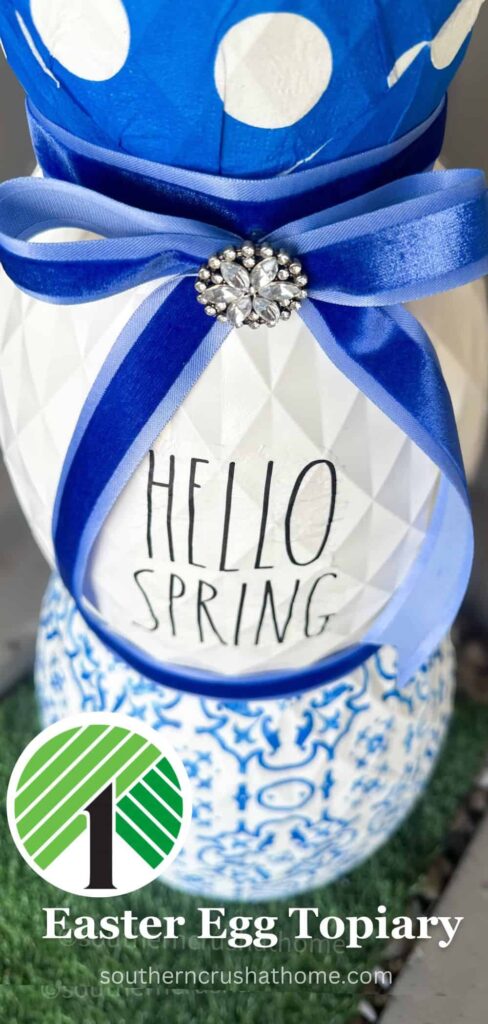
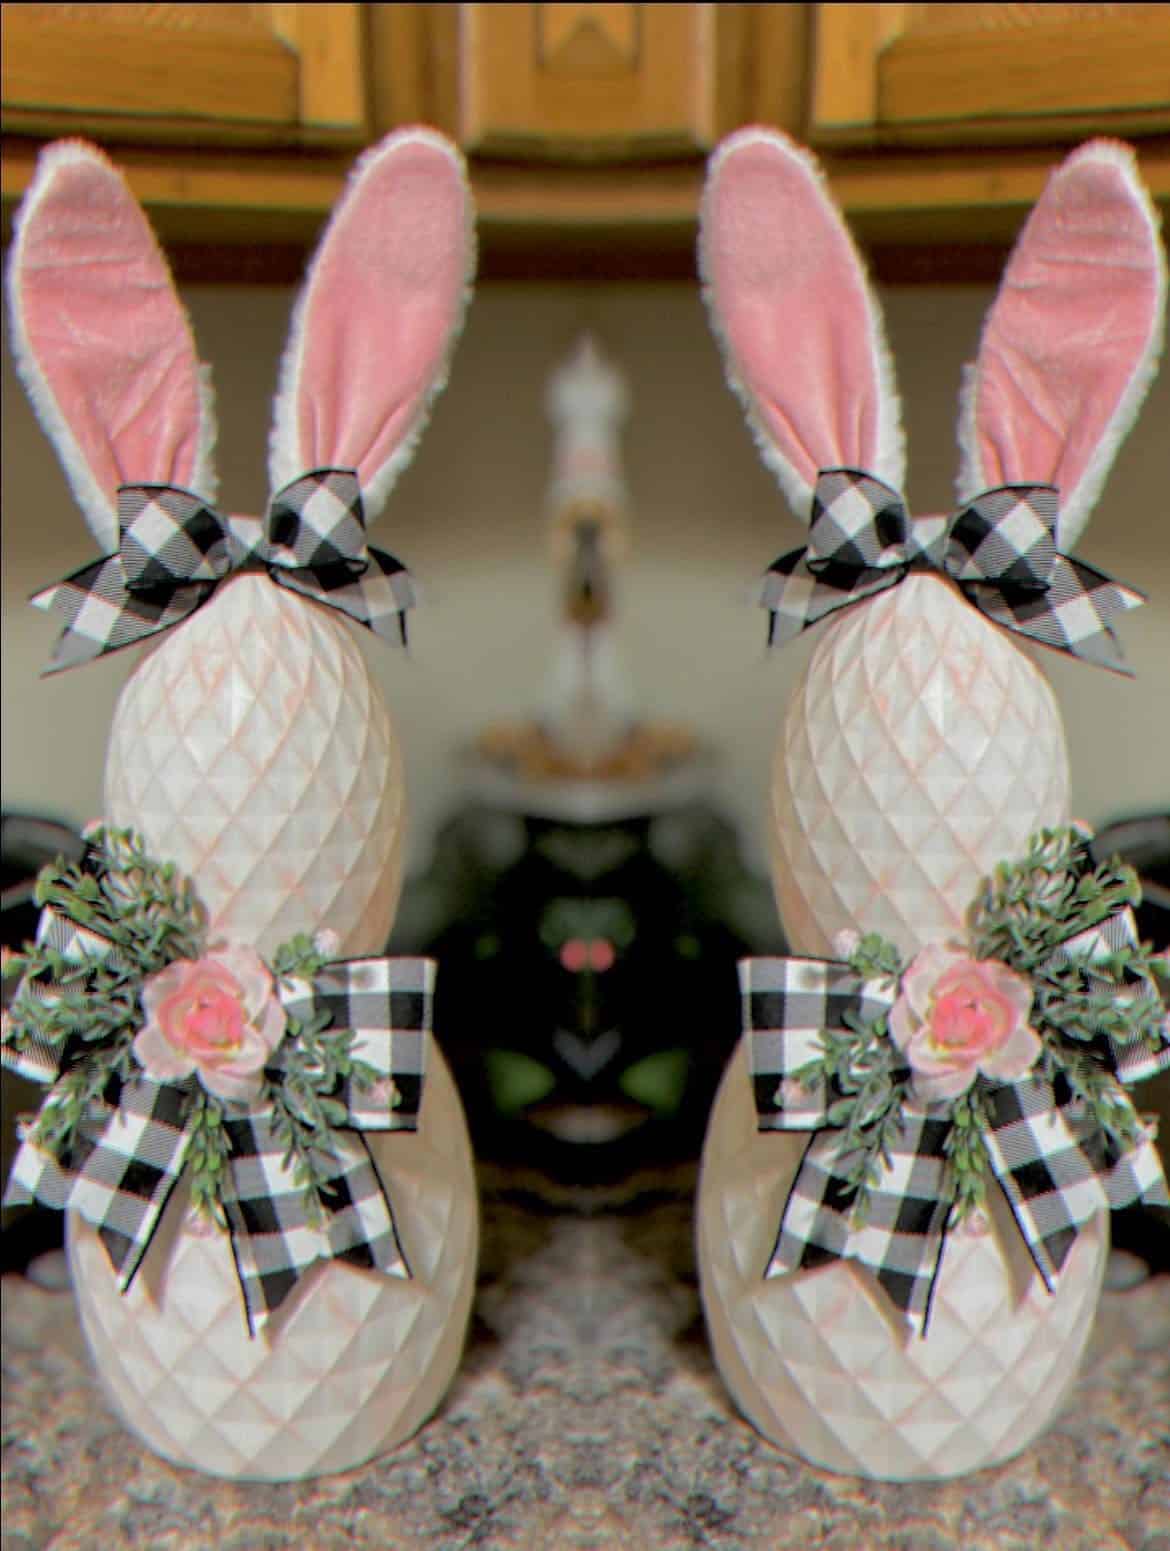
Step 5: Add a Bow
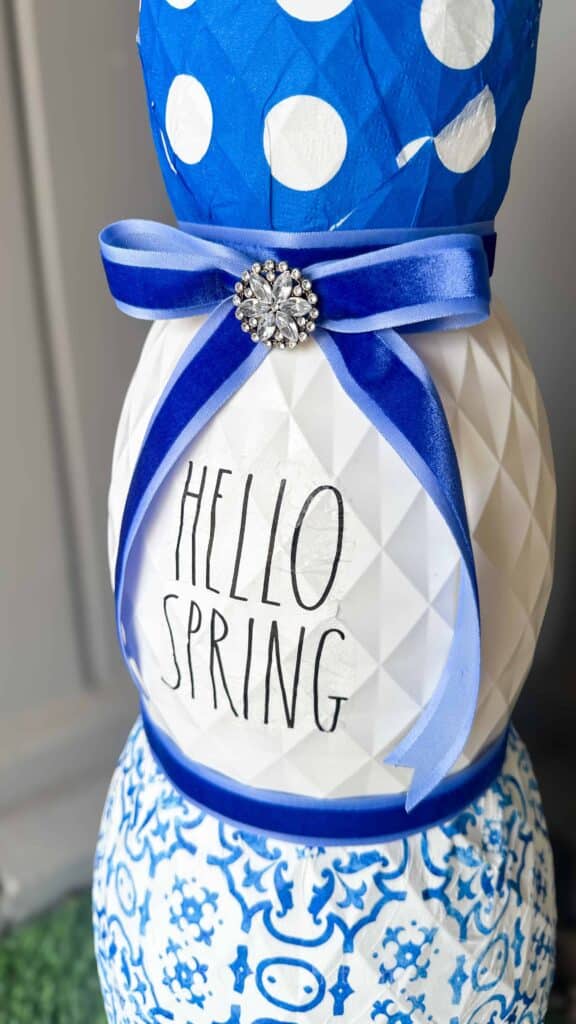
Create a simple ribbon bow using your favorite spring ribbon. A pastel stripe, polka dot, or floral print would all work beautifully.
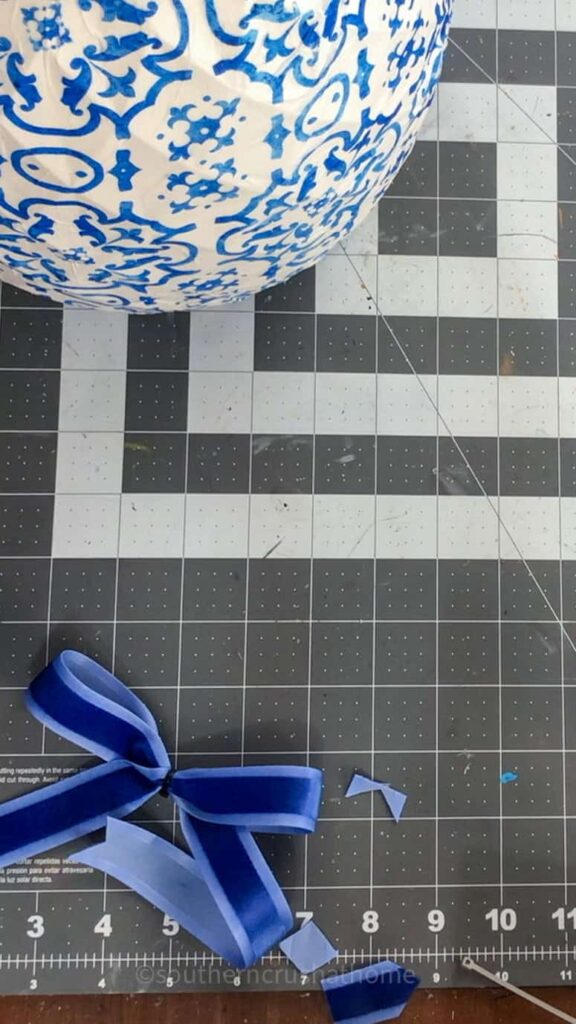
I chose a velvet ribbon from Dollar Tree. Use hot glue to attach the bow to the top or front of your topiary egg.
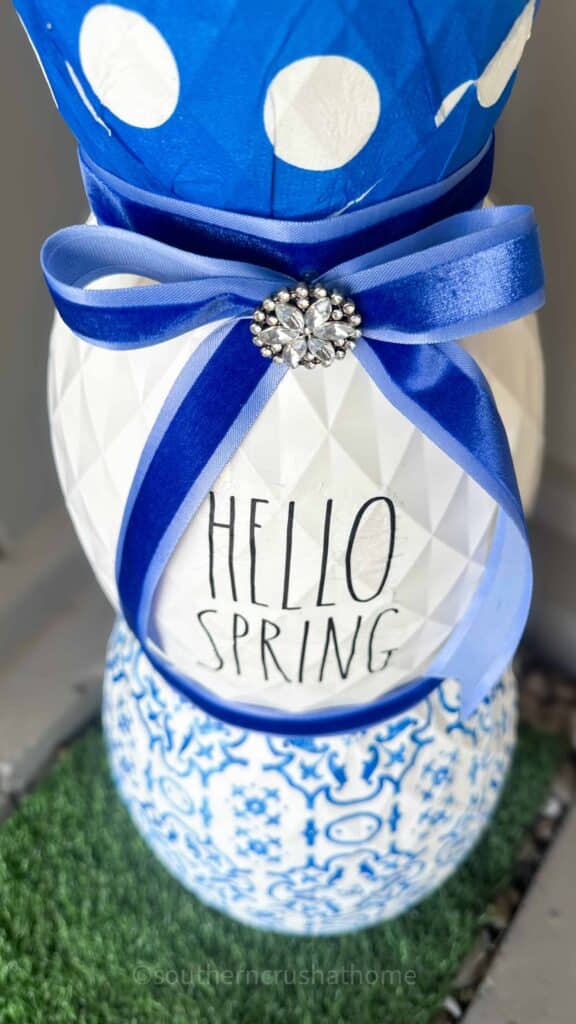
Step 6: Add an Embellishment (Optional)
For a little extra sparkle, add a rhinestone, button, or jewel to the center of your bow using hot glue. This adds a polished, boutique-worthy finish to your craft.
How to Display Your Easter Egg Topiary
Once your topiary is complete, there are so many charming ways to show it off in your home:
- Table Centerpiece: Place it on a tray with greenery, faux carrots, and mini eggs for an easy spring centerpiece.
- Bookshelf or Hutch Decor: Place it onto a styled shelf or seasonal vignette with florals and bunnies.
- Entryway Table: Add it to your entryway display for a cheerful welcome.
- Gift Idea: These topiaries also make adorable hostess gifts or Easter basket fillers for adults.
Consider setting your topiary outside on your porch like I did here. It makes a great statement piece for the start of your seasonal decorating!
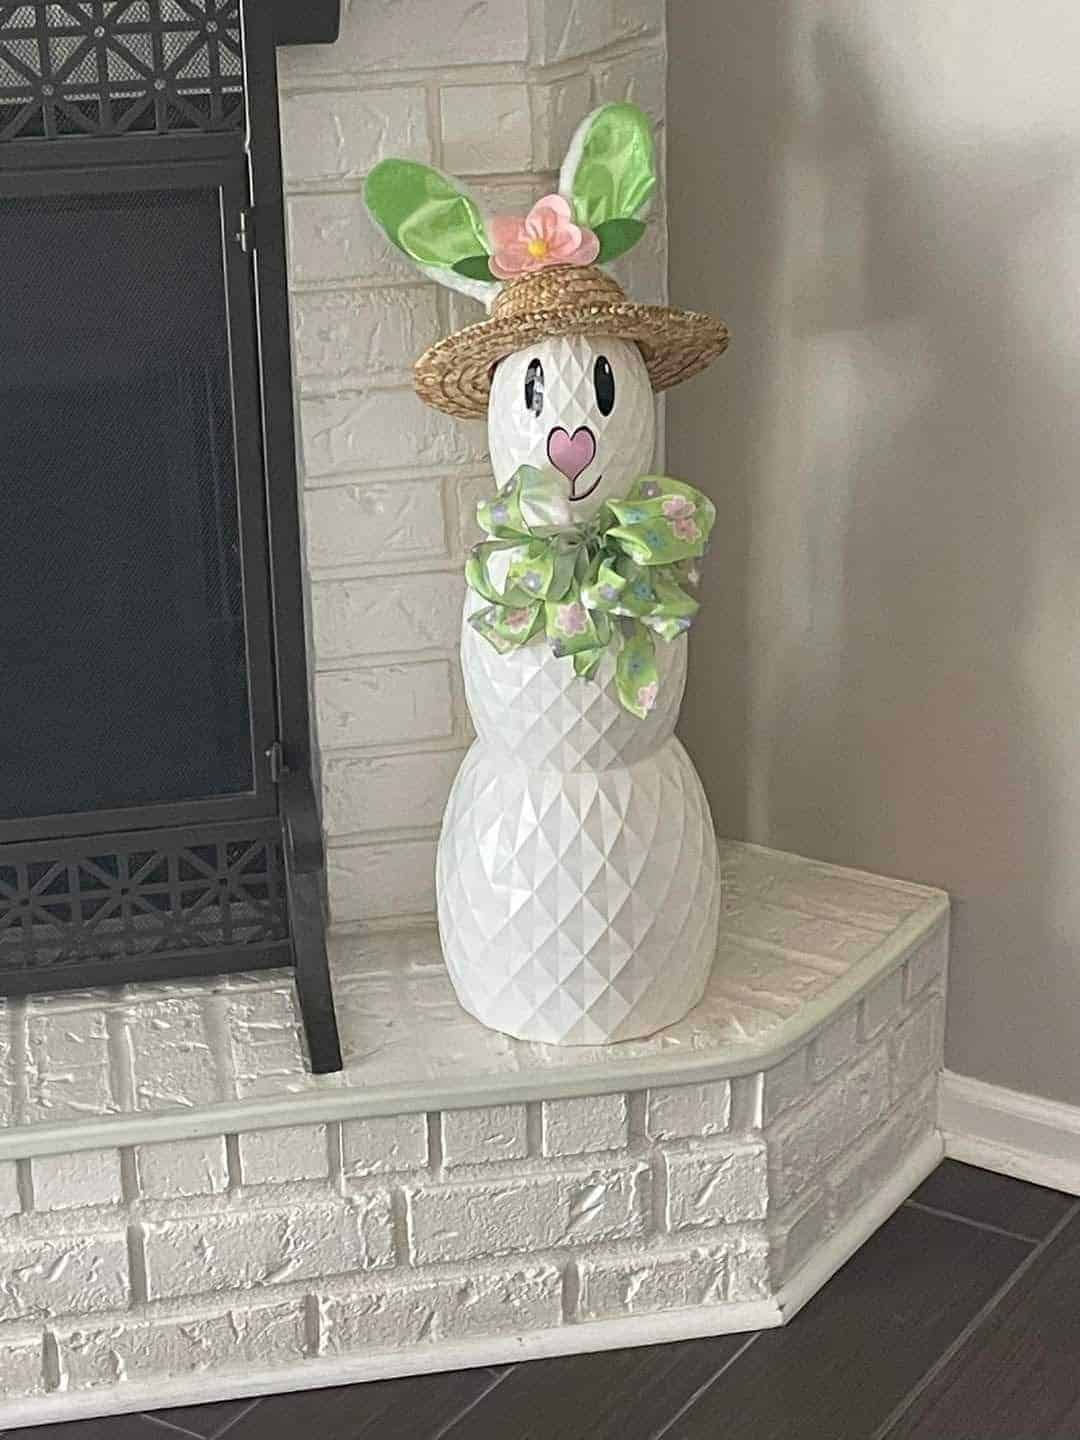
15 More Dollar Tree Stackable Egg Ideas
I’m so excited to share 15 additional DIY projects using Dollar Tree’s stackable eggs, created by other crafty and creative makers! These ideas range from farmhouse-inspired designs to modern and colorful decor that’s perfect for Easter, spring, and even year-round displays.

Patricia West ~ Pinterest 
Jackie Kehs ~ Pinterest Brooke Rodden 
Christina Falkenhan 
Debbie Henderson 
Tonya Weeks 
EunoiaNova Creations 
Michelle Teaford Evelyn Coates 
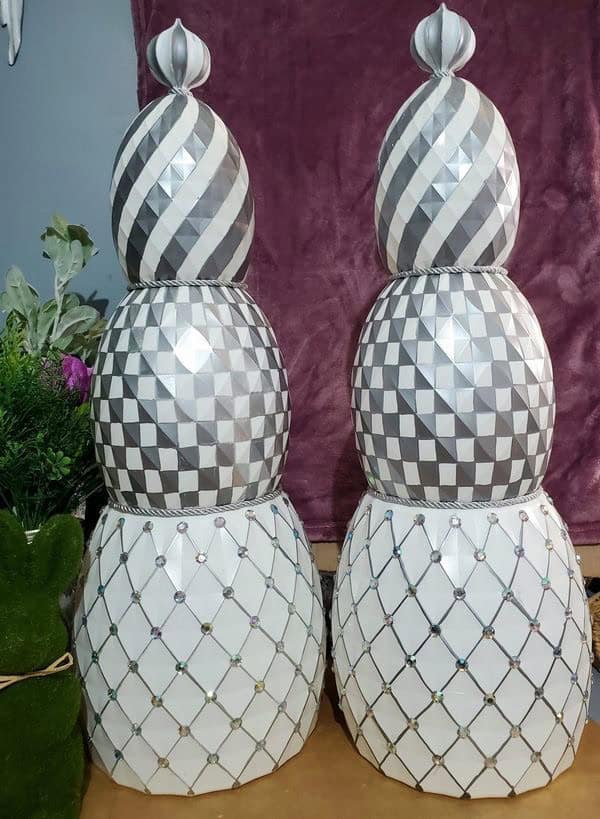
Crystal Koenig 
Emily Arnold unknown 
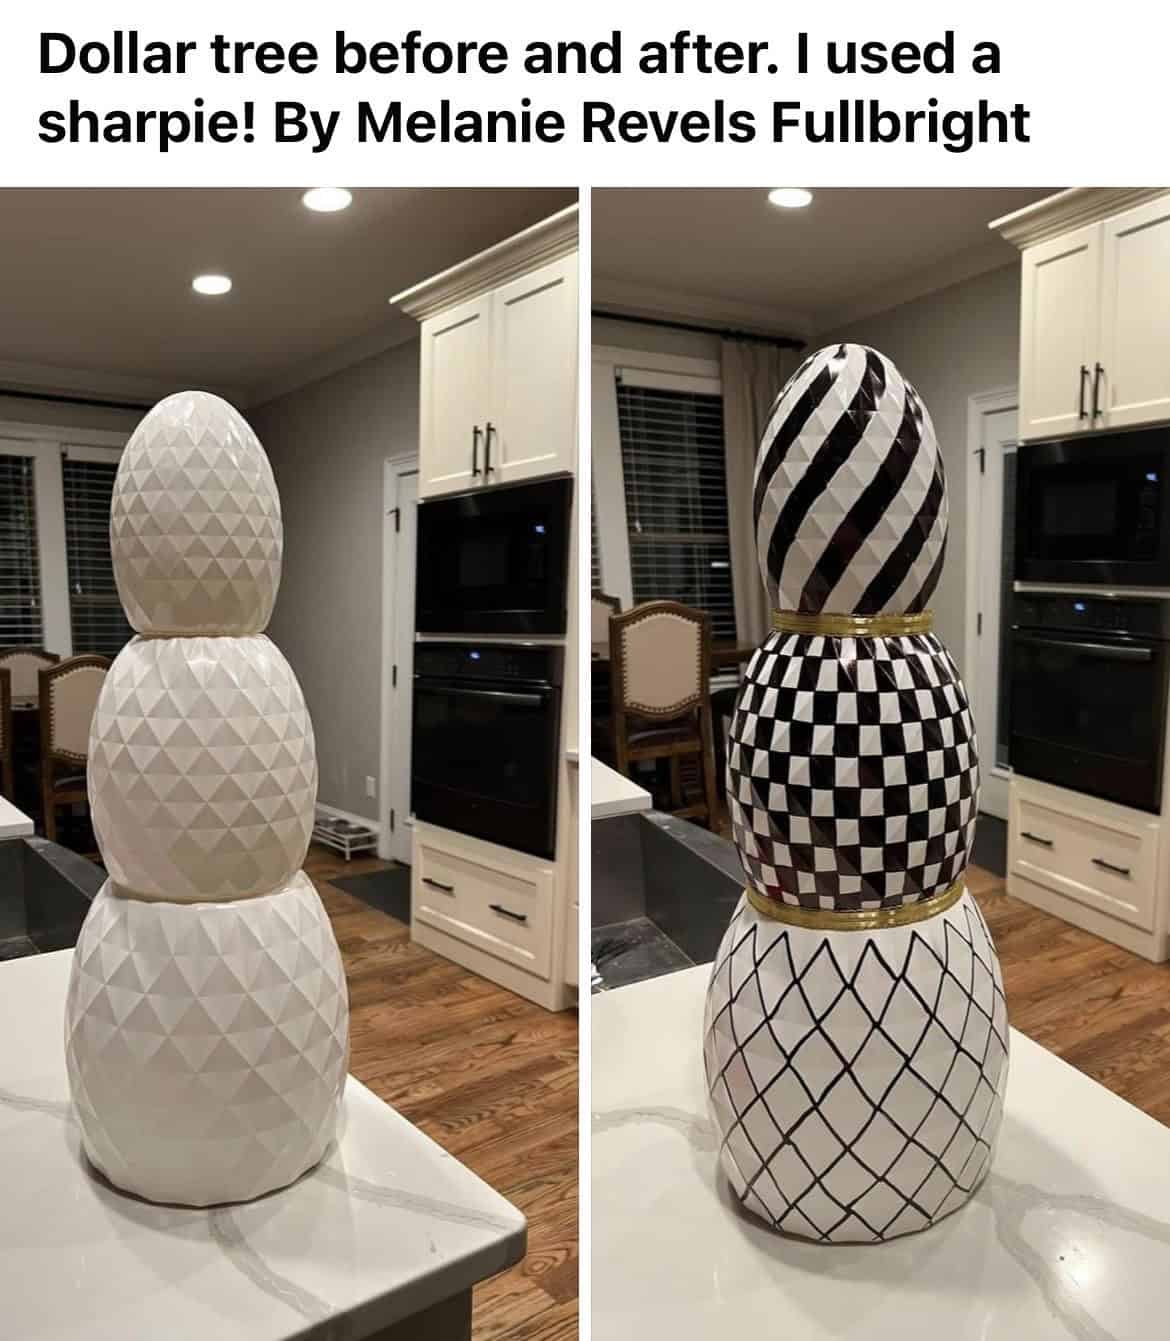
Melanie Fullbright 
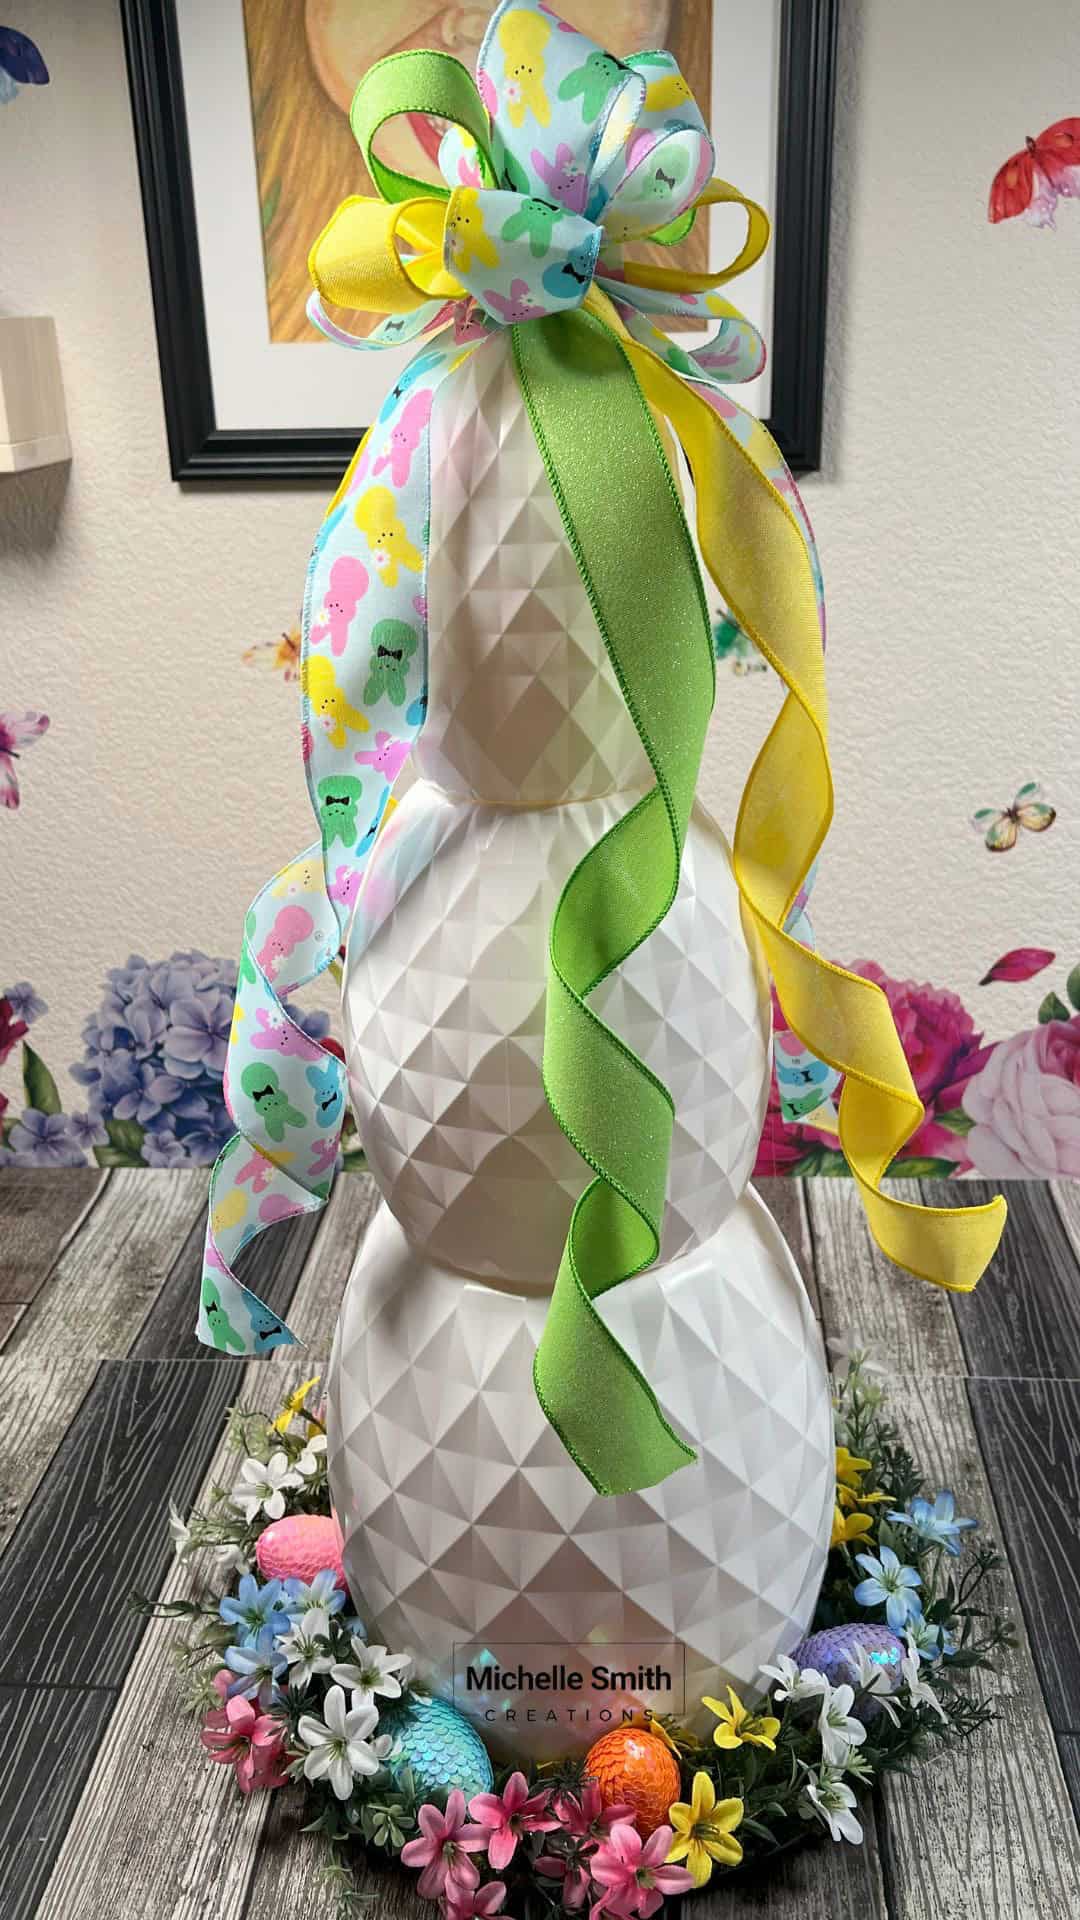
Michelle Smith Creations 
Crystal Koenig

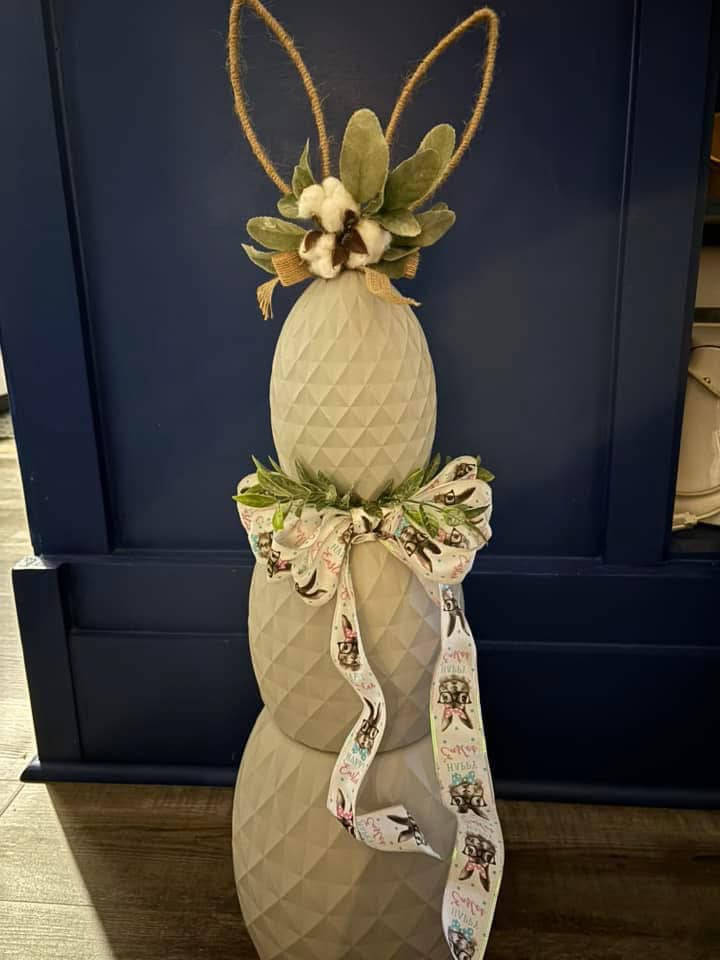
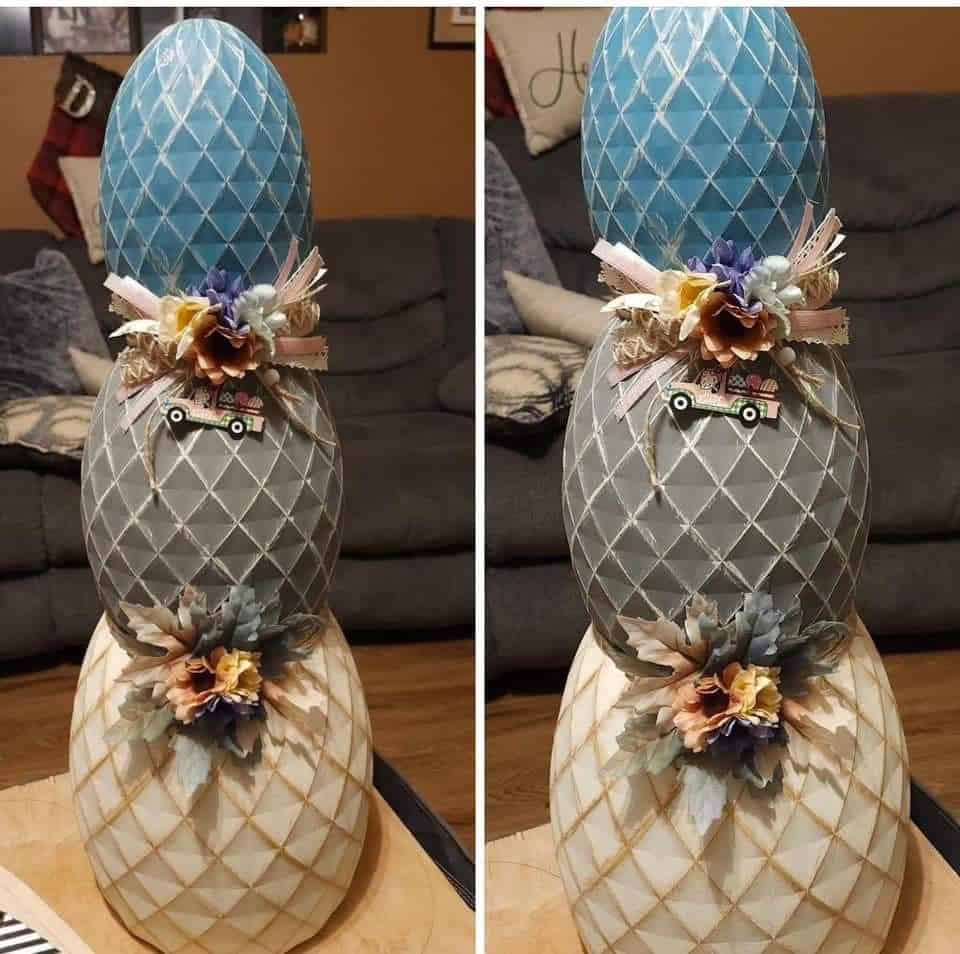
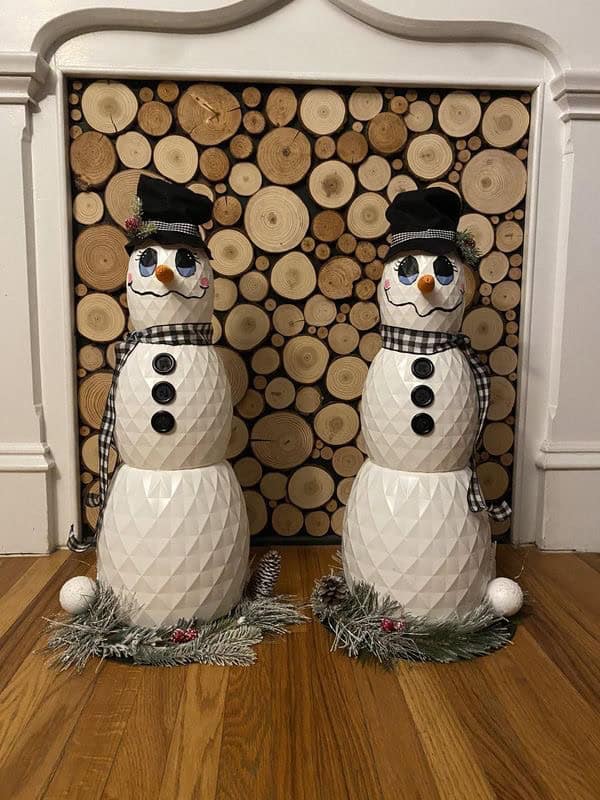
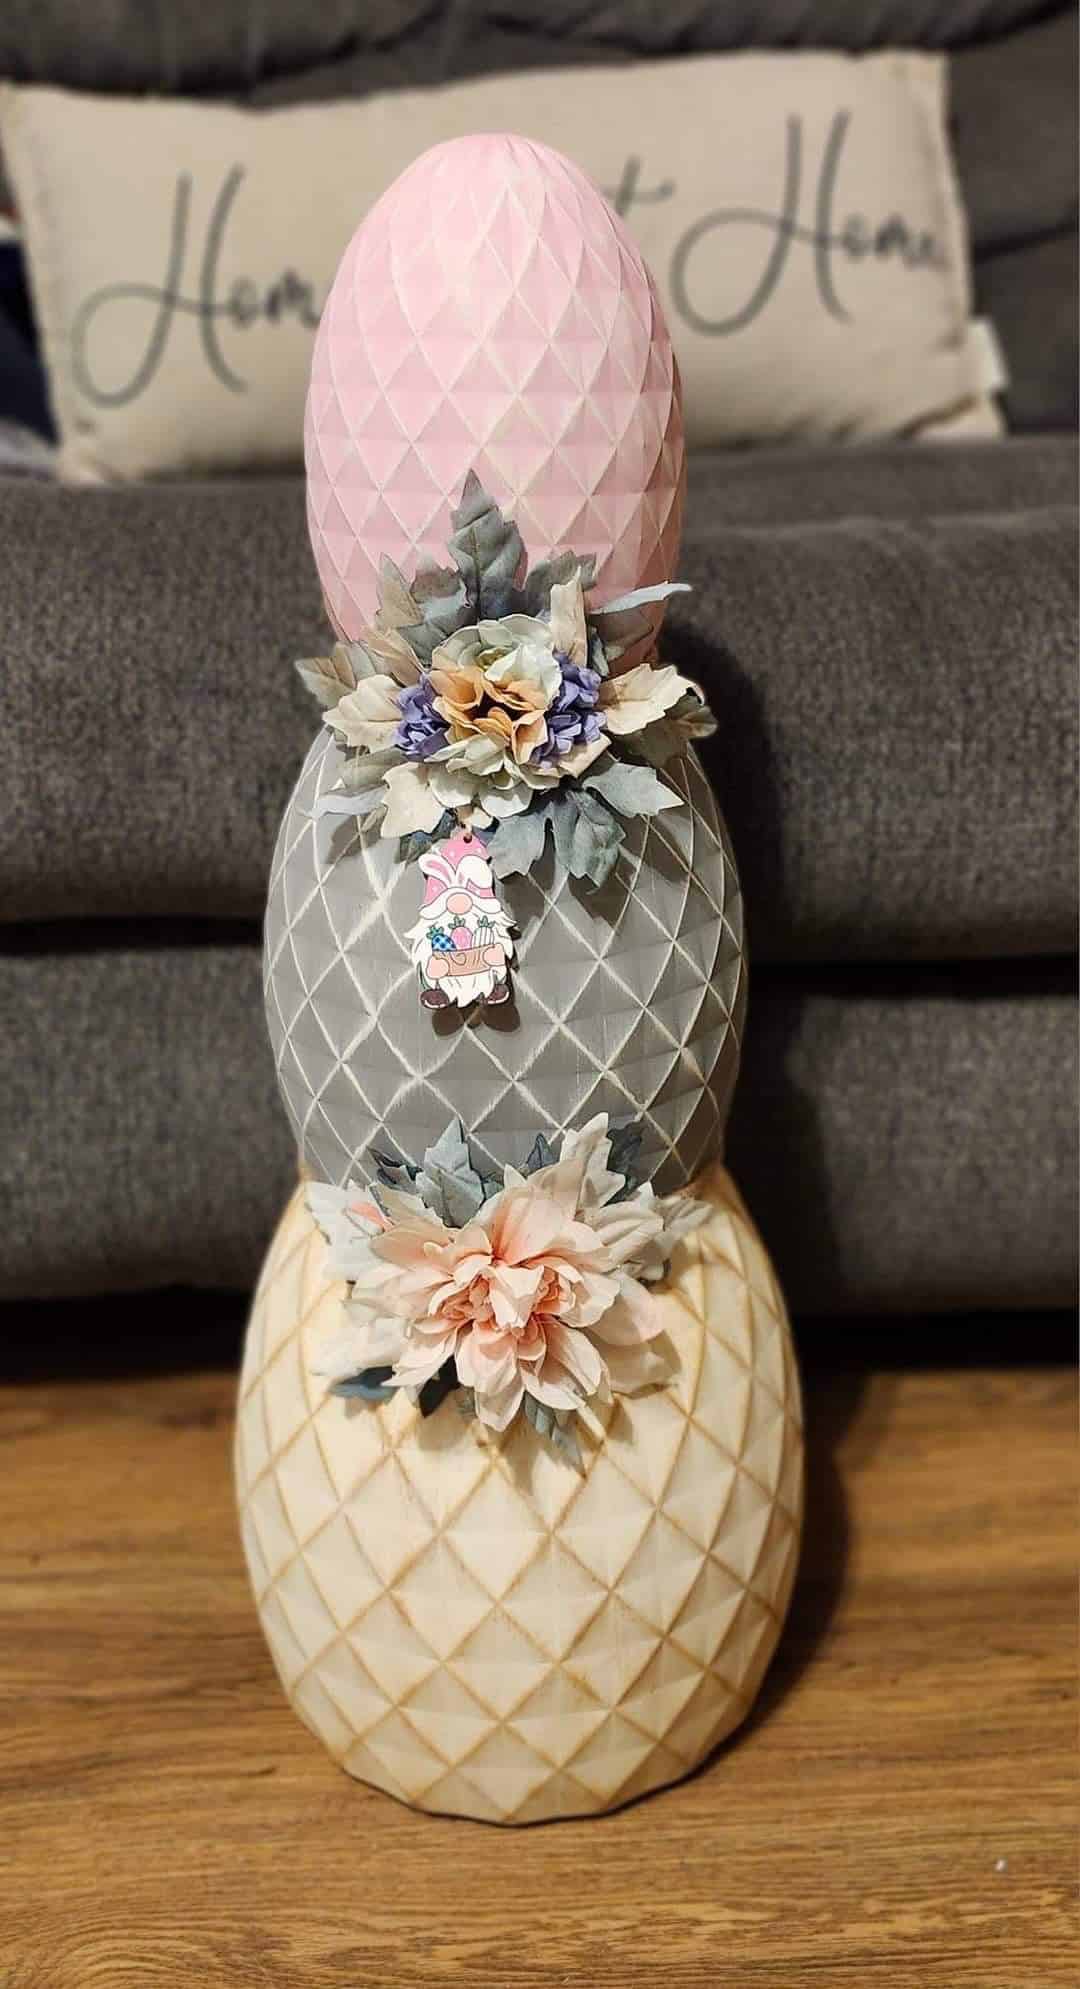
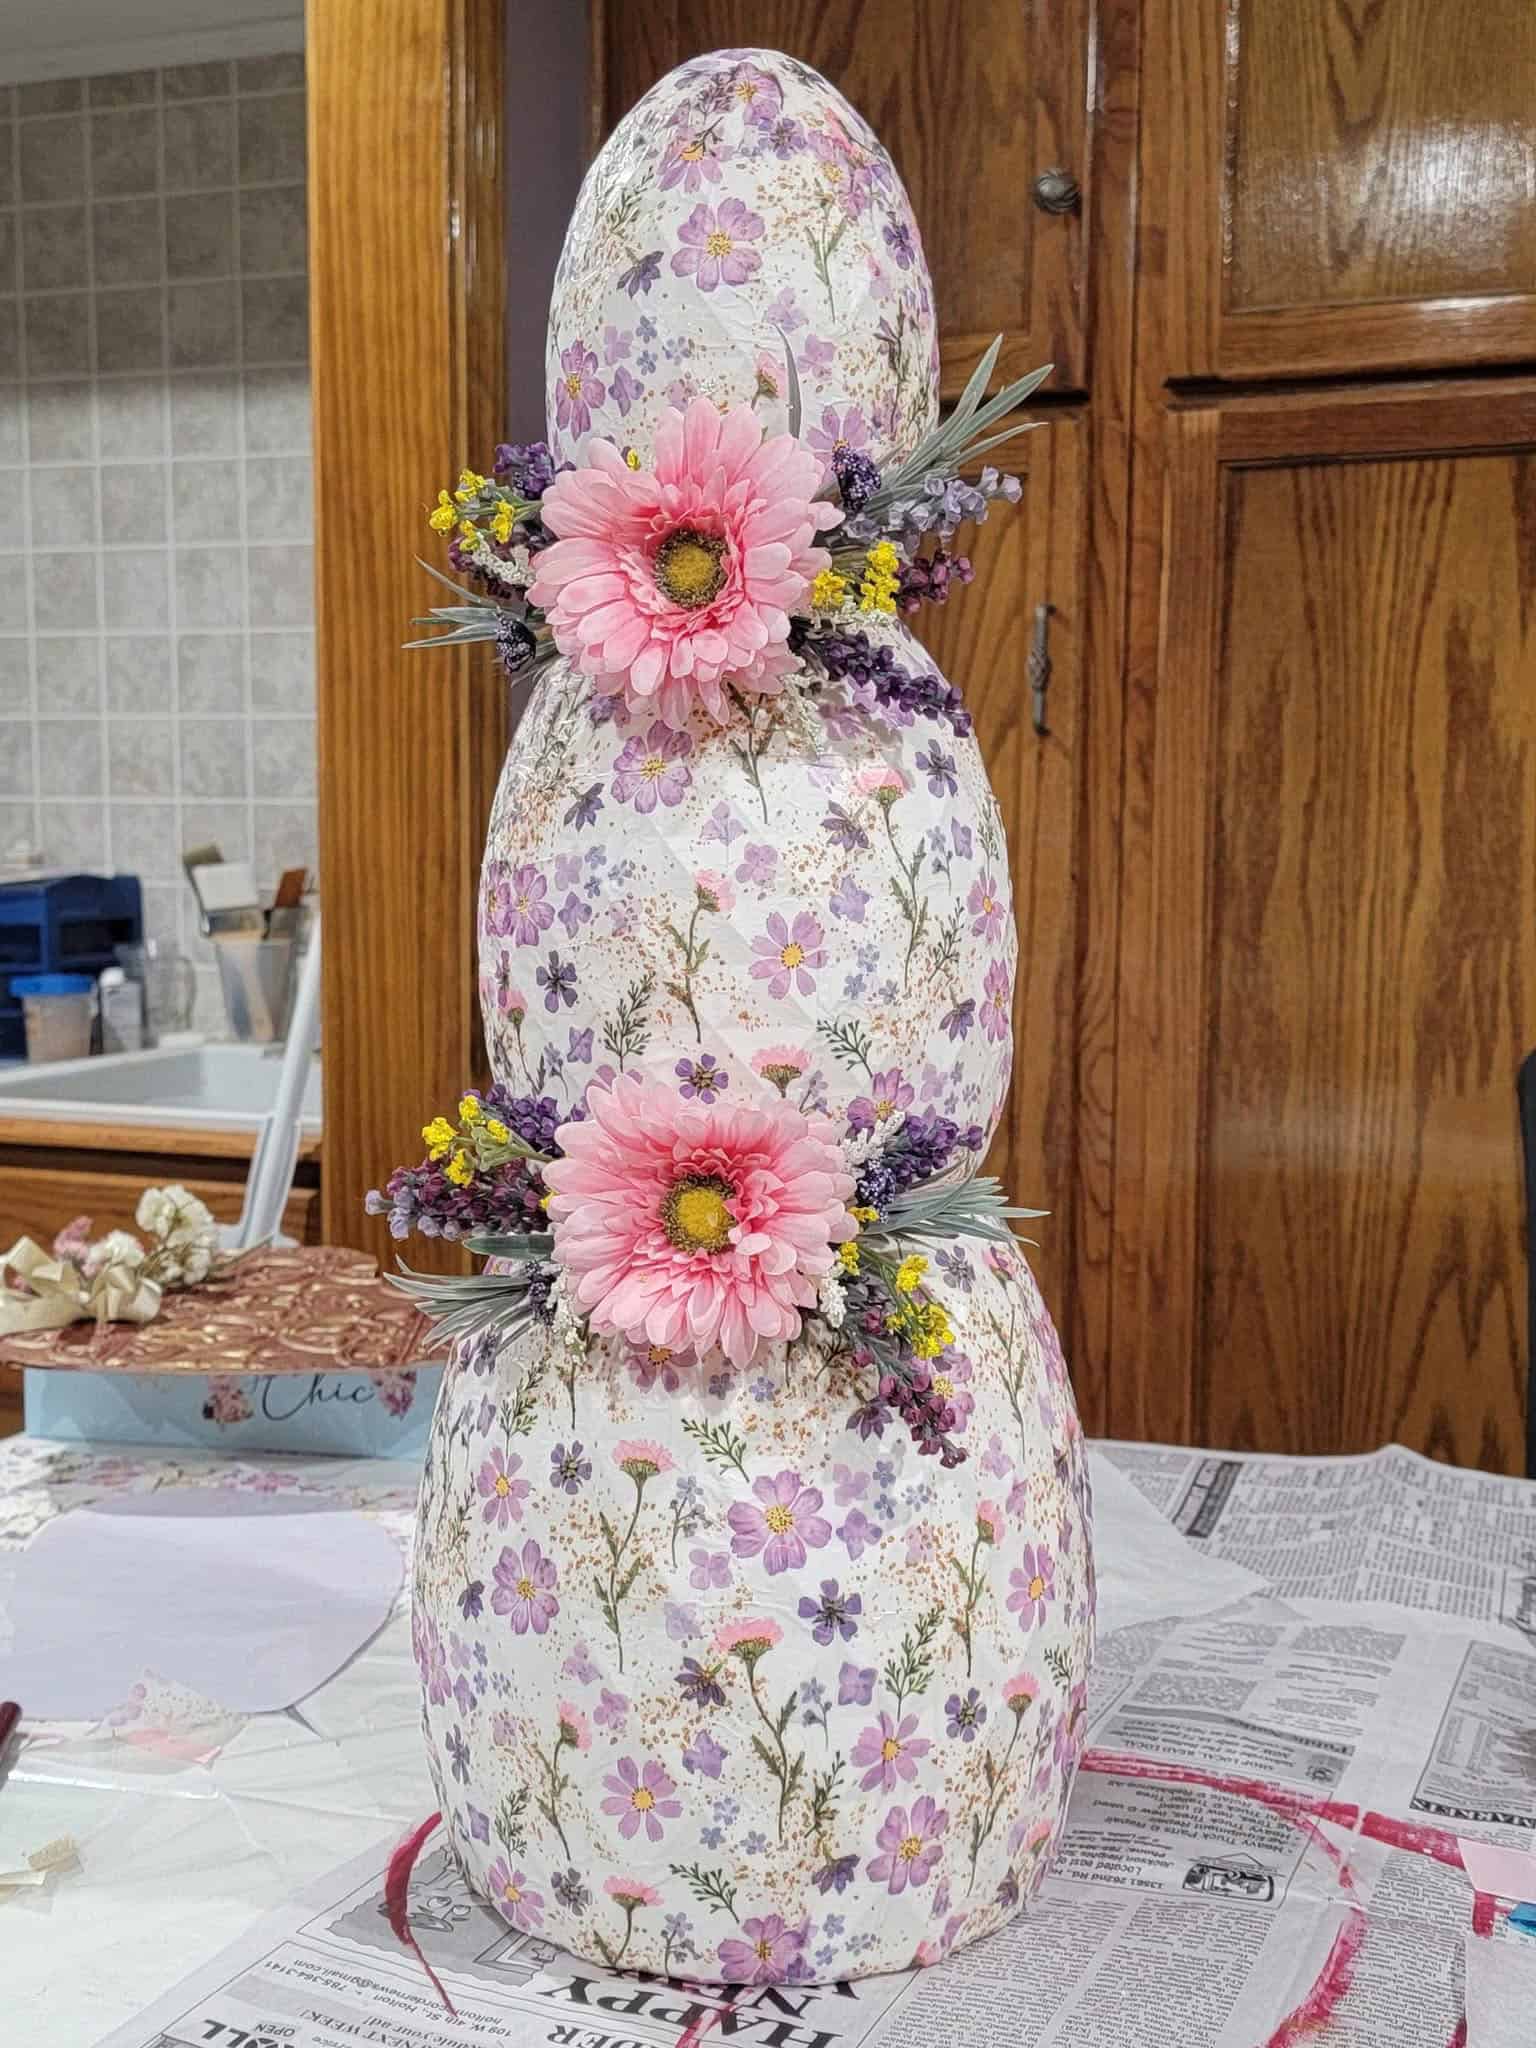

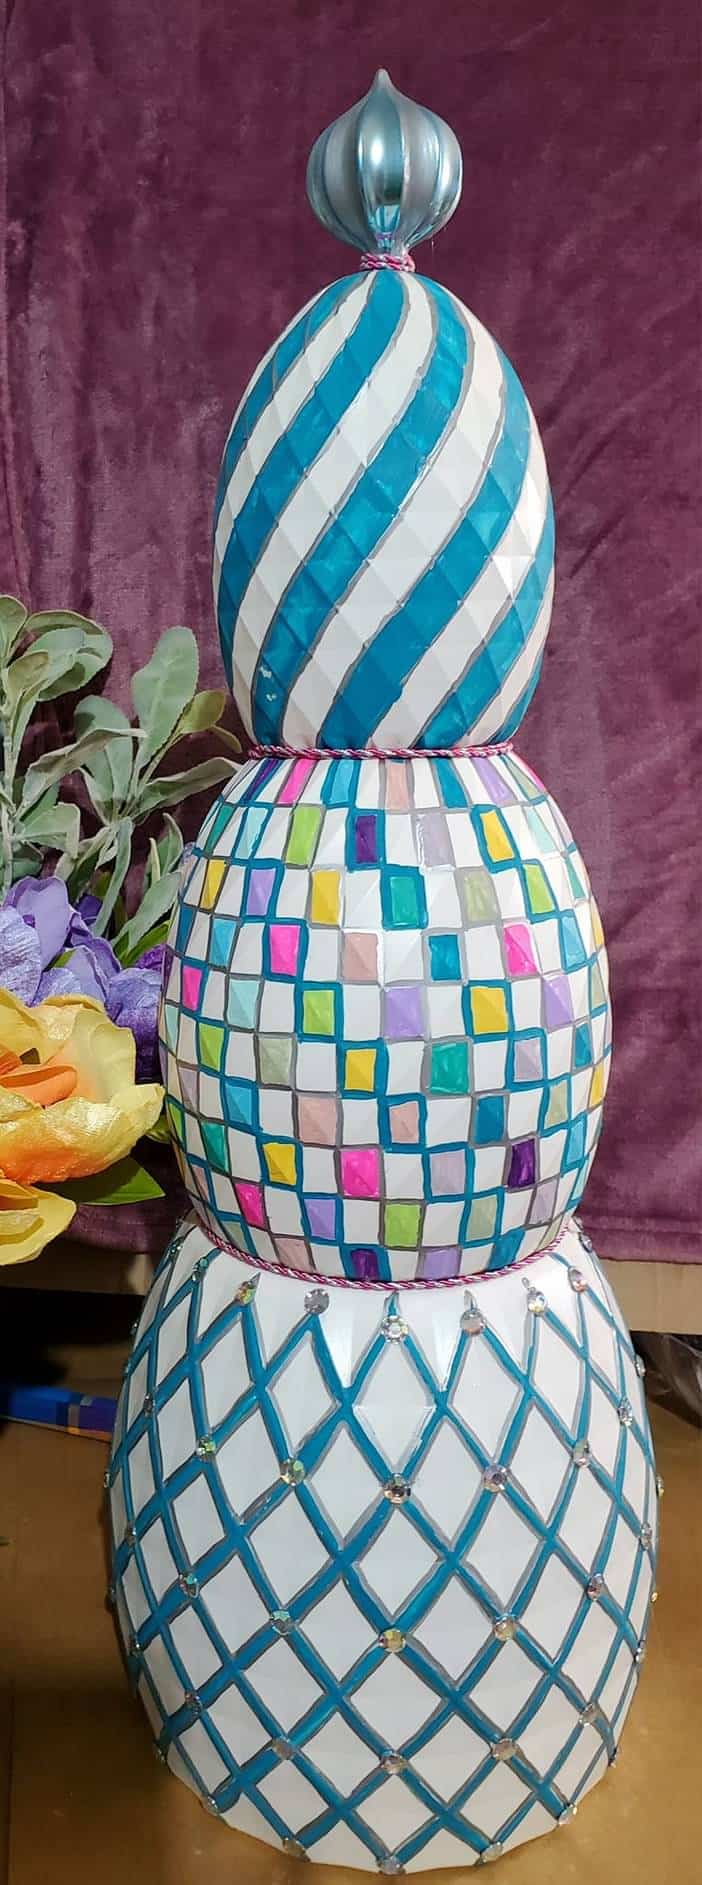
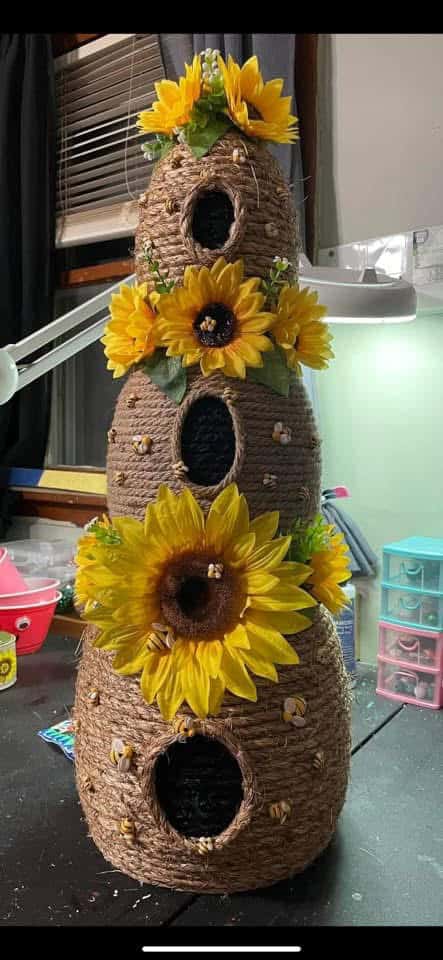

Whether you keep it simple or go all-out with embellishments, the Dollar Tree Easter egg topiary is a fun and festive project that anyone can create. Happy crafting and happy spring!
More Dollar Tree Stacked Decor Ideas
- 37+ Amazing Dollar Tree Plus Stackable Pumpkins Ideas
- 13 Creative Ideas for Dollar Tree Stackable Christmas Decor You’ll Want to Try

DIY Easter Egg Topiary +15 Ideas for Dollar Tree Stackable Eggs
Materials
- Dollar Tree stackable plastic eggs 3 sections per egg
- Mod Podge matte
- Foam brush
- Assorted napkins look for fun spring or Easter patterns
- Ribbon for a bow
- Rhinestone embellishment optional
- Scissors
- Hot glue gun and glue sticks
Instructions
Step 1: Separate the Layers of the Napkin
- Most decorative napkins are 2-3 ply. Carefully peel the layers apart, keeping only the top printed layer. This will make the napkin thinner and easier to adhere smoothly to the egg’s surface.
Step 2: Apply Mod Podge to a Section of the Egg
- Using a foam brush, apply a thin, even layer of Mod Podge to one section of the plastic egg. Start with a smaller area so the glue doesn’t dry too quickly before you apply the napkin.
Step 3: Add the Napkin
- Lay the napkin over the Mod Podge-coated area and gently press it down, smoothing it into the egg’s surface. Use your fingers or a clean brush to press the napkin into the grooves and design of the egg. Be very gentle to avoid tearing. Trim any excess around the edges with scissors if needed.
Step 4: Repeat on All Egg Sections
- Repeat the process for the other two sections of the stacked egg. You can use the same napkin print for a cohesive look or mix and match different patterns for a whimsical touch.
Step 5: Add a Bow
- Create a simple ribbon bow using your favorite spring ribbon. A pastel stripe, polka dot, or floral print would all work beautifully. Use hot glue to attach the bow to the top or front of your topiary egg.
Step 6: Add an Embellishment (Optional)
- For a little extra sparkle, add a rhinestone, button, or jewel to the center of your bow using hot glue. This adds a polished, boutique-worthy finish to your craft.