DIY Messy Bow Tutorial (Easy Bow Making)
This DIY project is so simple! Enjoy easy bow-making with this DIY messy bow tutorial. It's perfect for all occasions and is so quick to make- you'll want to make tons of them!
There are so many wonderful ways to use homemade bows. I love using them as hairbows or even as decorations to add to some DIY wreaths. If you have ever struggled to figure out how to make fancy ones, then this tutorial is gonna make you smile. It's one of the easiest ones you will ever find!
Even better – you can make it without spending a lot on materials.
Easy Bow Making – DIY Messy Bow
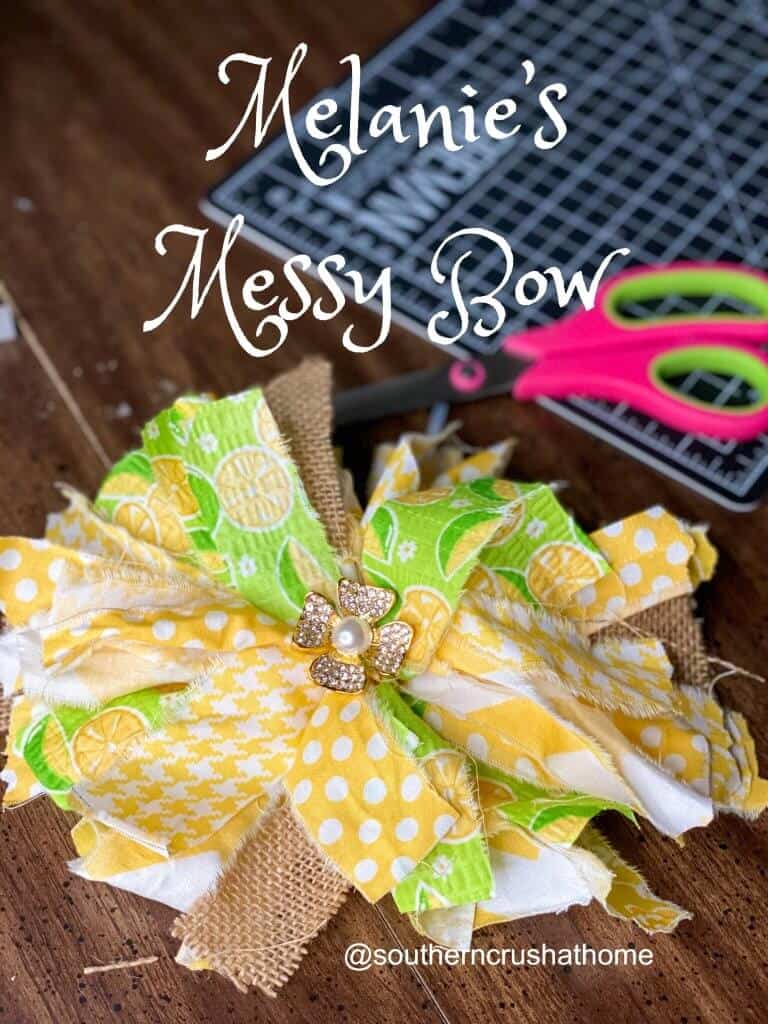
Here’s the DIY tutorial you’ve been waiting for. I’ve tried making different fancy bows over the years, and most of them were tricky and intimidating to create. So naturally, I would stick with your basic “tie your shoe” loop-ty loop bow. However, I’ve since discovered that some of the simplest (and messiest!) of bows can be the prettiest!
In fact, one day when I was “messing around” and this DIY ‘messy’ bow came to life and it truly fits my decorating style perfectly! It can be made for any season or occasion, especially Christmas.
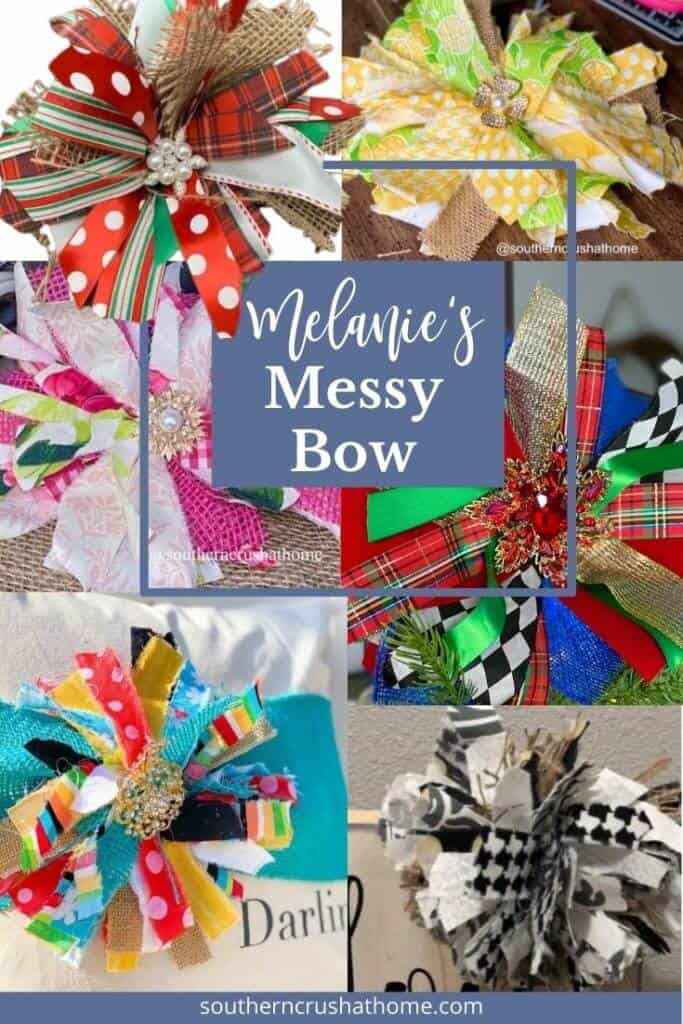
More DIY Messy Bows!
In this guide, I'll show you how to make a messy bow multiple ways:
- a basic messy bow
- a Christmas version
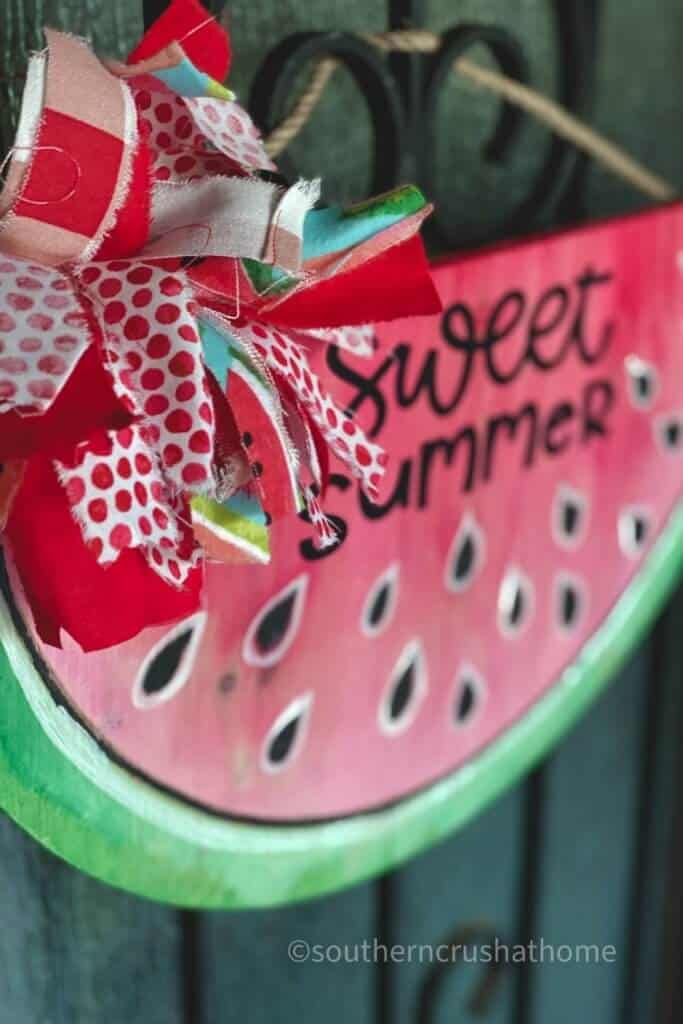
- a springtime one
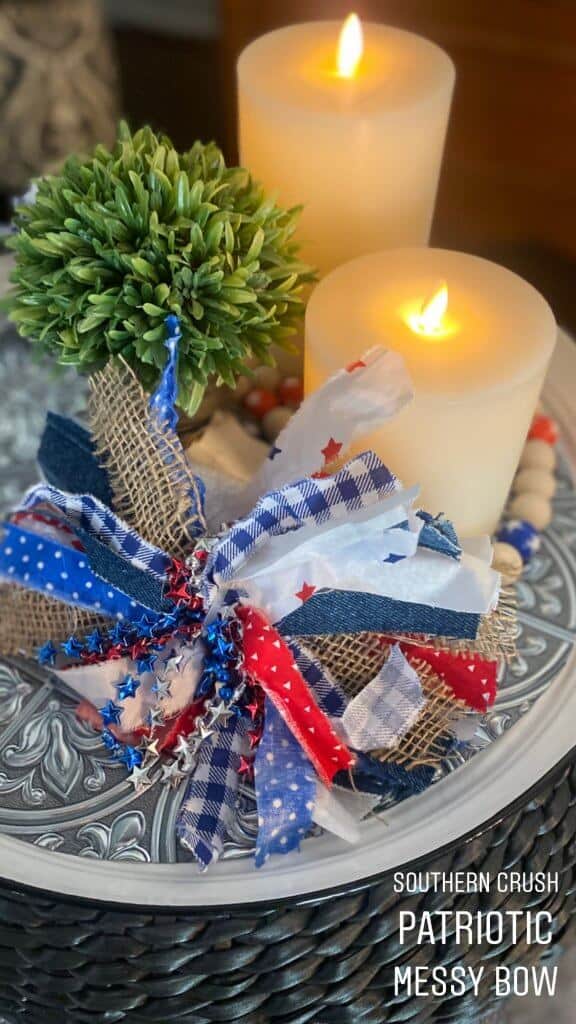
- a patriotic messy bow
- a drop cloth messy bow
- a lace messy bow
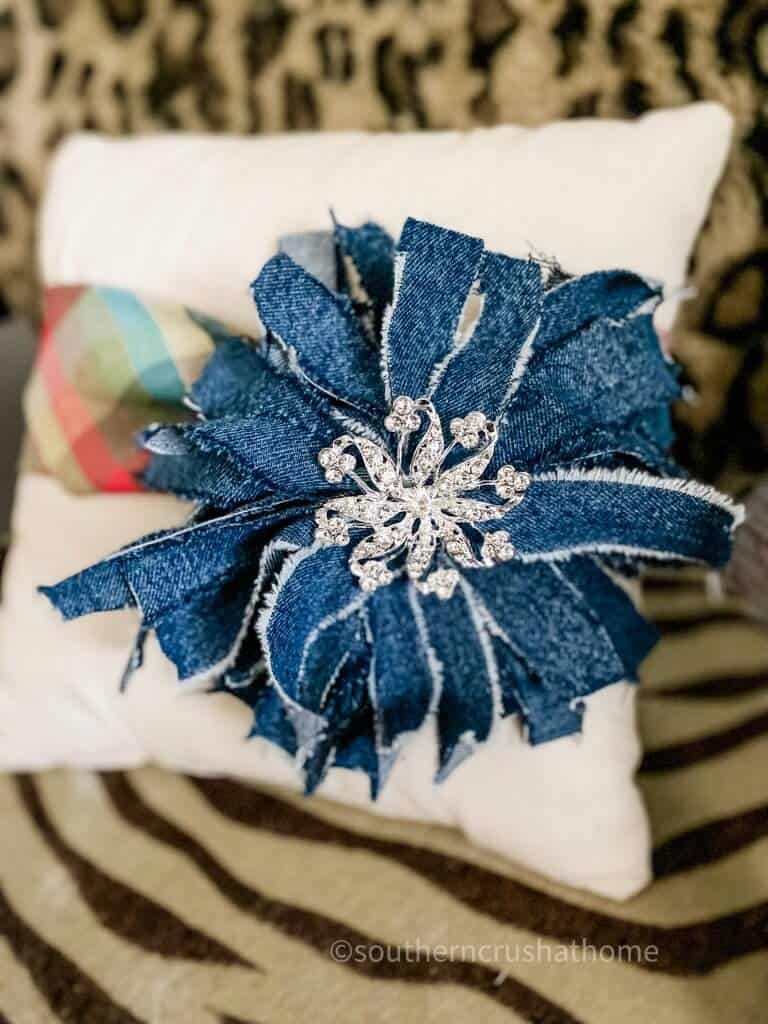
- a denim messy bow
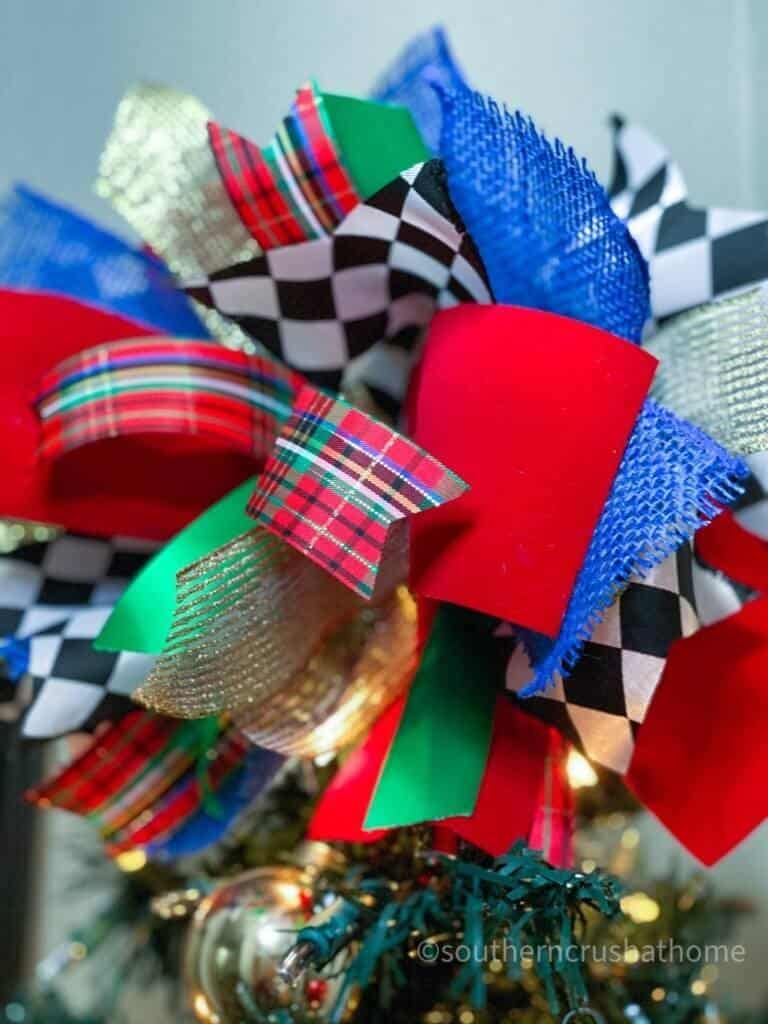
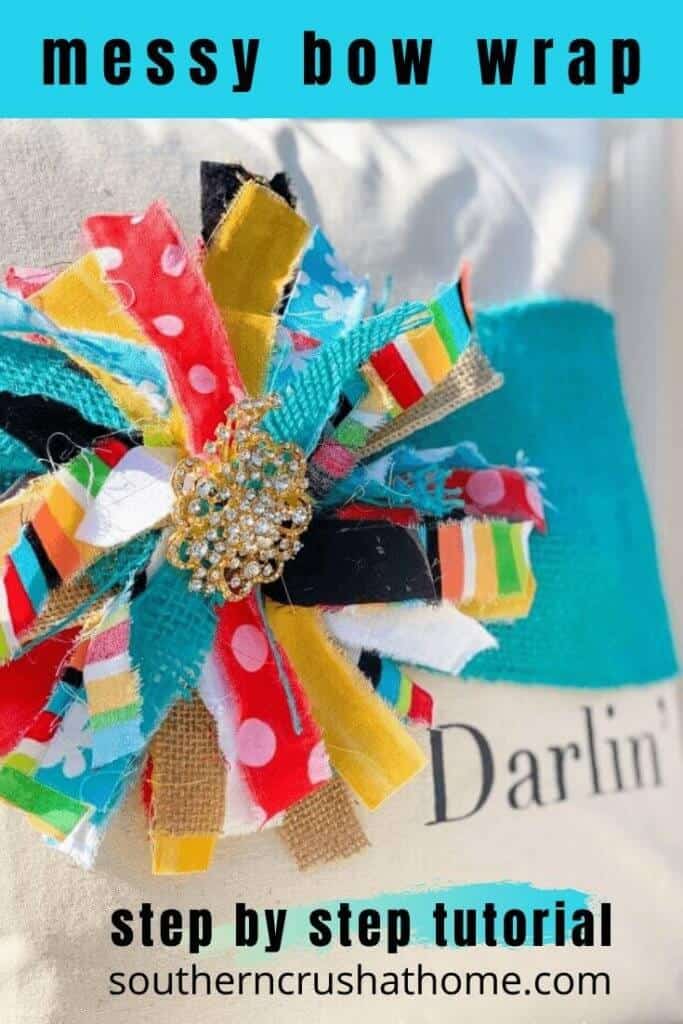
- a messy bow wrap

Join me and see for yourself how easy it is to make my signature DIY messy bow.
Be sure to PIN this tutorial!
DIY Messy Bow Tutorial
Just follow this simple tutorial and you'll master easy bow making. My DIY craft idea might just become your favorite way to make a homemade bow.
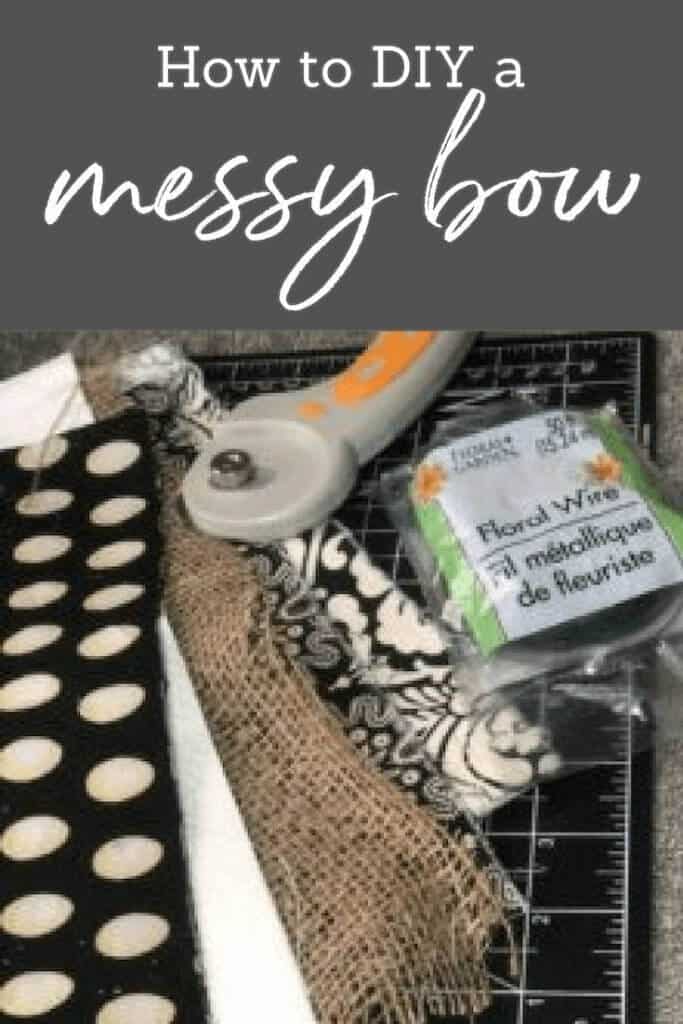
Supplies
This DIY bow uses your full creativity – here's what you need to make your own.
- Your favorite scraps of cotton fabric or vintage ribbon (my favorite) or regular ribbon (non-wired)
- A few scrap burlap pieces
- Floral wire or zip tie (depending on which method you choose)
Get Ready Cuz It's Gonna Get Messy!
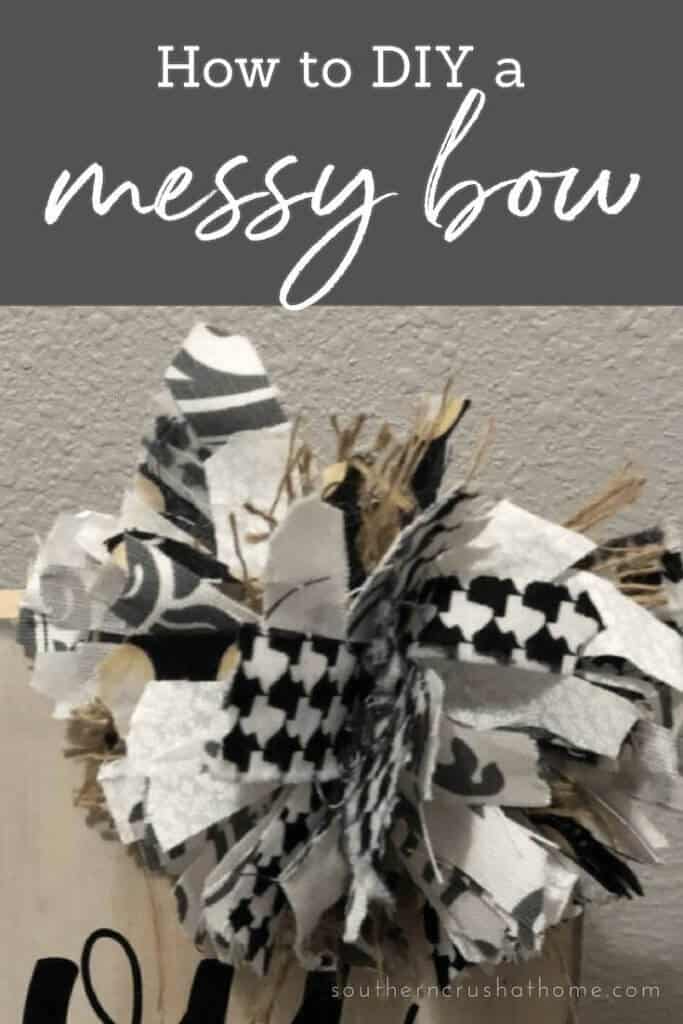
How To Make A Classic Messy Bow
Here's the complete tutorial. Follow each step and you'll have your own beautiful messy bow!
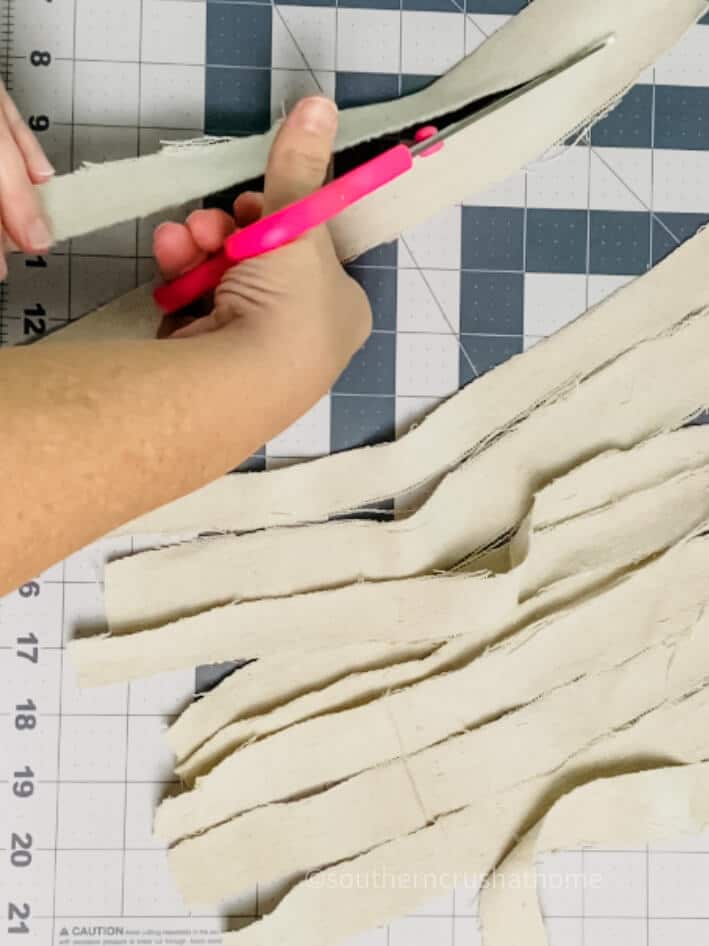
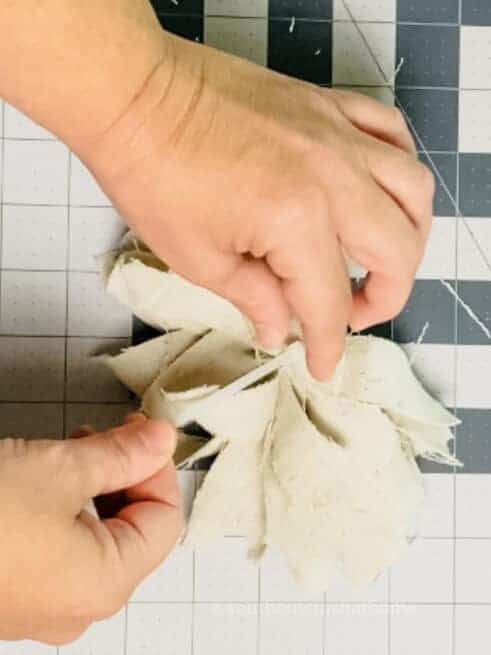
- Cut approx 1/4-1/2″ strips of your favorite material or ribbon. This does not have to be exact. Don’t forget your burlap!
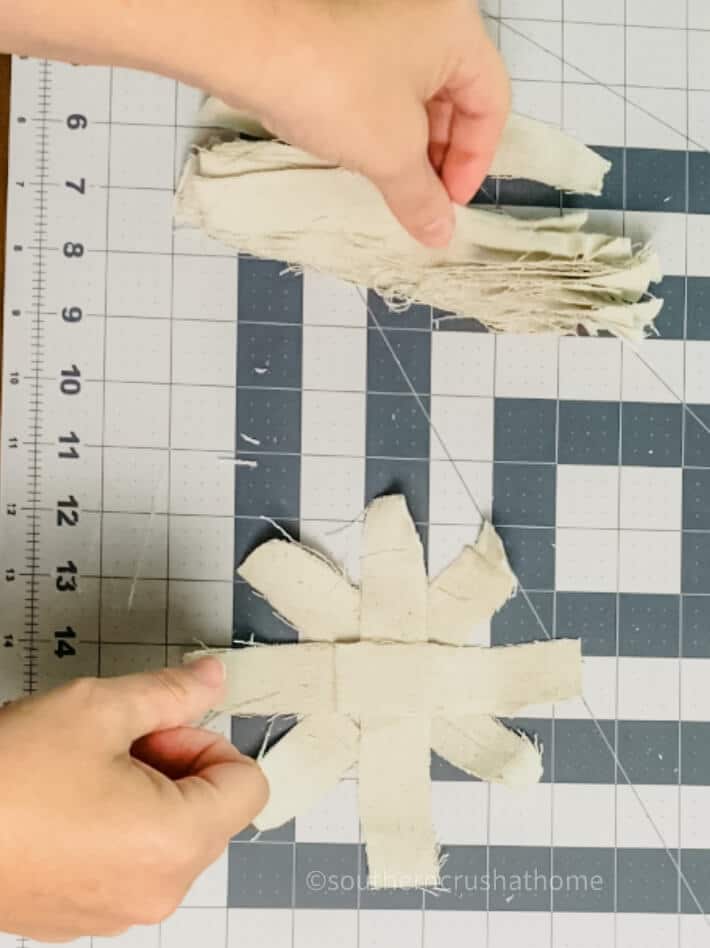
- Take each strip and wrap loosely or tightly around your fingers depending on the size of bow you’d like to create.
- Pull the strips off of your fingers and tie a 4-5″ piece of floral wire around the center and twist tightly.
- Take a pair of scissors and cut the ends through the hoops.
- Shake the bow holding the floral wire as a handle.
- Pull the strips down into a bouquet and trim the top of them until they are at your desired length.
- Shake some more (this is the messy part) and fluff until you like the way it looks.
- Use the wire to attach it to your favorite project or gift!
Follow Along With This EASY Video Tutorial
If you consider yourself to be a visual learner and are struggling with the instructions above, it's okay! Here is a quick and easy video tutorial to help guide you step by step to make the perfect messy bow.
That’s it! This is an easy DIY craft that can be changed out for the seasons or occasions.
Easy Bow Making – Messy Bow Alternatives
There are different ways to make these fun little projects. Here's another way to make your own pom-pom style bow.
- Cut approx 1/4-1/2″ strips of your favorite material or ribbon. This does not have to be exact. Don’t forget your burlap!
- Layer them flat barely overlapping each one on top of the other.
- Take a zip tie and zip the ribbon pieces in the center.
- Pull each separate piece of fabric or ribbon towards the center back and forth until it creates a pom-pom type effect.
- Trim the top to your desired bow size.
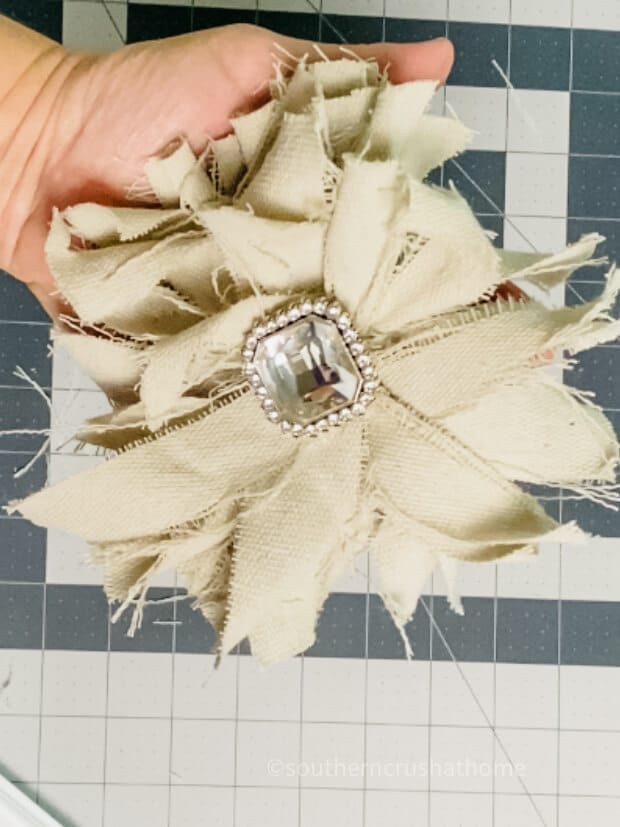
- Embellish the center as desired or leave it the way it is; either is super cute
I just love making these all year long!
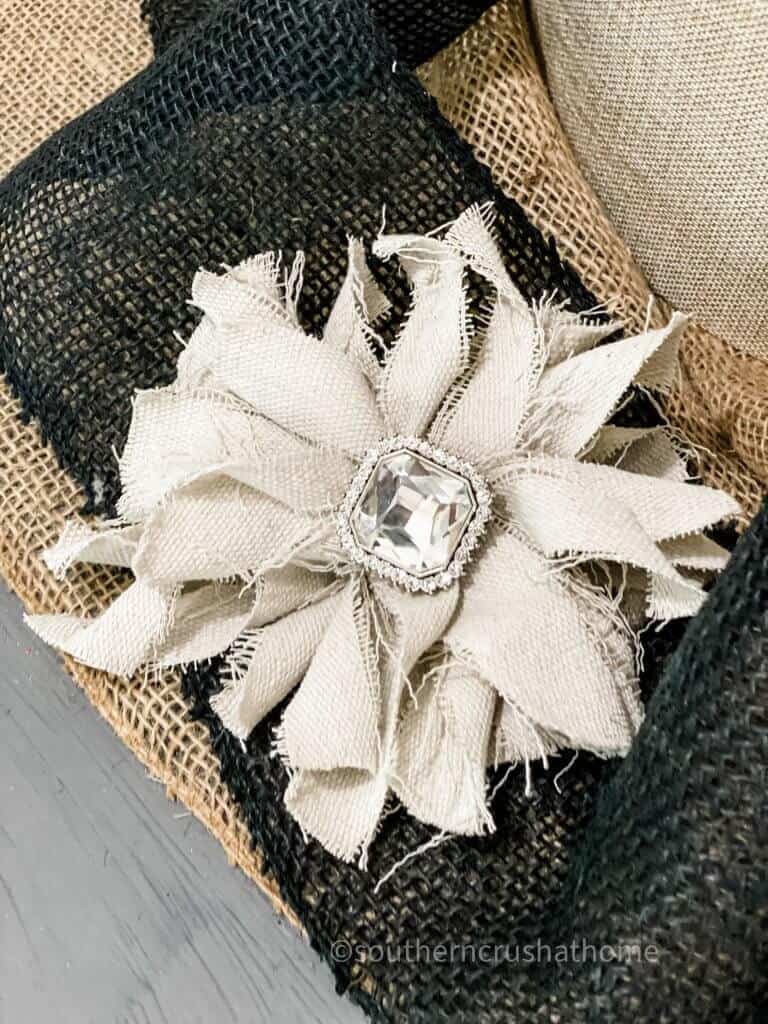
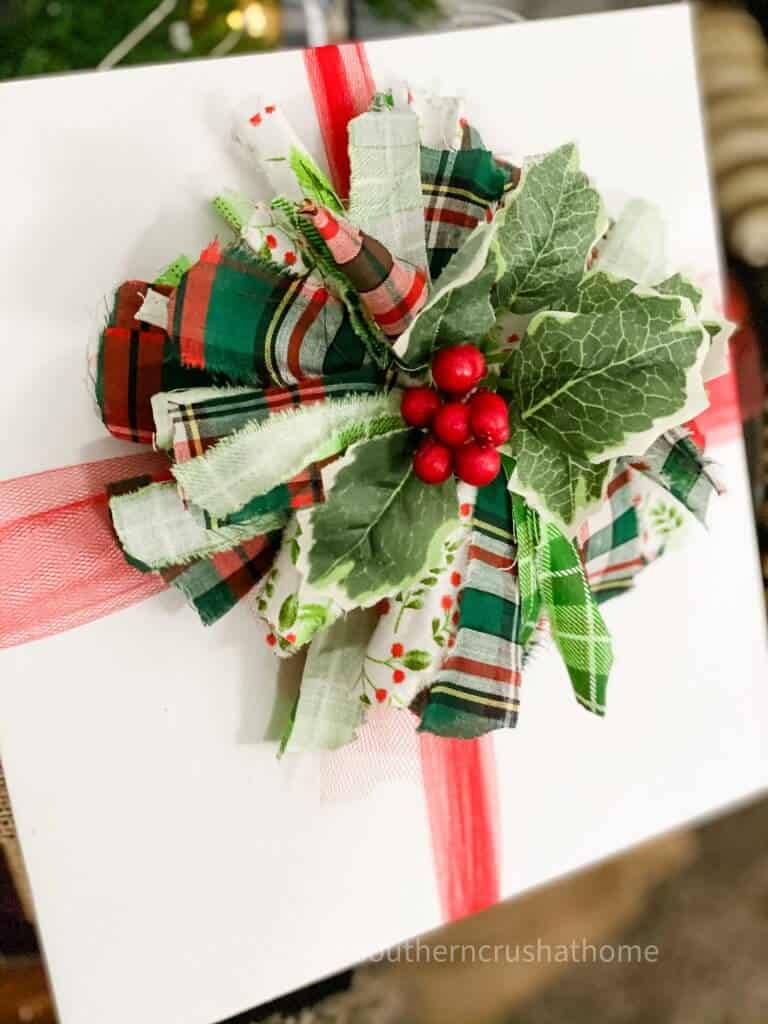
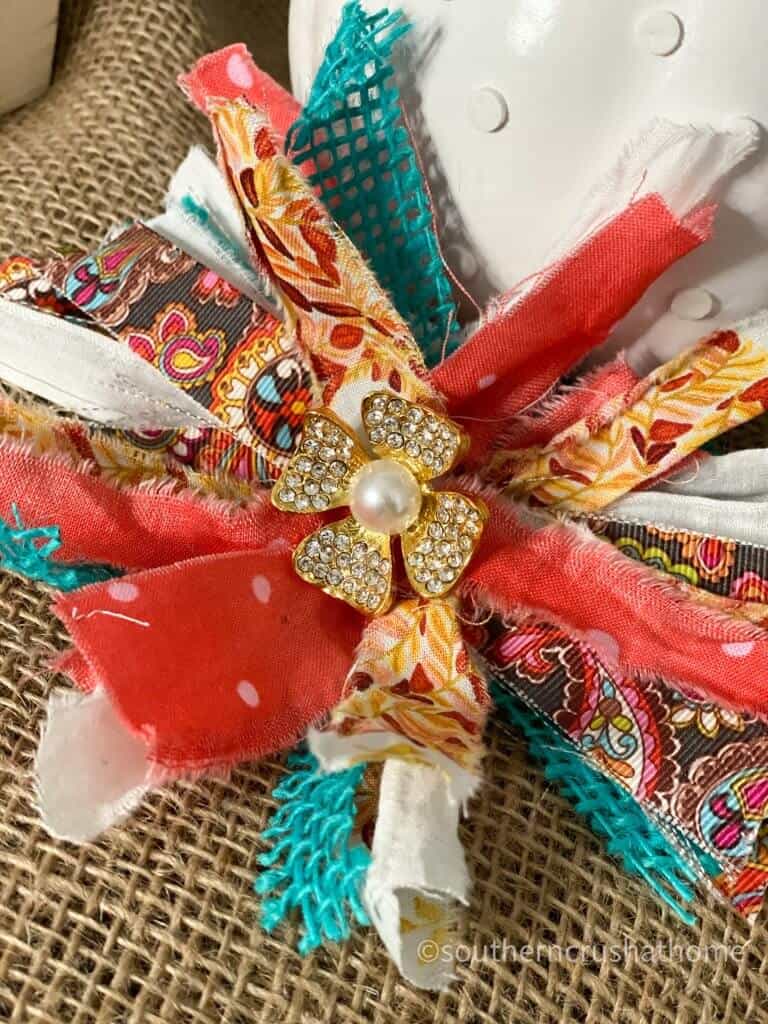
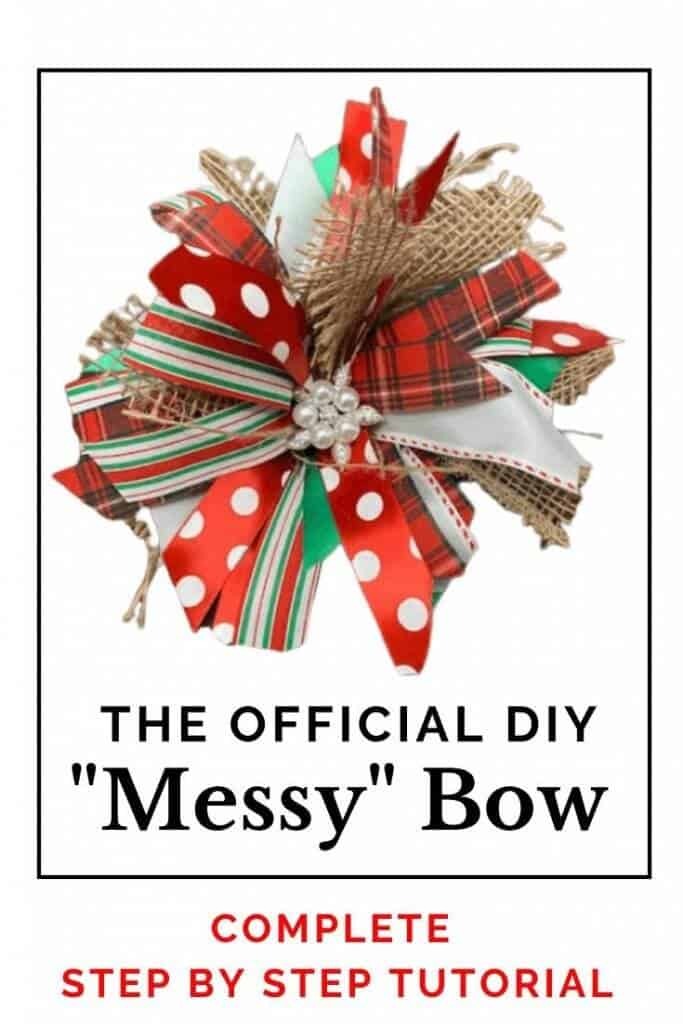
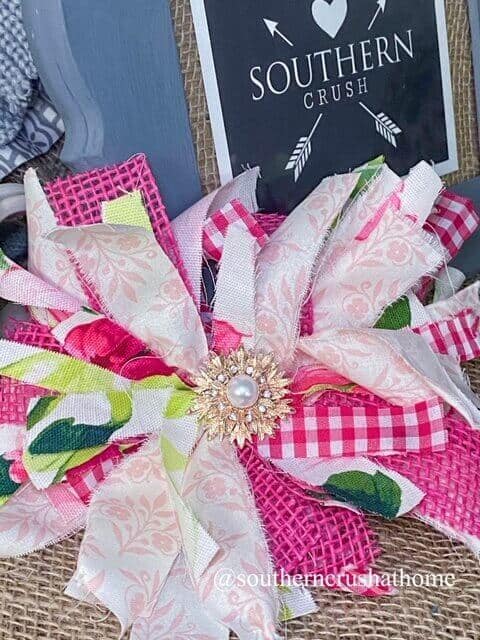
DIY Christmas Messy Bow
These messy crafts are perfect for Christmas wreaths and decorating too. All you have to do is use different fabrics.
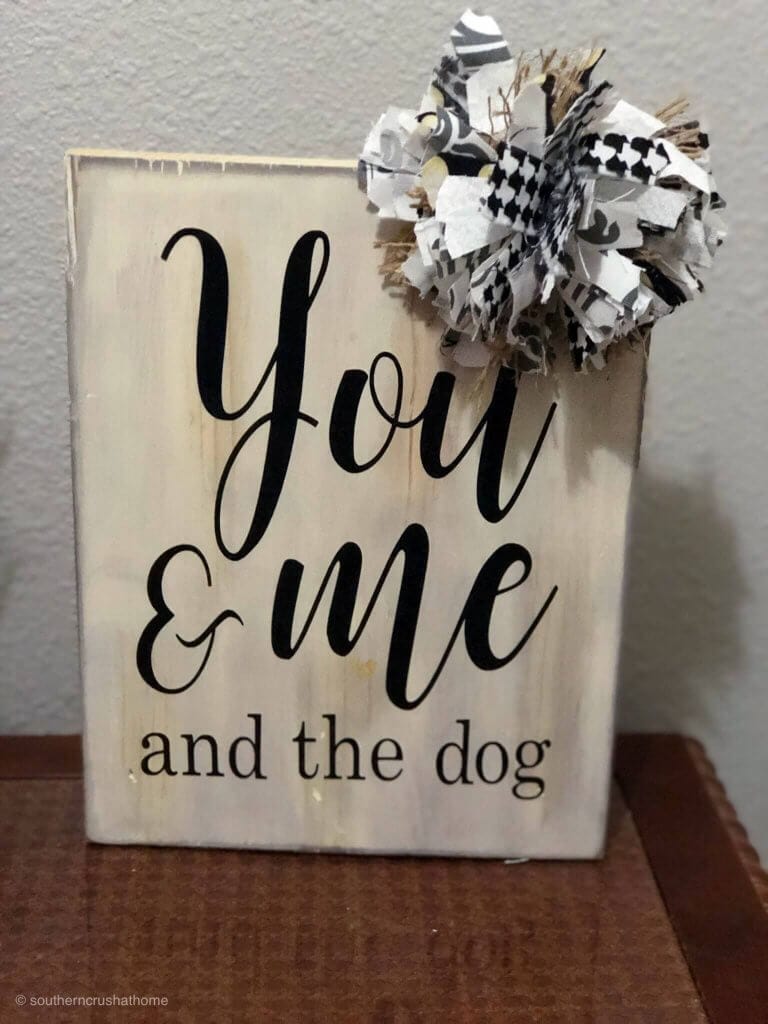
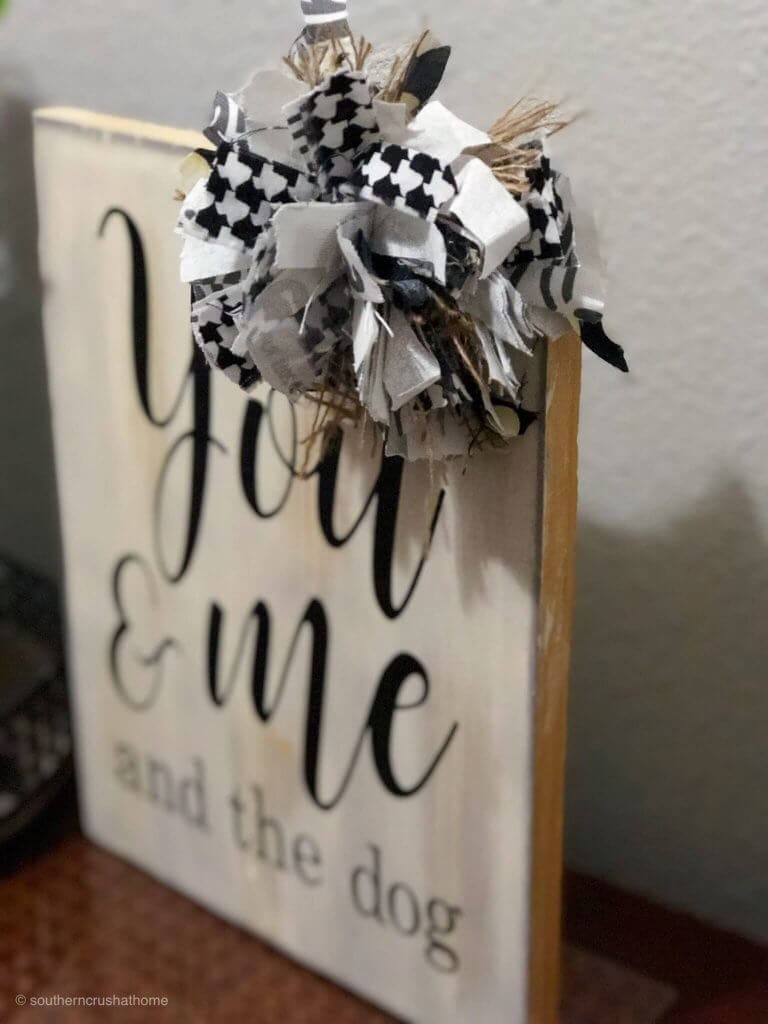
I made out of vintage thrift store ribbons and a rhinestone bling centerpiece. Don’t forget the signature burlap for added farmhouse flair and texture. It is ready to dress up any gift, candle, pillow, Christmas tree, or even sitting on a tiered tray!
Here's how to make a Christmas version of my classic craft.
WATCH DIY Christmas Messy Bow Video Tutorial
Are you a visual learner? I made a video showing you how to make a Christmas messy bow. Check it out below and follow along.
Want 7 Easy Bow Tutorials + Bonus Tree Topper?

Springtime Messy Bow
Finally, here's how to make a bright and cheerful spring messy bow.
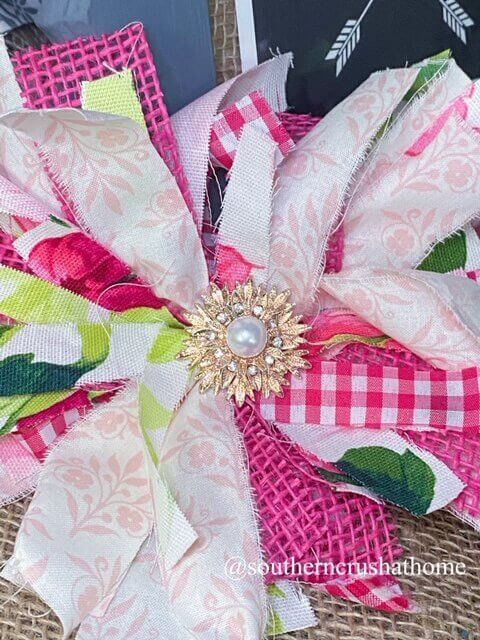
Place these on your spring wreaths or use them on a vase full of fresh blooms.
WATCH Video for Spring Themed Bow Making
I also made a video showing you how to make a spring messy bow too. I hope you enjoy it and follow along.
Easy Bow Making: Sign Up For More Crafting Tips
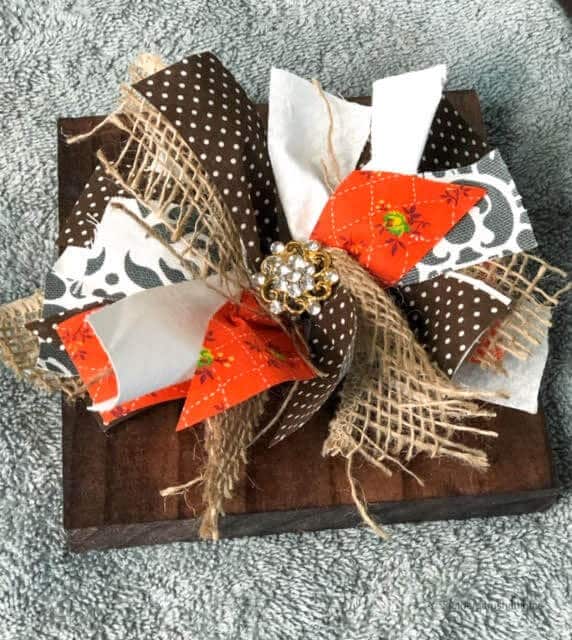
Everyone can make their own bows with my new technique. Life is short – enjoy the mess! If you liked this project, I bet you'll love the fall version of the messy bow too. Also, in case you missed it you can find this amazing Messy Bow Burlap Pillow Wrap idea HERE.
Pin and Share
Please pin this post for later so you can find the tutorial when you want to make another messy bow.
Be sure to PIN this for the future!
Please join us over on our Facebook Page to see more fun projects “LIVE.” We love chatting about all things crafts.
If you love this kind of DIY project, you need to be getting my emails, friends! Each week I send out a couple of emails that include updates, crafts, shopping experiences, and decor inspiration. Be sure to sign up HERE. I can't wait to meet you!
DIY Messy Bow
Materials
- scraps of cotton fabric or non-wired ribbon
- scrap burlap pieces
- floral wire or zip tie
Instructions
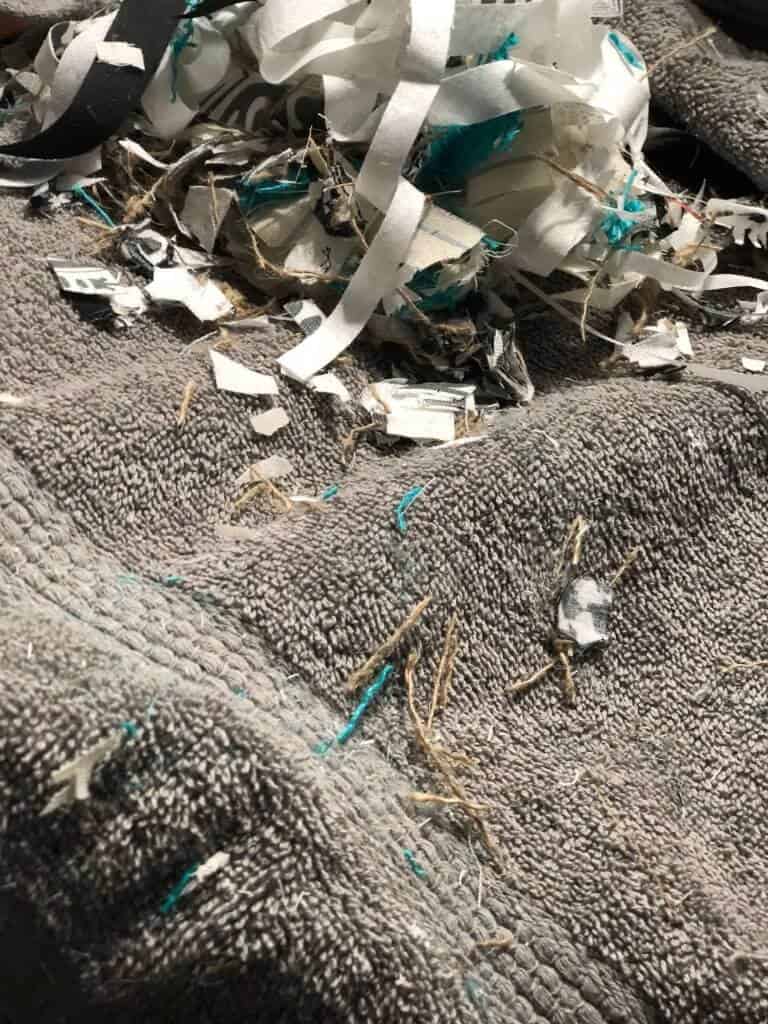
- Lay a towel down on your work surface as this project gets a little messy.
- Cut strips of your material/ribbon and burlap into approximately 1/4"-1/2".
- Take each strip and wrap them around your fingers. You can wrap tightly or more loose depending on the size of the bow you want to make.
- Pull the strips off and tie a 4-5" piece of floral wire in the center. Twist it closed.
- Use scissors to cut through the hoops.
- Hold onto the floral wire as a handle and shake the bow apart.
- Pull strips into a bouquet. Trim until they are the length you'd like.
- Shake and fluff!
- Use the wire to attach it to a project, gift, or anything else you can imagine.
I love the messy bows I’ve watched you make. After an hour on Pinterest yours is the only one I have found!!! Yay??? I love everything you do. You are truly amazing.
Vanessa Fatherree
WOW! Thank you so much for the kind words! I love the messy bow, too! It reminds me that nothing is perfect and that I don’t have to be either…
I love it! I do see scrap fabric pieces around at the thrift shops. I’ll have to pick some up!
Thanks for the video!
Yay! I’m glad you’re going to try one!!
Never saw the messy bow before but I liked it thanks for sharing
You’re so welcome!
These “messy bows” are so adorable! A store bought bow is about 2.50 – 4.99 each. By getting rolls of ribbon marked down at fabric, craft & thrift stores, y oi u can make adorable messy bows for all your biw needs for alit less! Also so cute to use on a wreath, picture frame, mirror!
I can’t wait to start making them!
Sincerely, Julie Norvell
Yes! Exactly my thoughts! I’m so glad you’ll be making them!
Great idea! I love it cause you can use your scraps. I have been known to keep scraps of material and ribbon and now it will pay off. Thanks for being so creative. Iris Jones, Chickamauga Georgia
You’re so welcome!
Love the messy bow. It is so fun to make,
Yay!! I’m so glad you like to make them!
Love watching you make projects and you sent the link I ask for about making the “messy bow”. Loved it – might be hooked now . Thanks for all you do! Teresa Kings
You’re so welcome!!! Thank you!
Finally a bow I can make quickly and so easy!
Yay! I’m so glad!
Yay ???? a bow I can make thanks for sharing this with us. ????????
I can’t make pretty bows, so I love the messy bow idea. I think I will rip my fabric to make it even messier. Thanks and I shared/sprinkled your blog for the bow. I’m thinking my friends will like it too. Thanks!
Haven’t tried the messy bow yet but plan on it they are really cute.
Love them both. I really like the pom Pom one that is the one I make
Thank you for the tip to get inspiration from Pinterest. I have been working on getting a room together to do crafts. It is coming together but slowly. Love watching you do all your crafts. You do inspire everyone to do crafts.
These are the best bows ever!!!!!
This is my fav bow of all time!
I love the messy bows. It makes it so much easier on your hands and quicker. Love the possible combinations.
Just bought the bling you use! Can’t wait to dress up my bows. Thanks!!
you’re so welcome!
Thank you my sweet friend!
I love this! Thank you
You’re so welcome!
I take the ribbon scraps that have wire and pull the wire out it works good …
that’s an awesome idea! thank you for sharing!