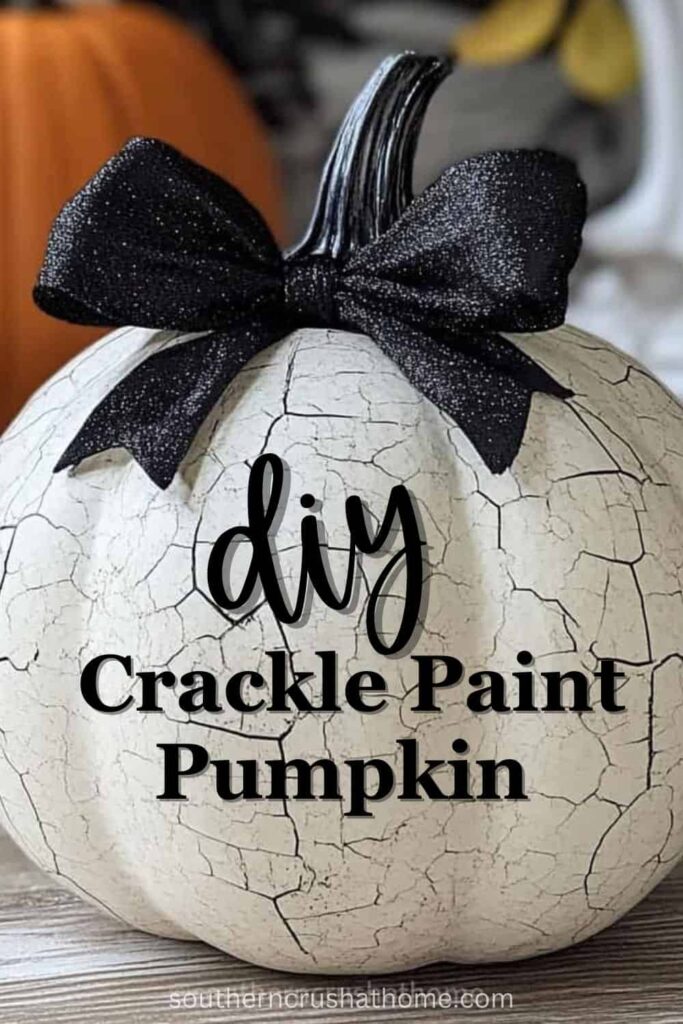
Easy DIY Crackle Paint Pumpkin
If you’re looking to give your pumpkins a unique, vintage vibe this Halloween or fall season, a DIY Crackle Paint Pumpkin is the perfect project!
PIN this for later!
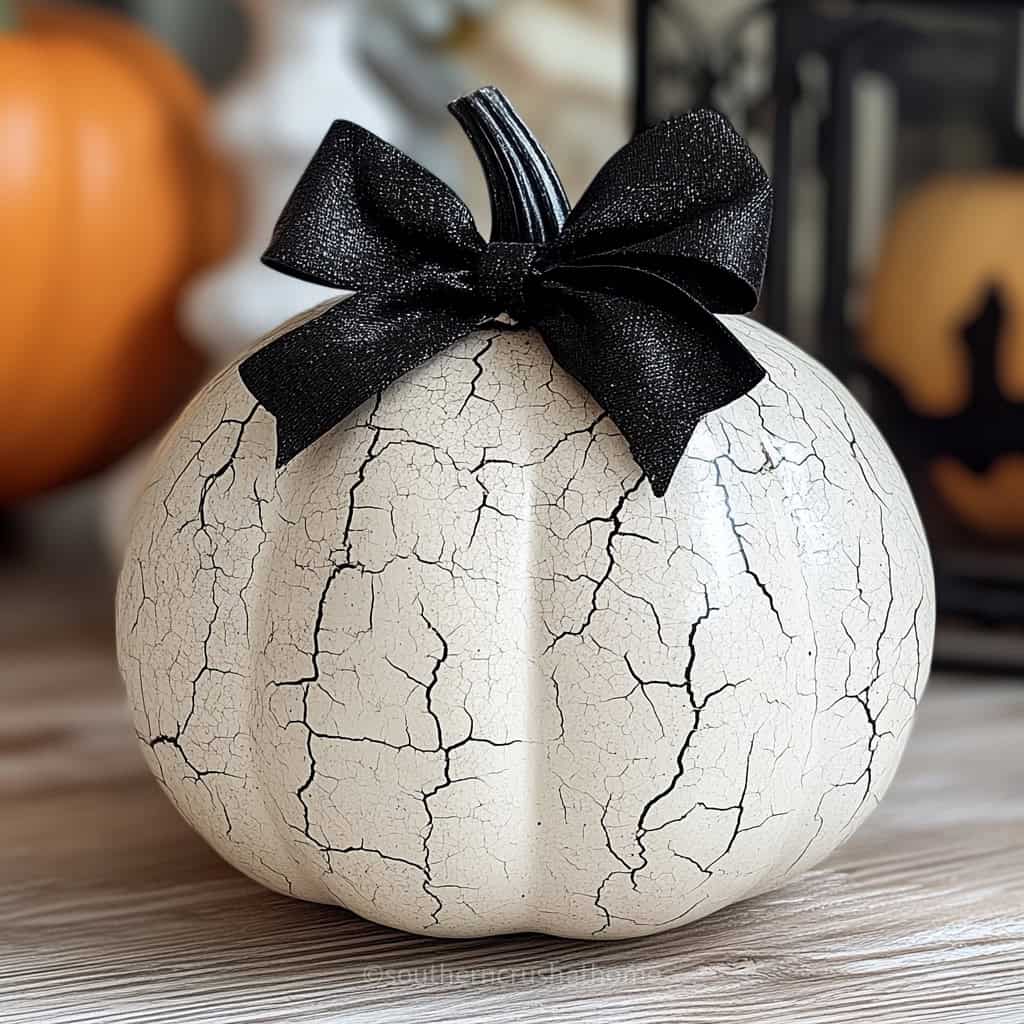
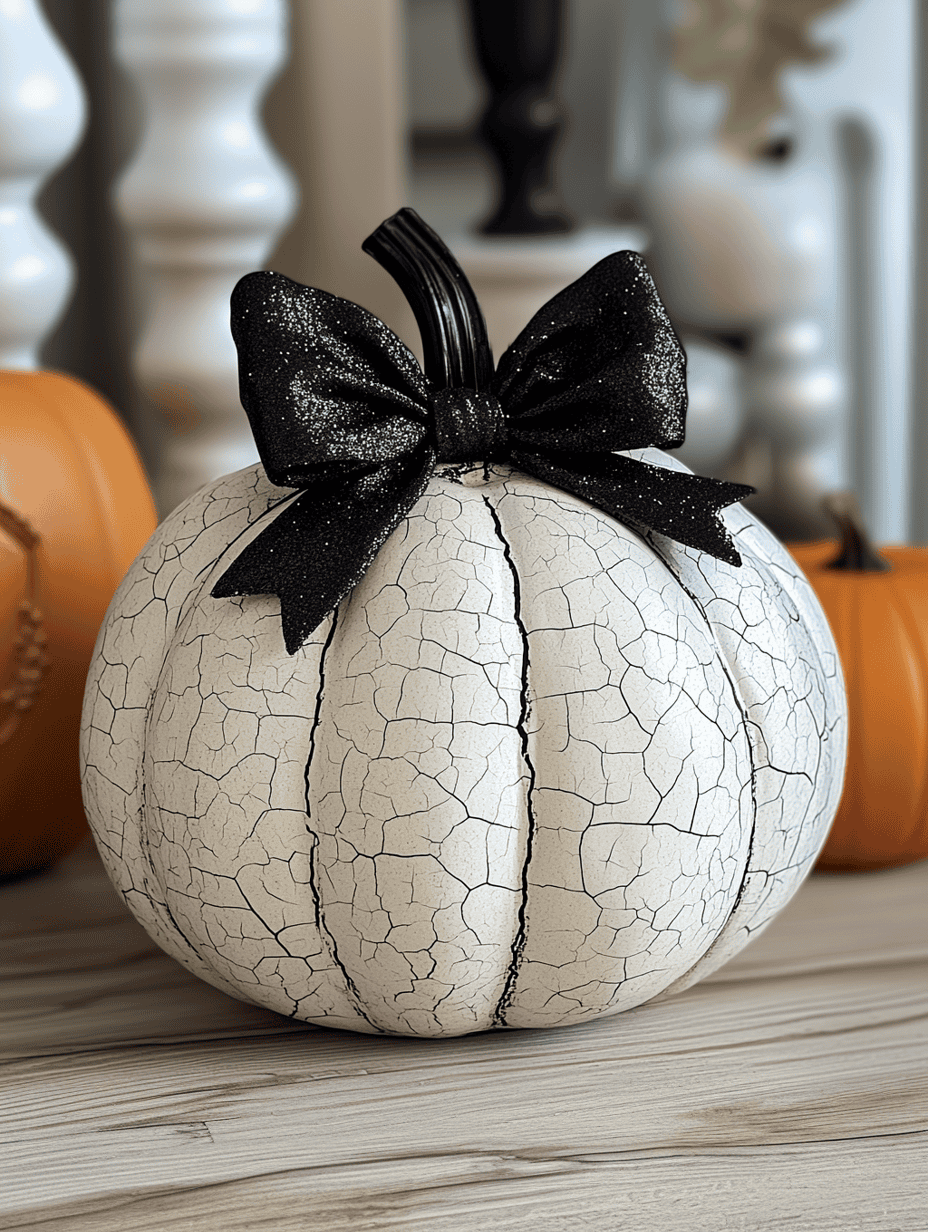
Crackle paint creates a beautiful, weathered effect, making your pumpkin look like it’s been aged over time, adding rustic charm to your autumn decor.
Craquelure is another term for the “crackle” effect and is used to describe the pattern the cracks make on the surface as the paint dries.
In this tutorial, I’ll walk you through how to achieve this crackle effect using just a few simple materials. You’ll learn how to create the crackle paint effect, how to control the size of the cracks, and how drying time and patience play a key role in this process.
Plus, we’ll cover what gesso is, why it’s important, and how to substitute it with everyday materials like Mod Podge or regular Elmer’s glue.
Let’s get started!
This blog post contains affiliate links. The opinions are wholly my own from my own experience. I may earn a small commission from clicks through to the websites that end in a purchase.
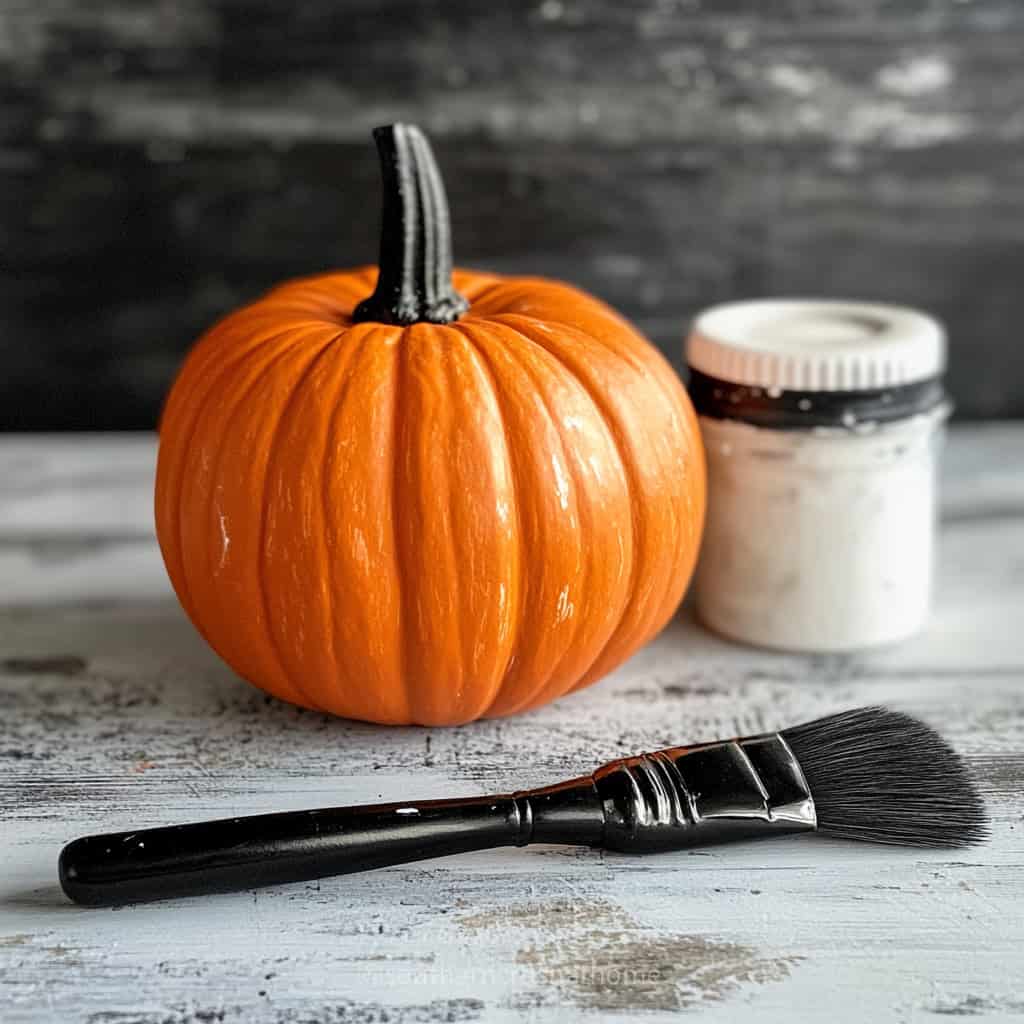
Materials You’ll Need:
- A faux pumpkin
- Gesso or White or black acrylic paint (for the base coat)
- Crackle medium (or DIY glue crackle: Elmer’s glue or Mod Podge)
- A paintbrush
- Topcoat paint color (any contrasting acrylic paint color)
- A heat gun (optional for speeding up drying time)
- Silicone Paint Mat
- Paint Brush Cleaner
- Continuous Spray Bottle
Step-by-Step Tutorial: How to Make a Crackle Paint
If you would rather watch a video, tutorial I’m sharing this one from my YouTube channel for you below.
What is Gesso?
Gesso is a primer used in painting that helps prepare surfaces like canvas or wood to accept paint. It creates a smooth, absorbent surface that makes your paint stick better and last longer.
While traditional gesso can be found in art supply stores, for this project, you can substitute it with materials like Mod Podge or even Elmer’s school glue—both of which work just fine as a primer for achieving the crackle effect.
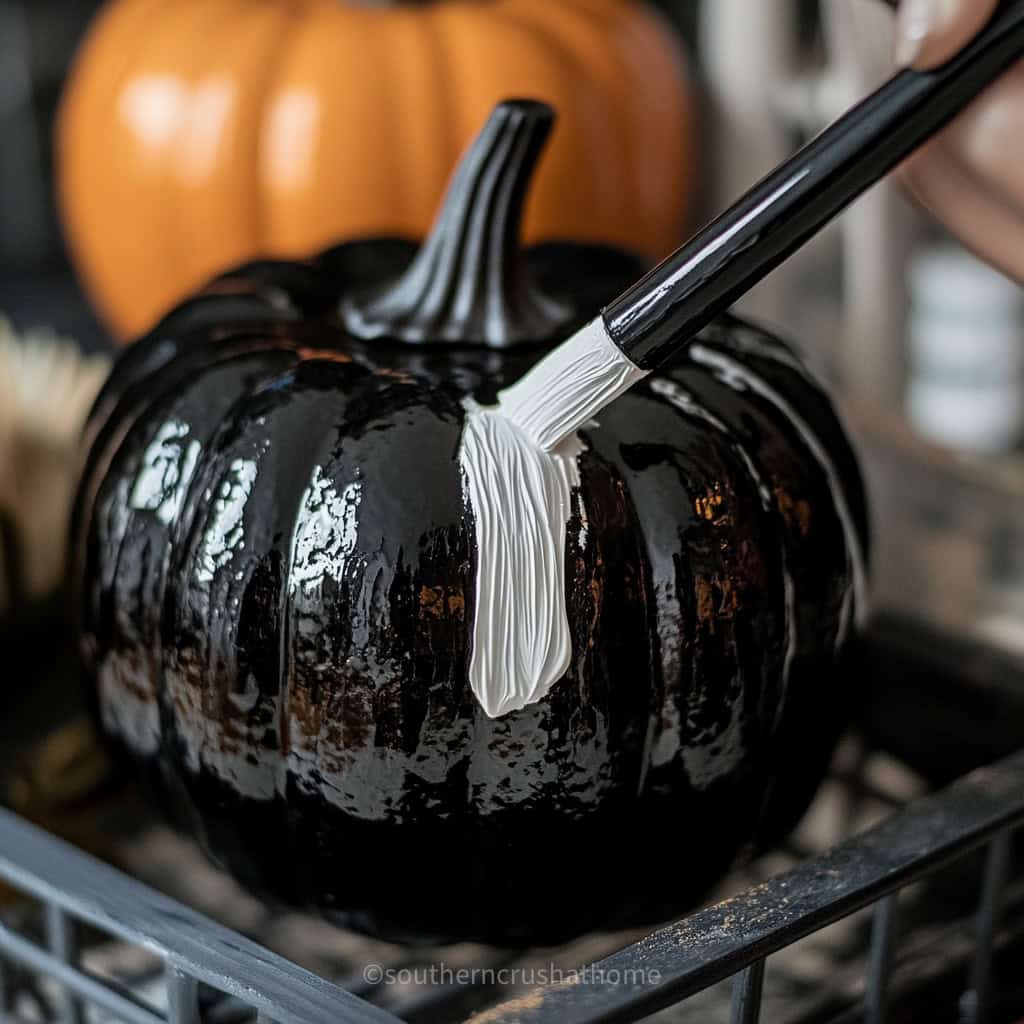
Step 1: Paint the Base Coat
First, you need to apply your base coat of paint. This will be the color that peeks through the cracks, so choose a color that contrasts with your topcoat. If you’re decorating for Halloween, keep your theme in mind when choosing a color!
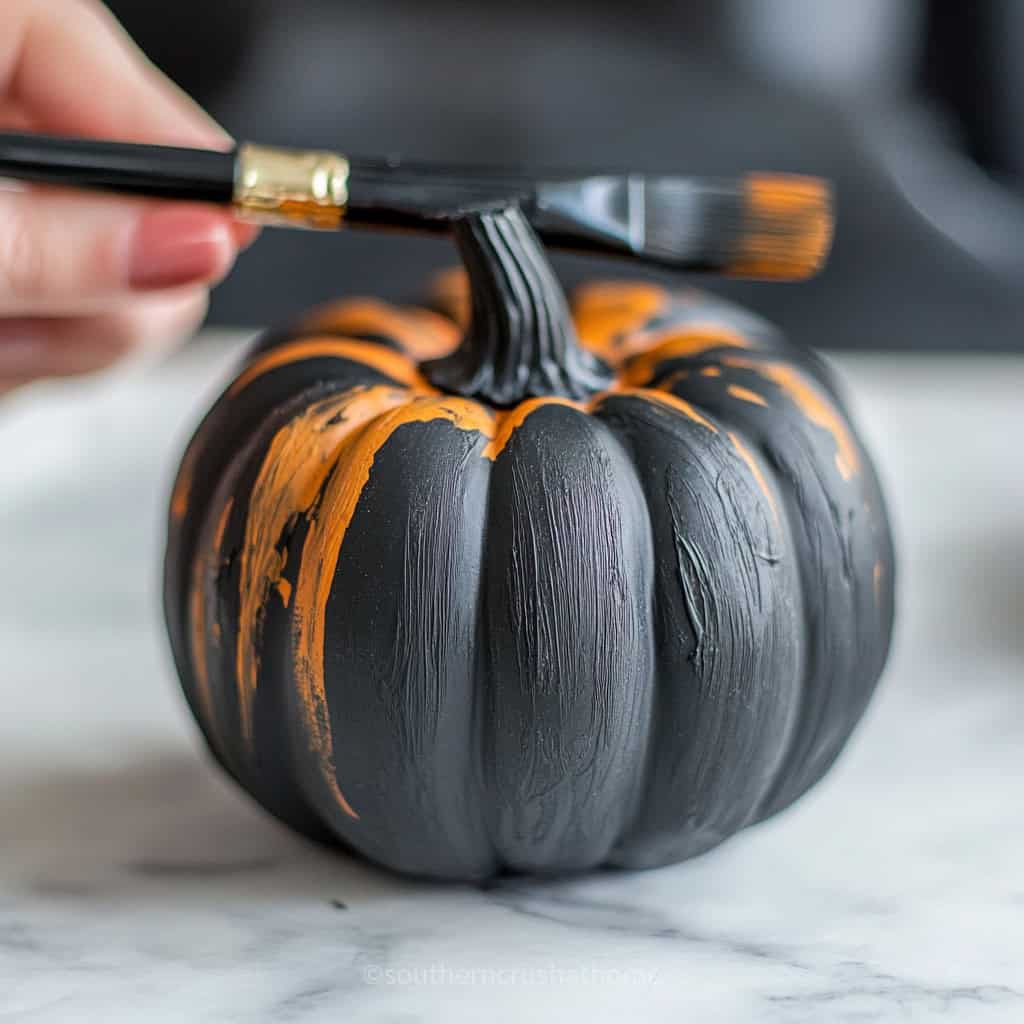
For a classic look, you can go with black or dark brown as your base coat if you want white cracks, or white for a lighter, distressed look.
Let the base coat dry completely—this is crucial to ensure the crackle effect works properly.
Step 2: Apply the Crackle Medium (or Glue)
Now for the magic! Instead of using an expensive crackle medium, you can easily use Elmer’s glue or Mod Podge. Here’s how:
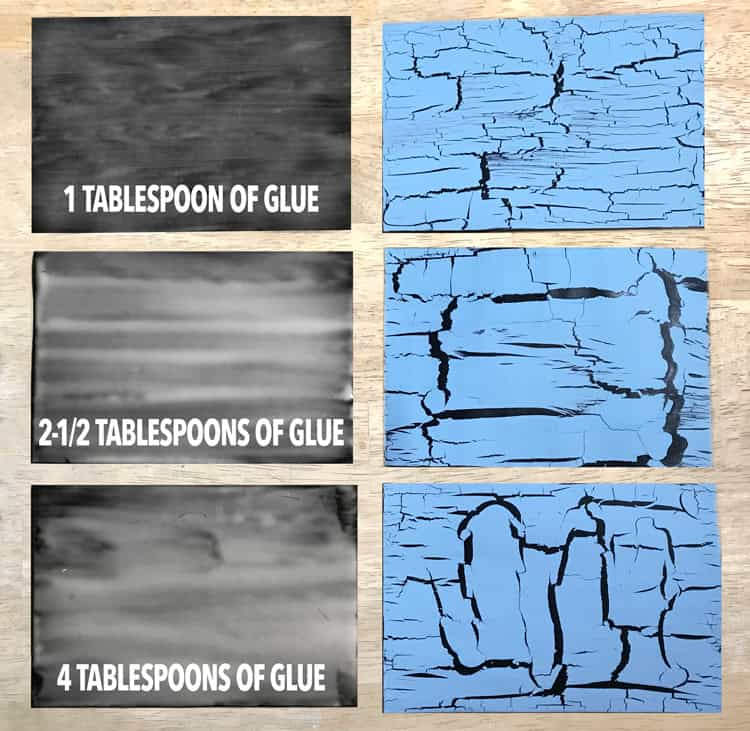
- Generously apply a coat of glue or Mod Podge over the pumpkin. For larger cracks, use a thicker layer of glue, and for finer cracks, use a thinner layer. The amount of glue directly affects the size of the cracks.
- Be sure to work quickly, as the glue will start to dry fast. Don’t let it dry completely before moving to the next step—it’s best to apply your topcoat while the glue is still tacky.
Pro Tip: Drying time for gesso or glue is around 30 minutes to an hour, depending on the thickness of your application and the temperature in your workspace.
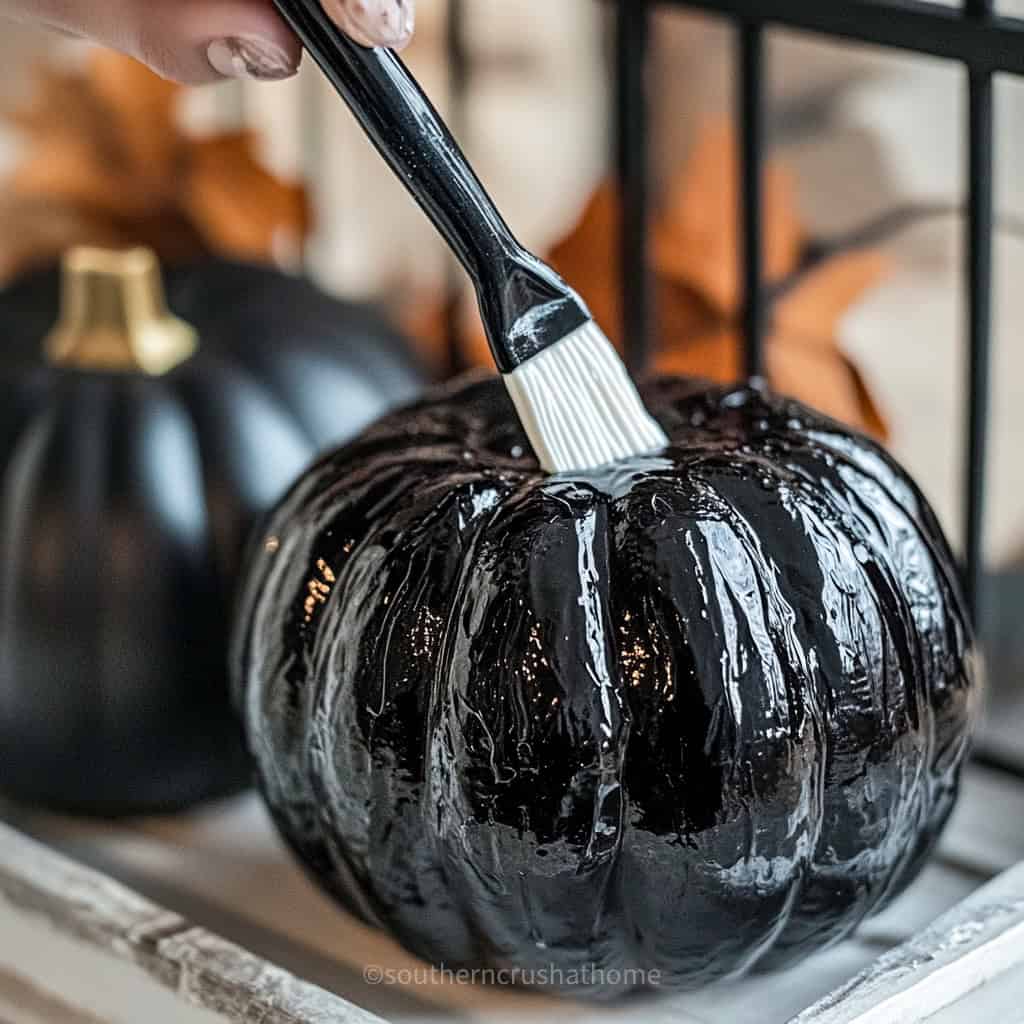
Step 3: Paint the Top Coat
Once your glue is applied and still tacky, immediately paint your topcoat color over the glue. Use a contrasting color from your base coat for the best crackle effect (for example, white on top of black or orange).
- Important: Avoid over-brushing when applying the topcoat. Too many strokes will disrupt the cracking process. Apply the topcoat in even, smooth strokes and leave it alone to dry.
Step 4: Watch the Crackle Paint Cracks Form
As the topcoat dries, you’ll start to see the crackle effect happen before your eyes! The cracks will appear where the glue shrinks and pulls the top layer of paint apart, revealing the base coat underneath.
- Patience is key here. Let the pumpkin dry naturally for the best effect. If you’re in a rush, you can speed things up by using a heat gun, but keep it on a low setting to avoid warping the pumpkin.
Step 5: Drying Time
Once your crackle paint is applied, it can take 2-4 hours for the pumpkin to fully dry, depending on the humidity and thickness of the paint layers.
The cracks will continue to form as the topcoat dries, so resist the urge to touch it while it’s drying.
Step 6: Optional Finishing Touches
If you want to protect your pumpkin and add a slight sheen, you can apply a clear varnish or sealant over the dried crackle paint.

This step is optional but can help preserve the look of your pumpkin if you plan to display it outdoors or reuse it in future seasons.
Tips for Perfect Crackle Paint:
- Size of Cracks: The thickness of the glue determines the size of the cracks. For large, dramatic cracks, use a thick layer of glue. For finer, hairline cracks, use a thin layer. (see graphic above)
- Patience Pays Off: Don’t rush the drying process. The best cracks form when the glue and paint dry naturally. If you’re in a hurry, use a low-heat gun, but keep it at a distance to avoid bubbling the paint or warping your pumpkin.
- Experiment with Colors: For a chic and modern twist, try using metallic paint for the base coat and a matte topcoat. Or go for classic fall colors like orange and brown for a rustic farmhouse look.
Creating a DIY Crackle Paint Pumpkin is an easy and fun way to give your pumpkins a unique, vintage look perfect for fall or Halloween. The crackle effect adds texture and charm to any pumpkin, whether you’re going for spooky, rustic, or chic.
Plus, with simple materials like Elmer’s glue or Mod Podge, you can achieve this artistic look without breaking the bank.
Remember, patience is key to letting the cracks form, and experimenting with different glue thicknesses will give you endless creative possibilities.
Happy crafting! 🎃