DIY Candles – How To Transfer Photos To Candles
These DIY candles make a fantastic gift at any time of year. Learn how to transfer photos to candles effortlessly with this tutorial!
I was shocked at how fun and easy it is to create such unique decor with such a simple candle transfer process. These DIY candles use the wax coating on the surface of either traditional wax candles or battery-operated candles to adhere images from napkins, tissues, and photos to your particular candle
See for yourself how addicting this DIY candle transfer process actually is.
Why I Love Decorating With Candles
I absolutely love candles. They are soothing to look at and they smell amazing too. Candles are a great reminder to me, personally, that no matter how difficult life gets, “He turns my darkness into light.” 2 Samuel 22:29.
Therefore, I like to light a candle anytime someone is nearby.
DIY Your Own Candles
Pure white pillar candles are so easy to find in the store, and you can find them for a really low price most anytime of the year.
Instead of hunting for the perfect seasonal candle, make your own this time! That’s the fun thing about DIY crafts. Once you learn how to make your own home decor, you won’t go back to just buying mass-produced things again.
There are lots of tutorials out there that teach you how to melt and pour your own candles, even your own scented candles. My tutorial will teach you how to transfer any image, napkin or decoration onto your current candles.
When you do this, you can make your own decoration right in your own home. It’s so simple, anyone can do it!
How To DIY Candles For Your Home
Here’s my quick tutorial, along with some step-by-step pictures too. If you are a visual learner and need to see the craft in action, keep reading. I even included a video of the craft so you can make it along with me.
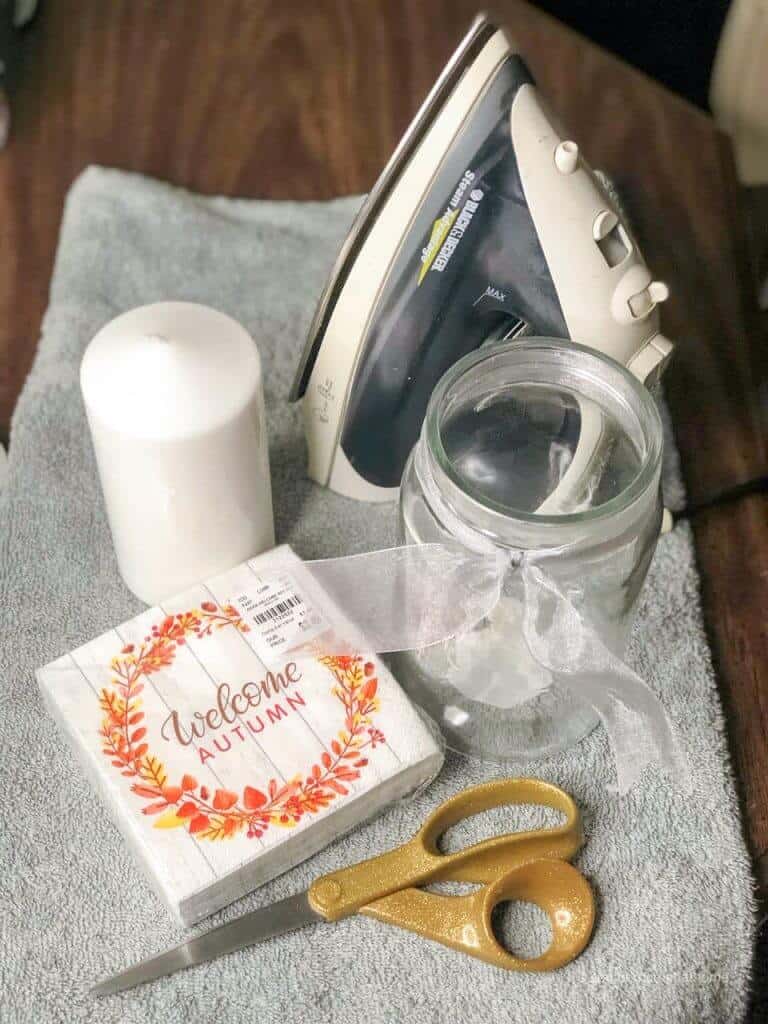
Supplies Needed
- Plain wax candle or battery-operated candle
- Fun paper napkins of your choice or photo-copied print
- Scissors
- Iron or curling iron or heat gun or blow dryer
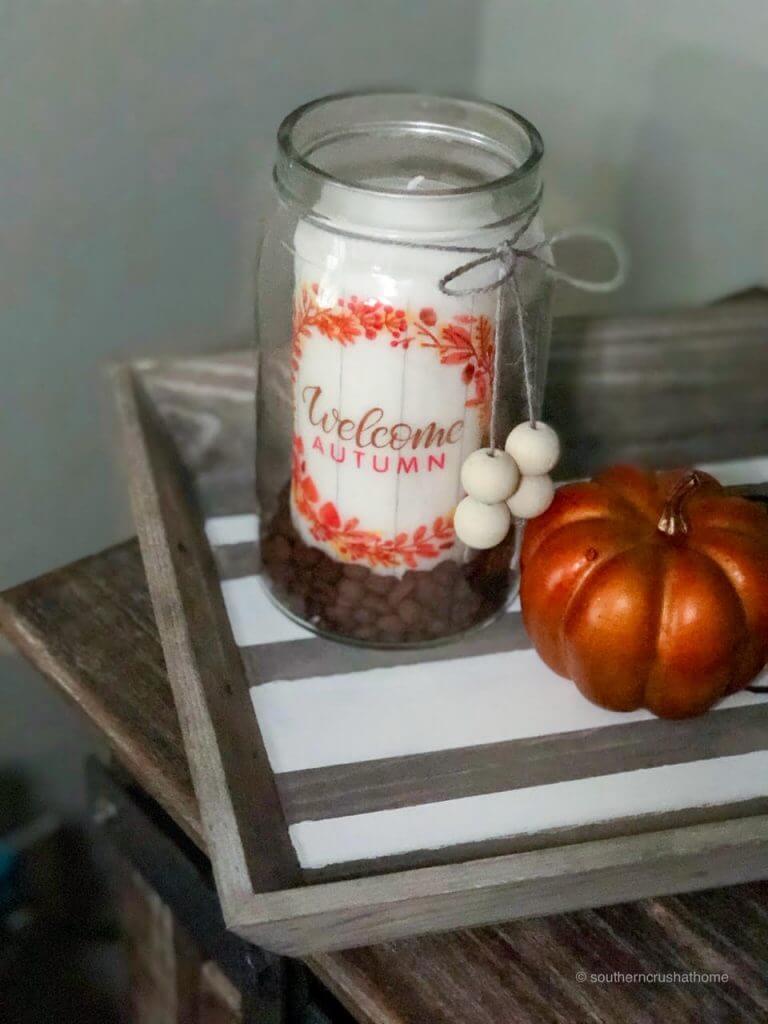
- Glass jar
- Ribbon, twine, coffee beans
Easy-To-Follow Instructions
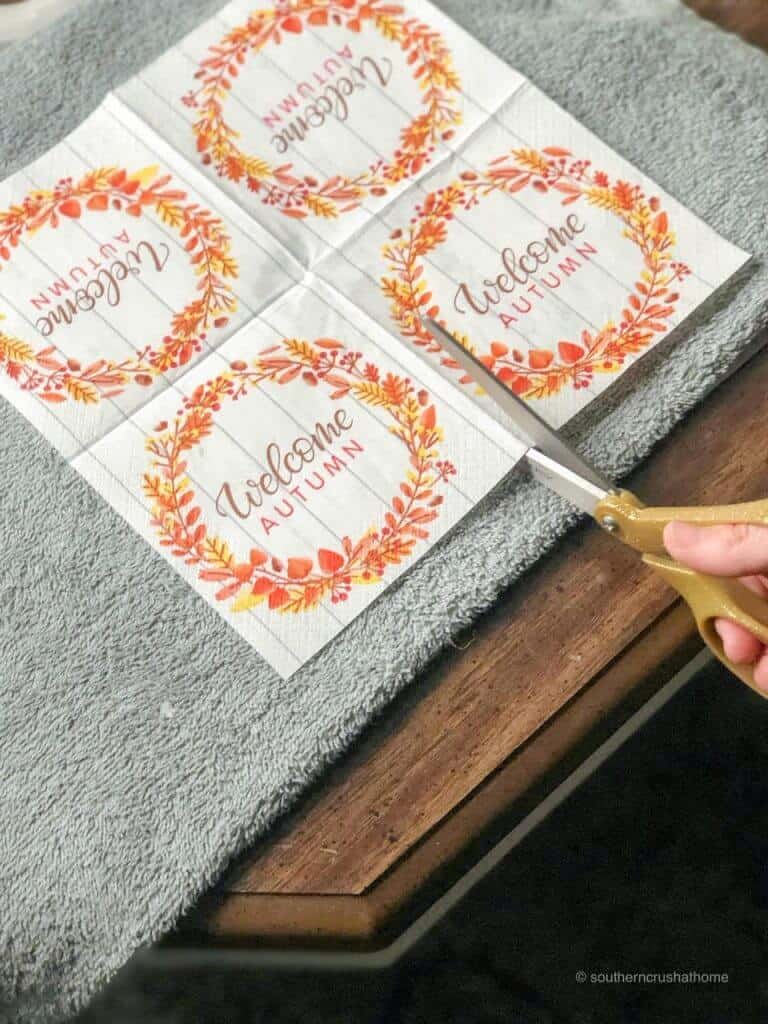
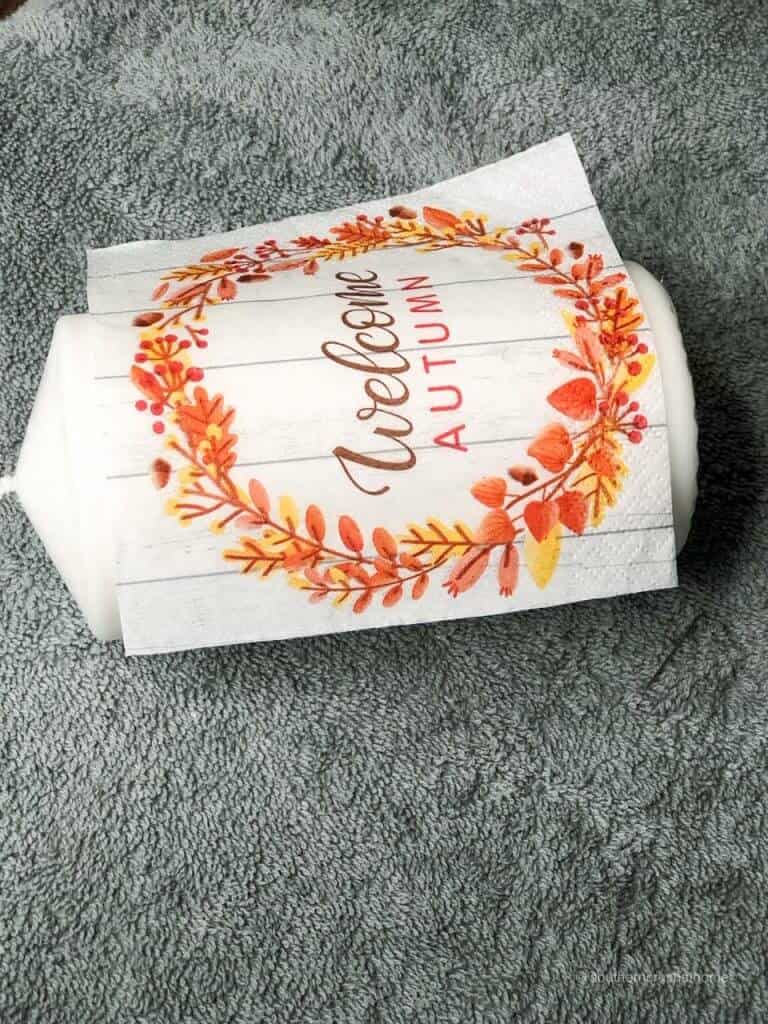
- Start by unfolding your cute napkin. Choose which area you’d like to use on your candle. If you choose a certain graphic on the napkin, be sure to cut as close to the edge of the design as possible. If you have a napkin like the one shown, choose one of the panels and cut it out, making sure that it fits across the width or circumference of your candle.

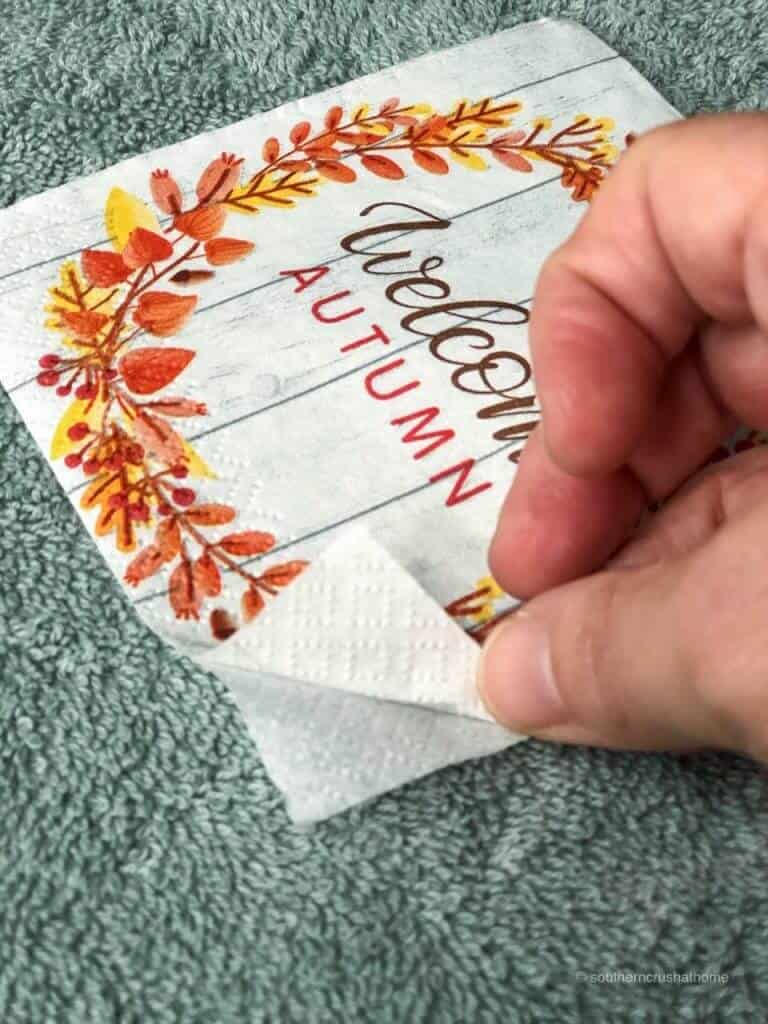
- Most napkins come as two-ply (or two layers.) Work the corners until you find one that easily starts to peel apart. Peel the backing off of your chosen napkin panel. (I’ve heard you can use a little water on the edges if necessary, but I haven’t tried that myself.)
- Lay your design across and around your candle to determine placement. Make sure it fits and is positioned so that it looks the most pleasing.
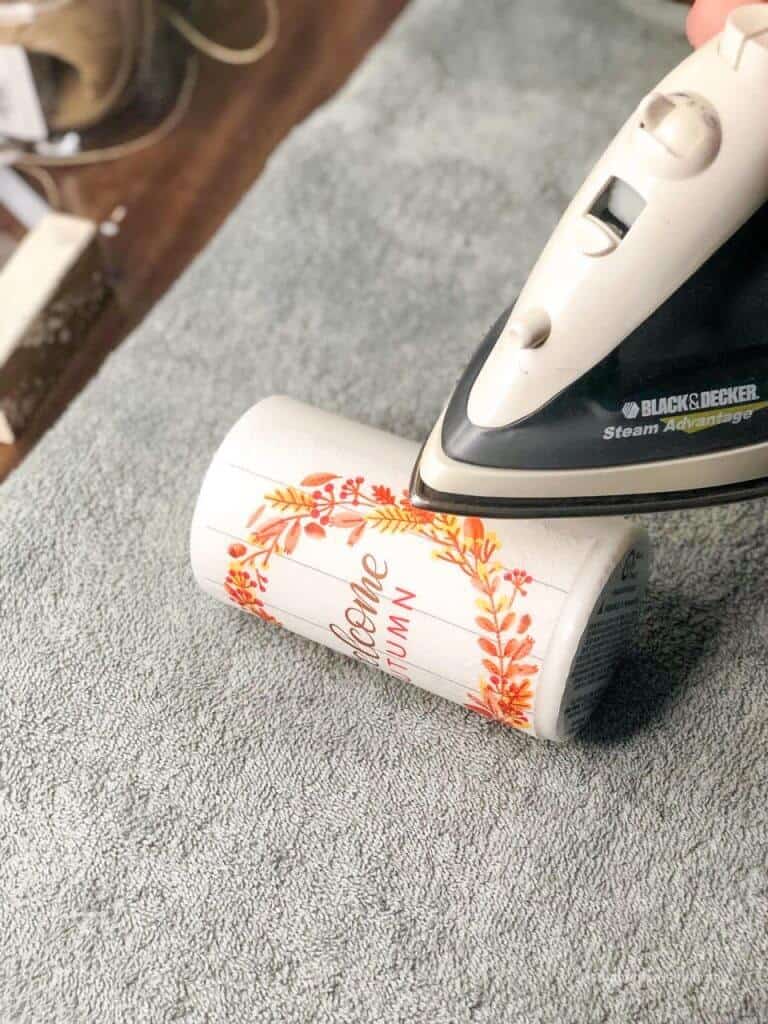
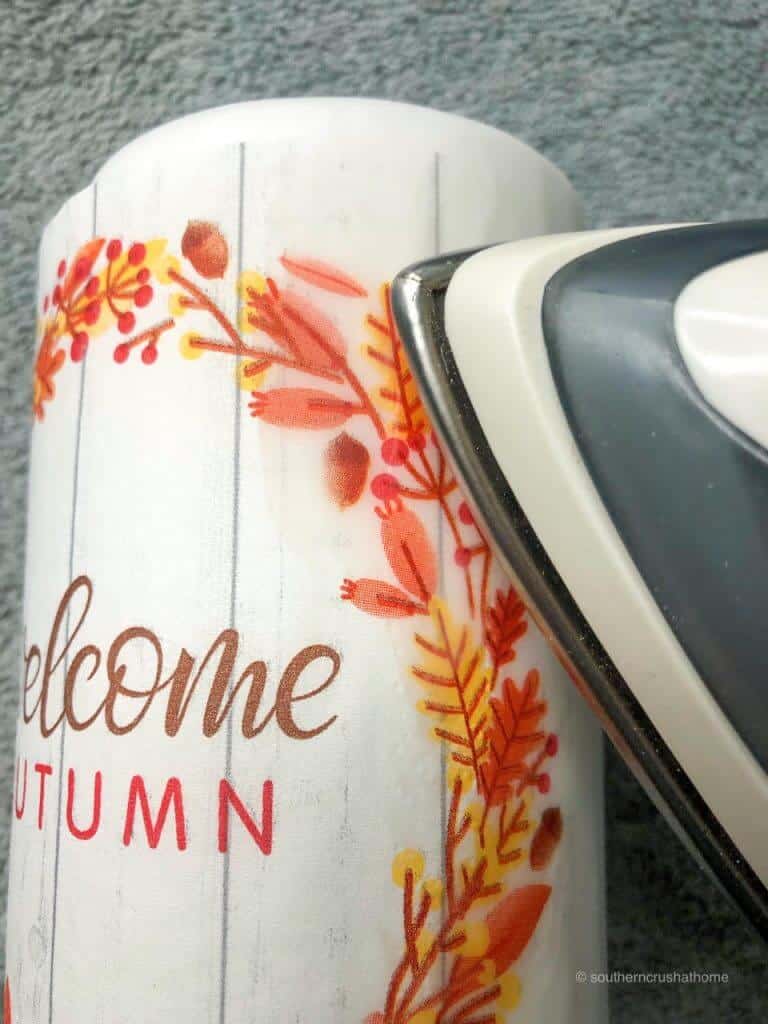
- Take your iron on it’s lowest setting and lightly go across the edges of the napkin, working your way around the candle. This works with a curling iron, hairdryer, or a heat gun as well.
- The iron method worked well for me! If you have special or memorable photos you’d like to transfer, you can print them on regular printer paper and place a piece of wax paper between your photo and the iron and get the same result as you do with the napkin transfer. The heat makes the napkin design literally melt into the candle so that it appears to be part of the candle.
- Don’t leave your iron on any one spot for too long or melting will begin. Iron should be on the lowest setting; however, you can adjust your iron’s heat settings as needed. This exact same process is applicable if you’re using a battery-operated candle and may actually be better.
WATCH DIY Candle Video Tutorial HERE
If you missed the live tutorial, you’ll definitely want to watch it. I take you step-by-step through this tutorial and exactly how to do it.
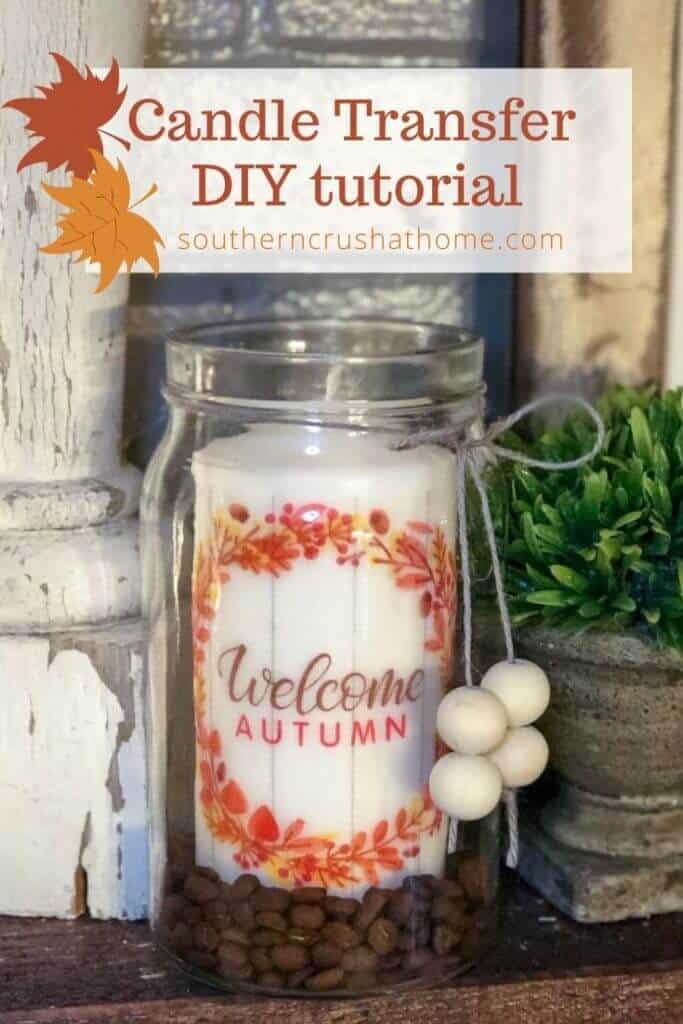
DIY Candles With Photo Transfers
What do you do with your candles after you decorate them with photos? I’ll share what I did and then give you some more ideas that you can try as well.
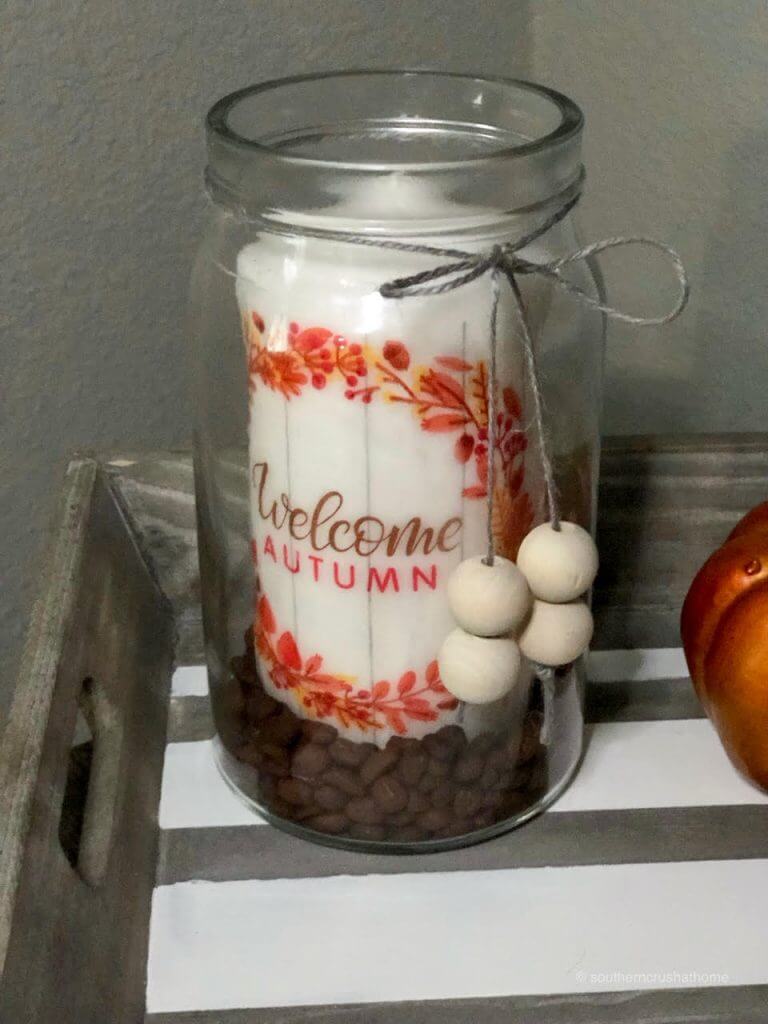
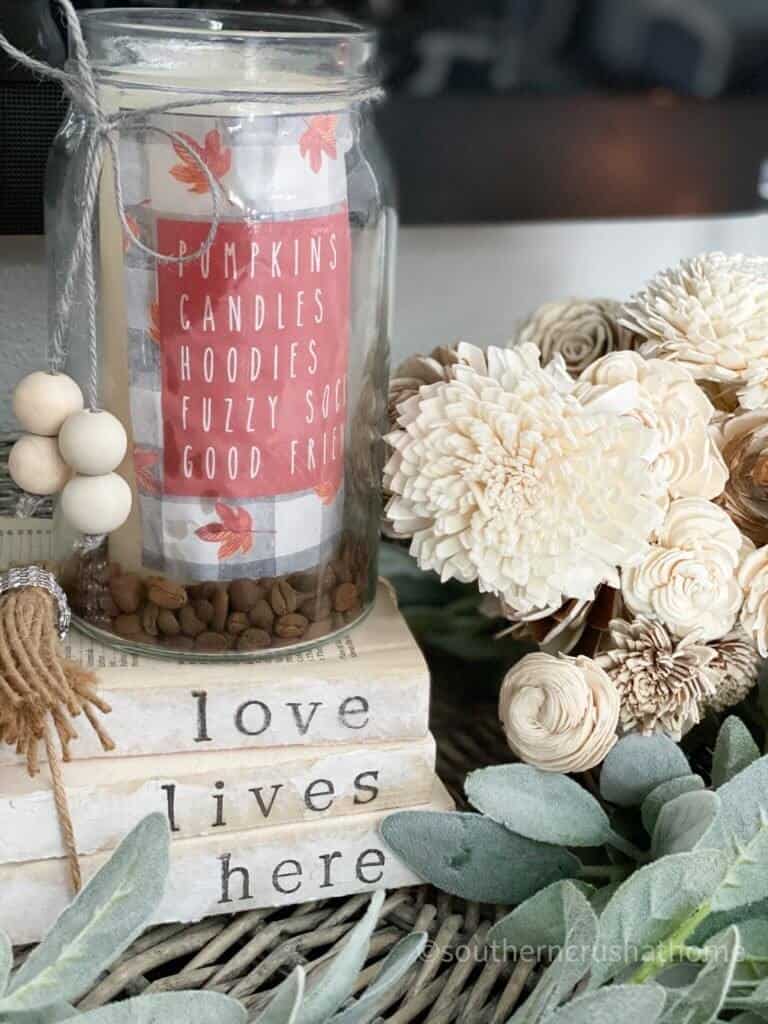
I decided to place my candle in a clear glass jar, added a little twine with beads, then lined the bottom with some strong-smelling Texas Pecan coffee beans to finish off the look of this super easy DIY!
Think of all the different versions you can create using this one idea! The ideas are limitless.
Some examples I’ve seen are seasonal candles for your tablescape, gifts for a wedding couple with the engagement photo, an anniversary gift with a wedding photo, a senior graduation gift, or anything with Rae Dunn lettering!
Here are a few more ideas you can try.
- Place the candles in a glass vase on top of colored stones
- Set the candle on top of candle holders
- Display the candles on your bookcase
- Place the candles on a serving tray around other book decorations
These are truly so easy to make and I hope you’ll try this one yourself.
transfer a printable to candles
This is another technique that you can try out using a FREE Printable and a heat gun. For this DIY candle transfer I used a faux battery operated candle instead of a traditional candle. It worked great and I love the results. This candle was part of my Friendsgiving celebration. You can read all about it HERE.
Sign Up For E-Mails
If you love this kind of DIY project, you need to be getting my emails, friends! Each week I send out a couple of emails that include updates, crafts, shopping experiences, and decor inspiration. Be sure to get yourself signed up below. I can’t wait to meet you!
Leave your thoughts below in the comments, please… BTW— Life is short—Enjoy the mess!
Join The Facebook Page
Easy DIY Candle Transfer
Equipment
- scissors
- heating element such as iron, curling iron, heat gun, or blow dryer
Materials
- 1 plain wax candle or battery-operated candle
- paper napkins of your choice
- 1 glass jar
- accessories ribbon, twine, coffee beans, etc.
Instructions
- Unfold the napkin fully, and decide which part of the design you would like to transfer to your candle. Double check that if fits around your candle properly, then cut it out as close to the design edges as possible.
- Peel apart the layers of the napkin - most are 2 ply.
- Place the napkin cutting on your candle, right side up. Make sure the placement is correct.
- Turn your heating element to the lowest setting possible and go across the edges of the napkin very lightly. Work your way towards the center.
- Light and enjoy!
I have done this with a blow-dryer and it worked out great. The only thing was I had to wear an oven mitt to keep the heat from burning my hand. Using an iron looks easier but does it burn your hand from the heat of the iron?
No burns whatsoever–I hope you’ll try it!
Oh my goodness, love those idea’s! Heading to find and round up my candles and start creating! Thanks so much!!
Can I lite the candle ?
I did…
What size candles do you recommend?
any size that will accommodate your napkin of choice…
You don’t have to mod pod get these candles before or after?
not at all
I have made one using napkins and hair dryer. Takes a little while to get the creases out. May try the iron next time.
I would love to hear about your photo ona candle using clear packing tape.
Using a narrower width to cover a tall photo, will the line be shown on the printed photo?
Thank you
Patricia