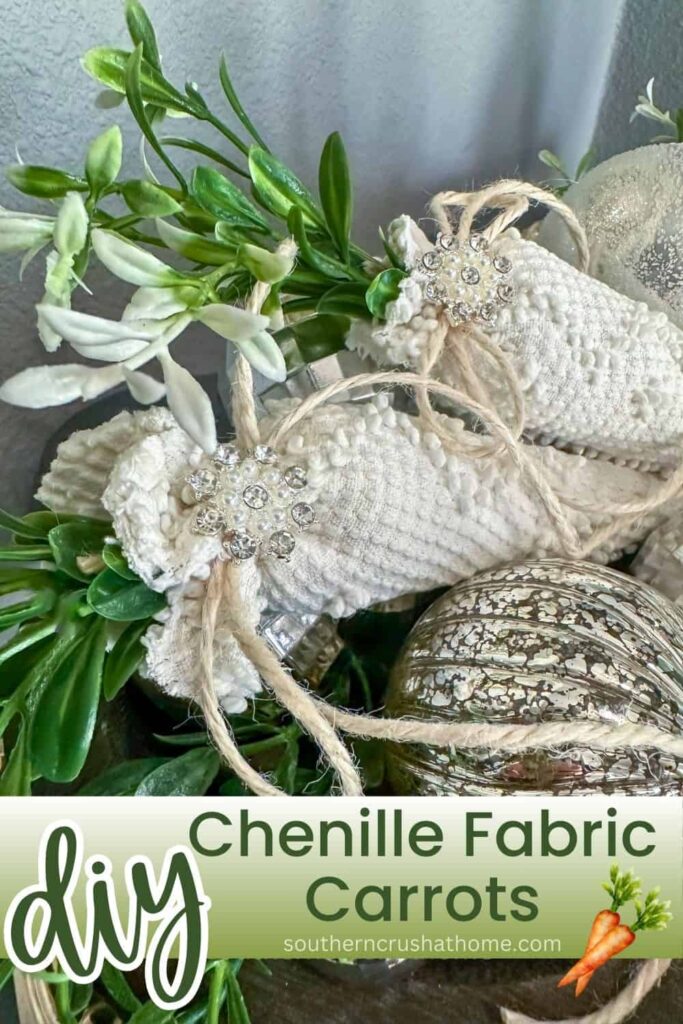
How to Make Chenille Fabric Carrots
If you’re looking for a simple, neutral Easter craft that adds just the right touch of nostalgic charm, these chenille fabric carrots are going to be your new favorite spring DIY! They’re soft, sweet, and super affordable—perfect for filling dough bowls, decorating wreaths, or adding a handmade element to your table decor.
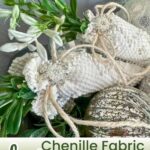
PIN this for later!
This is a great project for using up scrap chenille fabric (or really any fabric with a little texture), and you can customize them in different sizes to create a whole bunch of faux fabric carrots that look adorable grouped together or styled individually.
This blog post contains affiliate links. The opinions are wholly my own from my own experience. I may earn a small commission from clicks through to the websites that end in a purchase.
How to Make Chenille Fabric Carrots (Easy + Affordable DIY for Spring)
Let’s make some DIY chenille carrots!
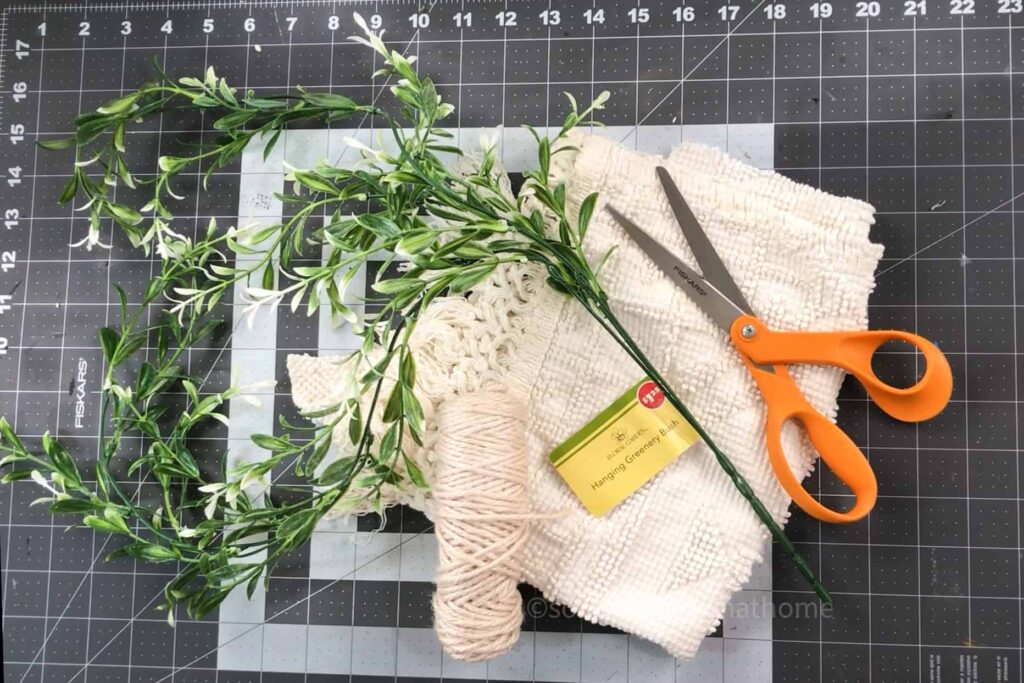
Supplies You’ll Need
- Scrap chenille fabric (or any soft, textured fabric)
- Fabric scissors
- Hot glue gun and fabric glue sticks
- Poly fill (or cotton stuffing)
- Twine or baker’s twine
- Faux greenery (I used Dollar Tree sprigs)
- Optional rhinestone bling (for a little sparkle)
Step-by-Step Instructions to Make Fabric Carrots
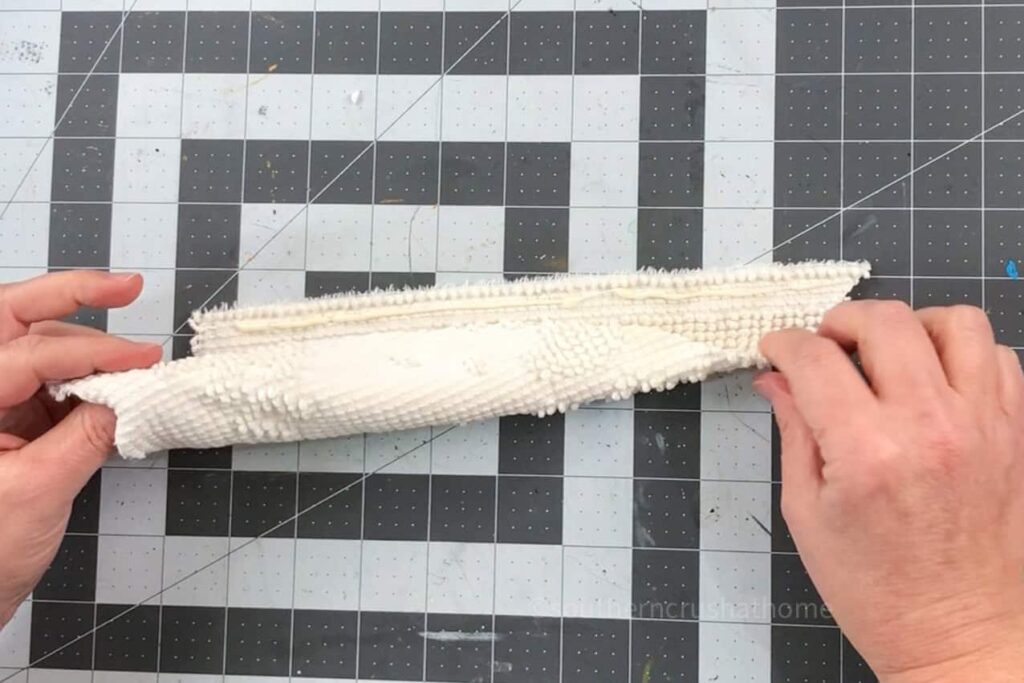
Step 1: Cut Your Fabric
Cut your chenille fabric into a triangular shape—this will be the body of your carrot. The size is totally up to you depending on how big or small you want your fabric carrots to be.
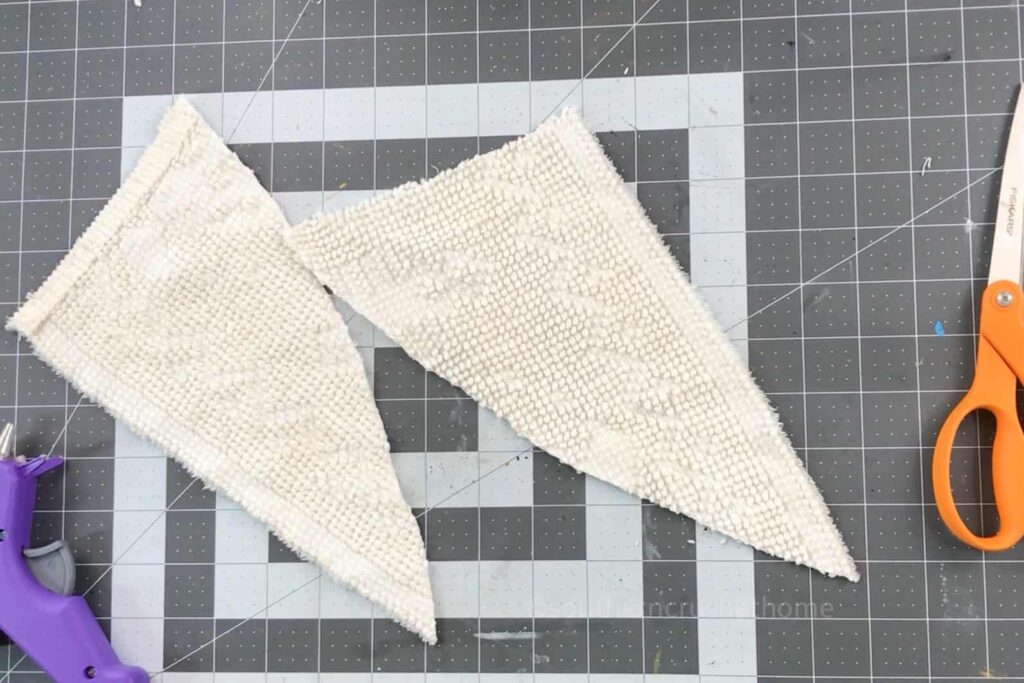
Taller triangles will make longer carrots; wider ones will make shorter, chubbier ones.
Step 2: Create the Cone Shape
Line one edge of the triangle with a thin bead of hot glue, then carefully fold the fabric over and press the opposite edge into the glue to form a cone or carrot shape.
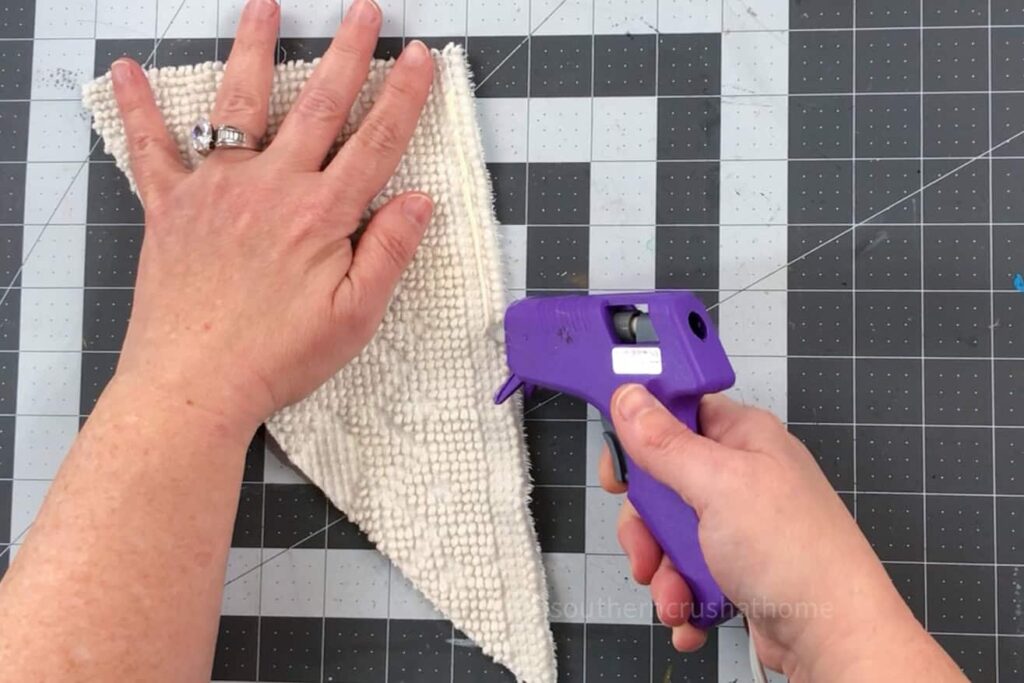
Hold it in place until the glue sets.
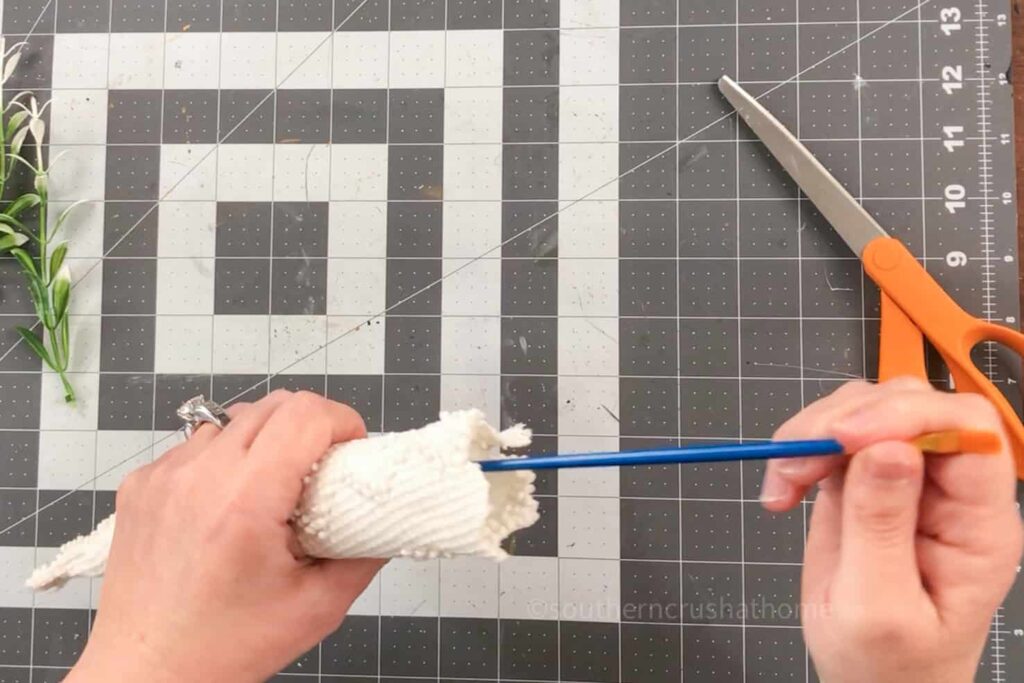
Step 3: Fill the Carrot
Stuff your fabric carrot with poly fill to give it some shape and fullness. You can use as much or as little as you’d like depending on how plump you want the carrot to be.
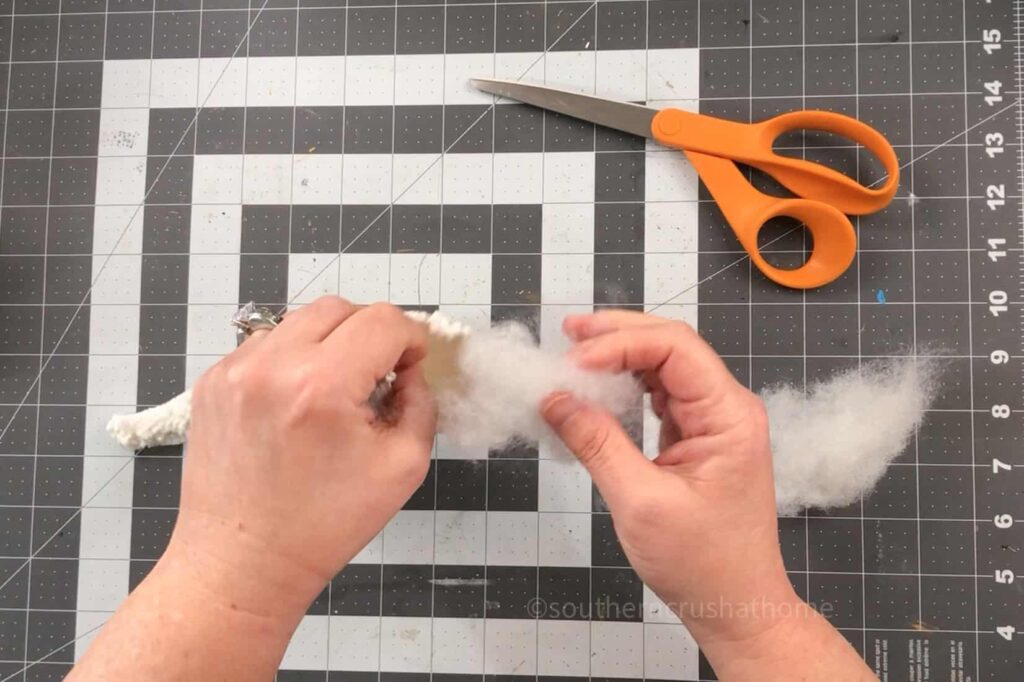
Use something like this paintbrush to get the polyfill to the bottom tip of the carrot.
Step 4: Add Greenery and Twine
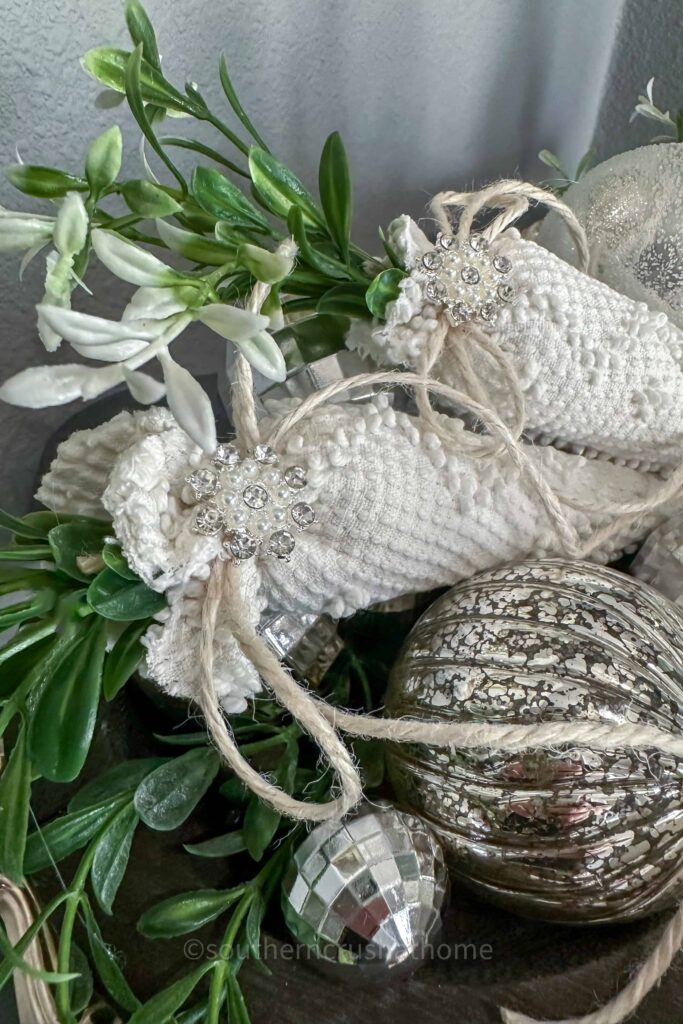
Take a few sprigs of faux greenery (I snipped mine from a Dollar Tree bunch) and bunch them together. Use baker’s twine or regular twine to tie them off at the bottom with a little knot. This will act as the carrot “top.”
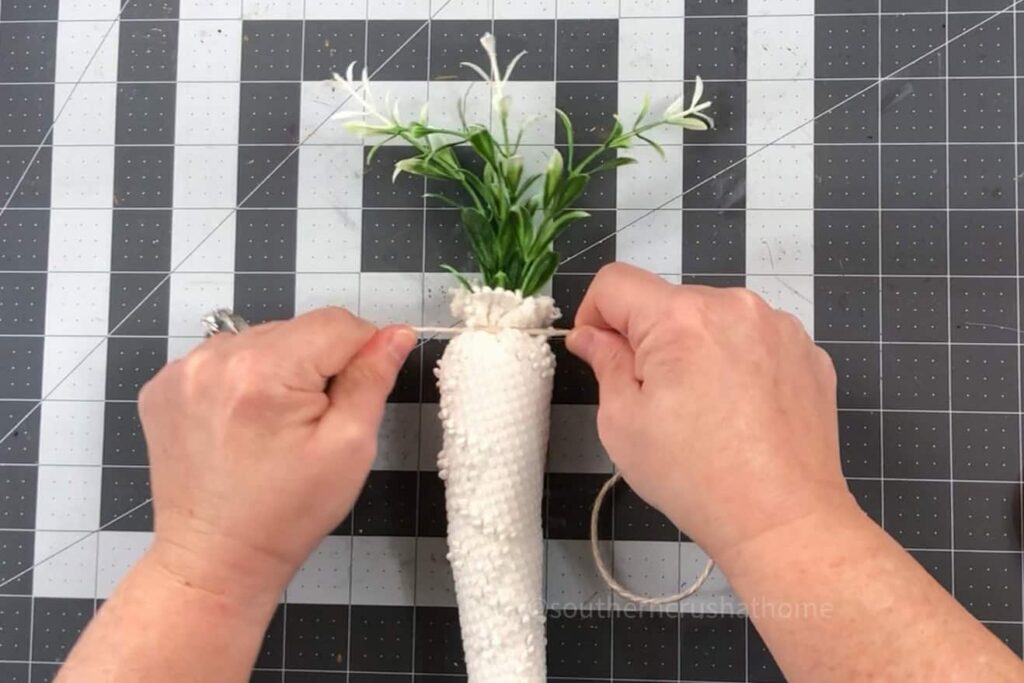
Tuck it into the top opening of your carrot and secure it in place with twine.
Step 5: Add a Bit of Sparkle (Optional)
If you want to give your chenille carrots a little extra personality, glue a small rhinestone or embellishment to the top where the greenery meets the fabric. It adds just the right amount of shimmer without taking away from the cozy, neutral vibe.
How to Style Your DIY Fabric Carrots
Once you’ve made a few faux chenille carrots, the fun part is figuring out where and how to use them. Here are some of my favorite ways to decorate with them:
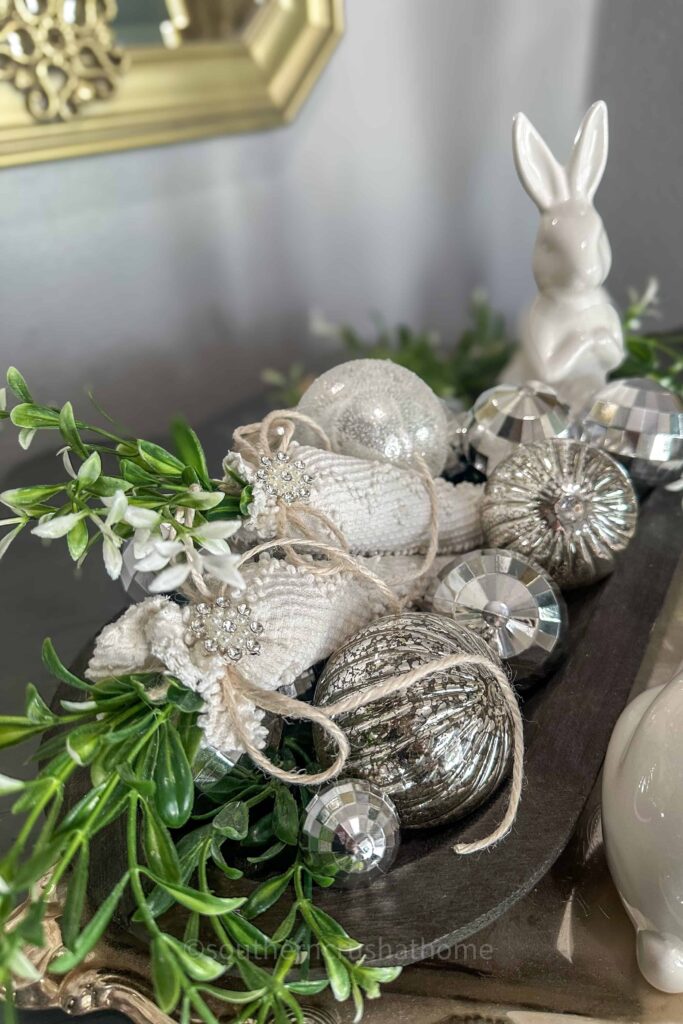
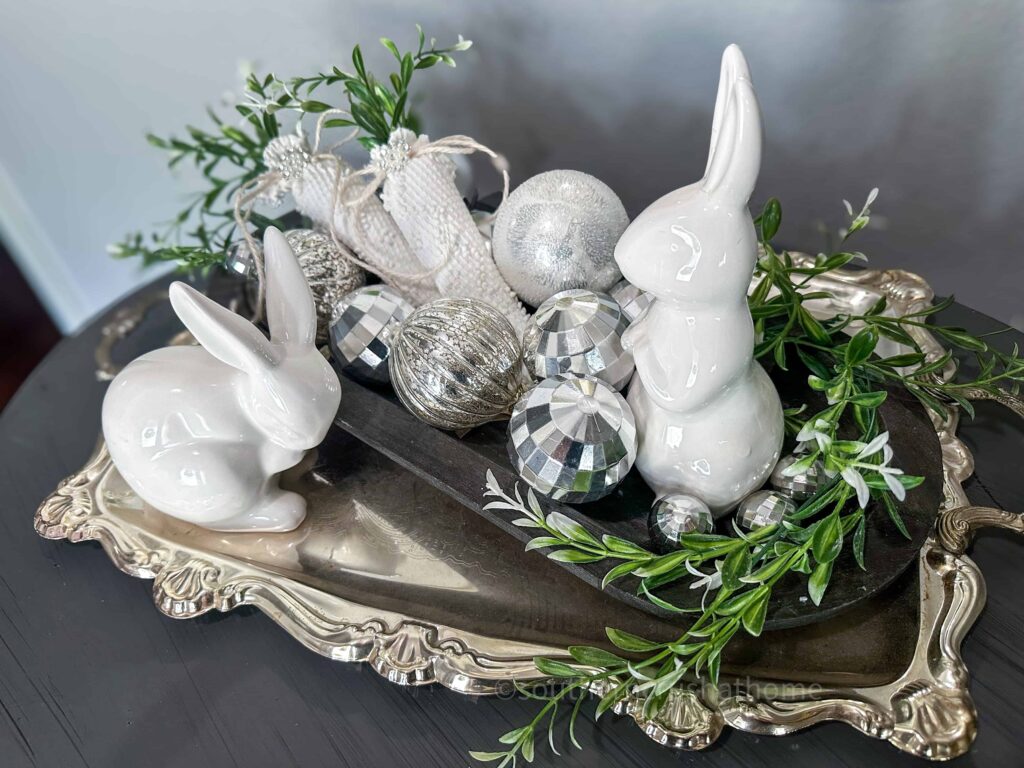
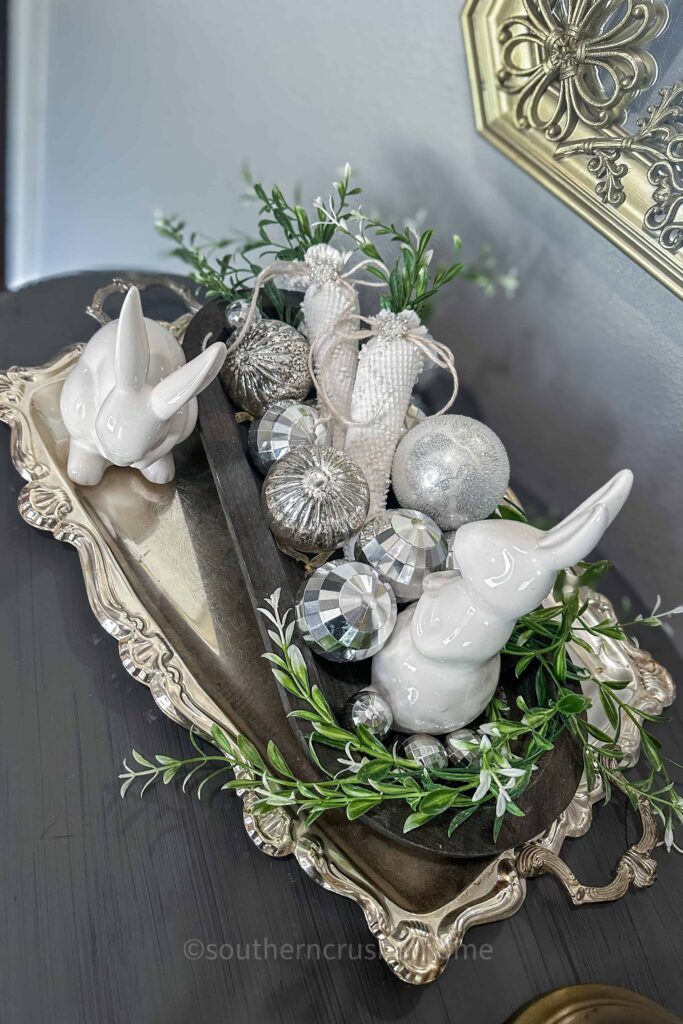
- Arrange them in a dough bowl with moss, florals, or other spring accents for an easy centerpiece.
- Tuck them into an Easter or spring wreath for a handmade farmhouse touch.
- Use them in your table settings—tie one to a napkin ring for an adorable place setting accent.
- Cluster them in a small basket with faux grass or moss for a sweet shelf sitter.
- Incorporate them into tiered tray displays for some soft texture and color.
- Attach one to a gift or Easter basket for a fun little extra.
- Use larger carrots as centerpieces for your spring table—grouped with candlesticks, greenery, or bunnies.
These chenille fabric carrots are the perfect touch to neutral Easter decor—simple, soft, and so charming. They take just minutes to make and are easy to personalize with your own fabric scraps, trims, or embellishments.
Whether you’re going full farmhouse or mixing in a little glam, these DIY fabric carrots are a fun and festive way to celebrate the season.
So grab your glue gun and let’s get crafting—your carrot-loving, spring-decor heart will thank you! Don’t forget to pin or save this idea, and follow along for more easy and affordable DIYs to brighten up your home this Easter!

How to Make Chenille Fabric Carrots
Materials
- Scrap chenille fabric or any soft, textured fabric
- Fabric scissors
- Hot glue gun and fabric glue sticks
- Poly fill or cotton stuffing
- Twine
- Faux greenery I used Dollar Tree sprigs
- Optional rhinestone bling for a little sparkle
Instructions
Step 1: Cut Your Fabric
- Cut your chenille fabric into a triangular shape—this will be the body of your carrot. The size is totally up to you depending on how big or small you want your fabric carrots to be. Taller triangles will make longer carrots; wider ones will make shorter, chubbier ones.
Step 2: Create the Cone Shape
- Line one edge of the triangle with a thin bead of hot glue, then carefully fold the fabric over and press the opposite edge into the glue to form a cone or carrot shape. Hold it in place until the glue sets.
Step 3: Fill the Carrot
- Stuff your fabric carrot with poly fill to give it some shape and fullness. You can use as much or as little as you'd like depending on how plump you want the carrot to be.
Step 4: Add Greenery and Twine
- Take a few sprigs of faux greenery (I snipped mine from a Dollar Tree bunch) and bunch them together. Use baker’s twine or regular twine to tie them off at the bottom with a little knot. This will act as the carrot “top.” Tuck it into the top opening of your carrot and secure it in place with hot glue.
Step 5: Add a Bit of Sparkle (Optional)
- If you want to give your chenille carrots a little extra personality, glue a small rhinestone or embellishment to the top where the greenery meets the fabric. It adds just the right amount of shimmer without taking away from the cozy, neutral vibe.