How to Make a Rag Wreath using Fabric Scraps
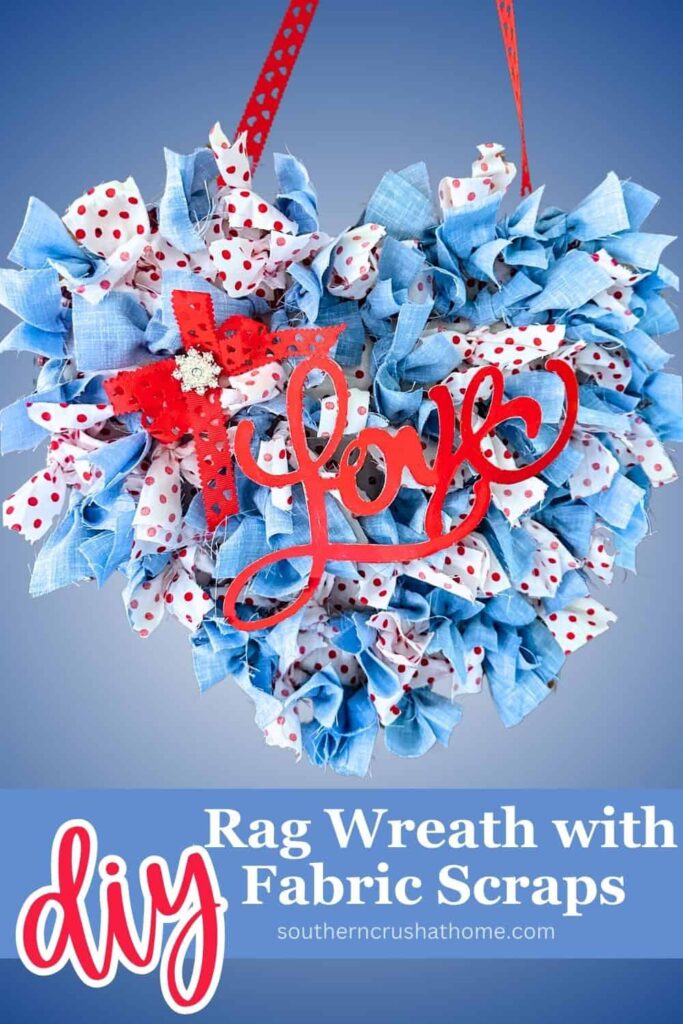
Valentine’s Day is the perfect excuse to get crafty, and this heart rag wreath is an easy, budget-friendly project that can help you use up some of those fabric scraps you have laying around.
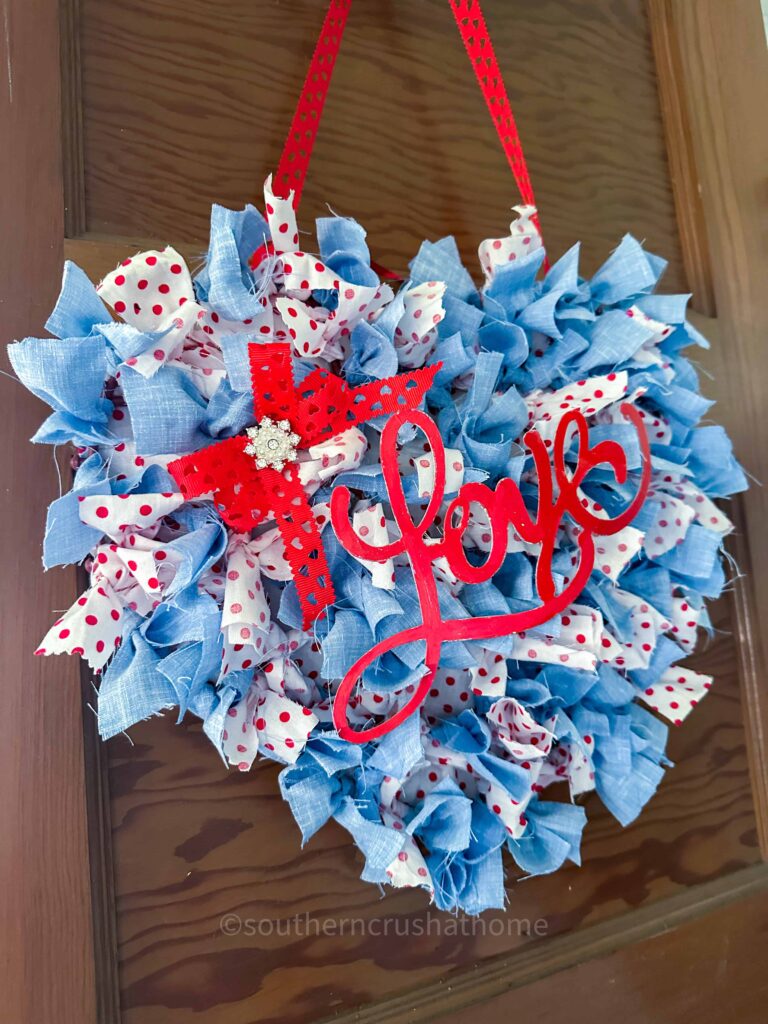
Using Dollar Tree supplies and fabric scraps you already have, you can create a beautiful rag wreath that’s full of texture, color, and personality.
PIN this for later!
This DIY is a great way to upcycle fabric remnants and customize your wreath with colors and patterns that match your style.
Whether you prefer soft pastels, bold reds and pinks, or farmhouse neutrals, this wreath can be tailored to fit your space.
Best of all, it’s no-sew, making it the perfect craft for beginners or seasoned DIYers who want a quick and fun project.
This blog post contains affiliate links. The opinions are wholly my own from my own experience. I may earn a small commission from clicks through to the websites that end in a purchase.
Supplies You’ll Need
- Dollar Tree heart-shaped decor (with cardboard lettering and tinsel)
- Fabric scraps (cut into strips, 1.5″ x 6″)
- Ribbon for bow (optional)
- Paint pens
- Scissors
- Hot glue gun and glue sticks

Step-by-Step Instructions for a Fabric Scraps Wreath
In this step-by-step guide, I’ll show you how to transform Dollar Tree heart-shaped decor into a gorgeous Valentine’s rag wreath. Plus, don’t forget to check out my YouTube video tutorial, where I walk you through the process and share extra tips!
Step 1: Prepare the Wreath Base
Start by removing the cardboard lettering and tinsel from the Dollar Tree heart-shaped decor.
Dollar Tree often carries tinsel-covered decorations for every season, and while they may not look fancy at first, the plastic frames underneath are great for wreath-making!
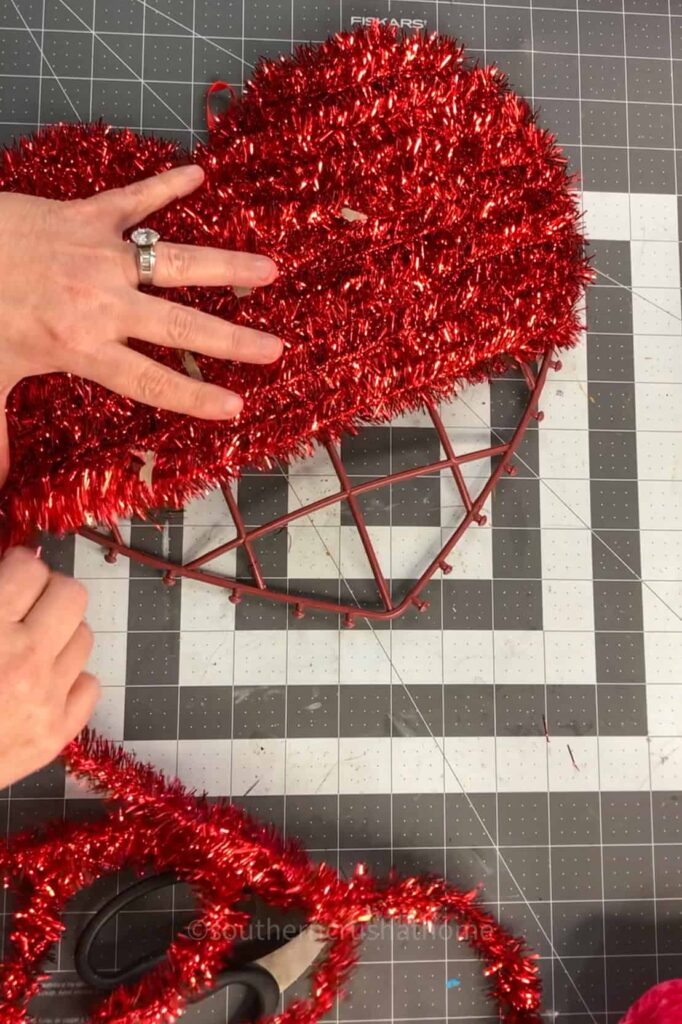
Once you’ve stripped the frame down to its basic structure, check for any rough edges. If needed, trim or smooth out any remaining bits of tinsel or glue.
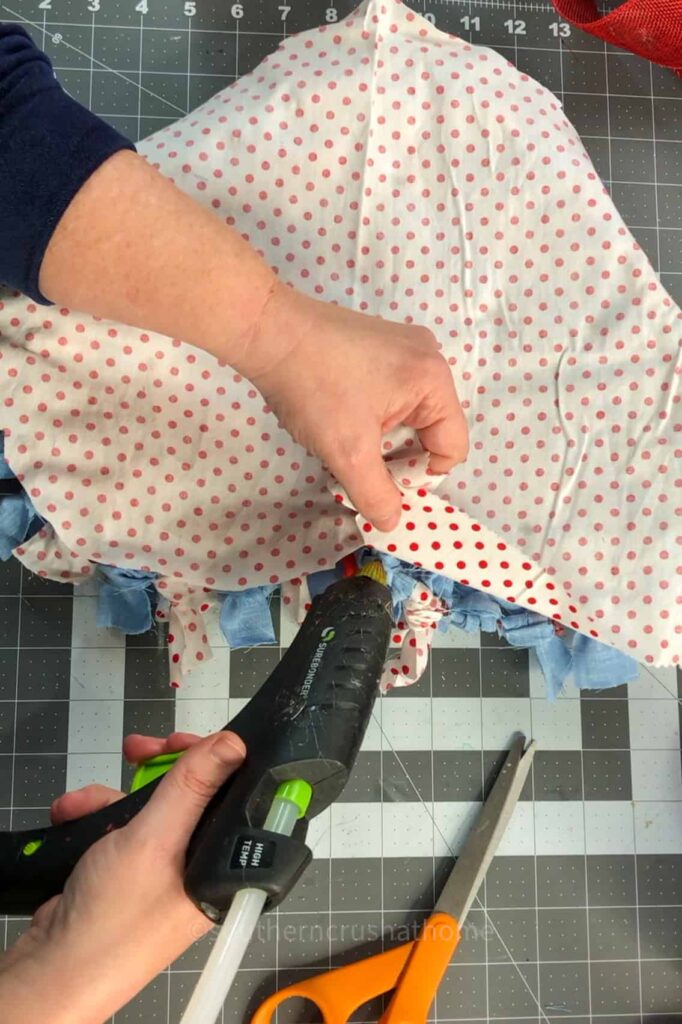
Step 2: Cut the Fabric Strips
Using scissors, cut your fabric scraps into strips measuring 1.5 inches wide by 6 inches long. You can use a mix of patterns, colors, and textures for a fun and unique look.
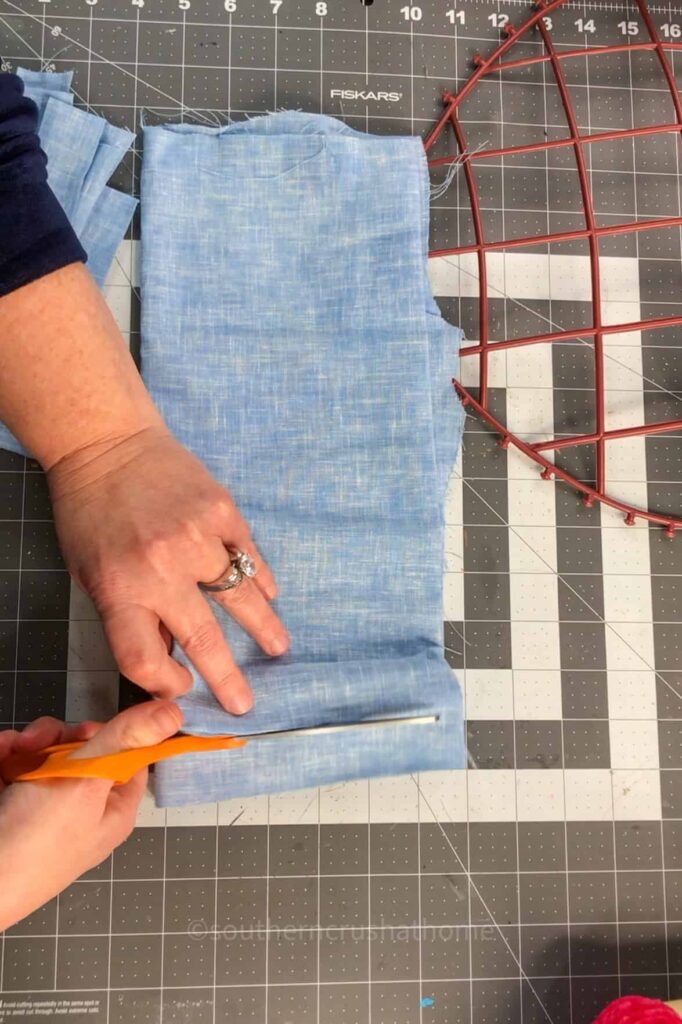
If you want a more cohesive design, stick to a specific color palette, such as:
- Traditional Valentine’s colors: red, pink, white
- Rustic farmhouse: neutral tones, soft florals, buffalo check
- Modern boho: pastels, mustard yellow, dusty rose
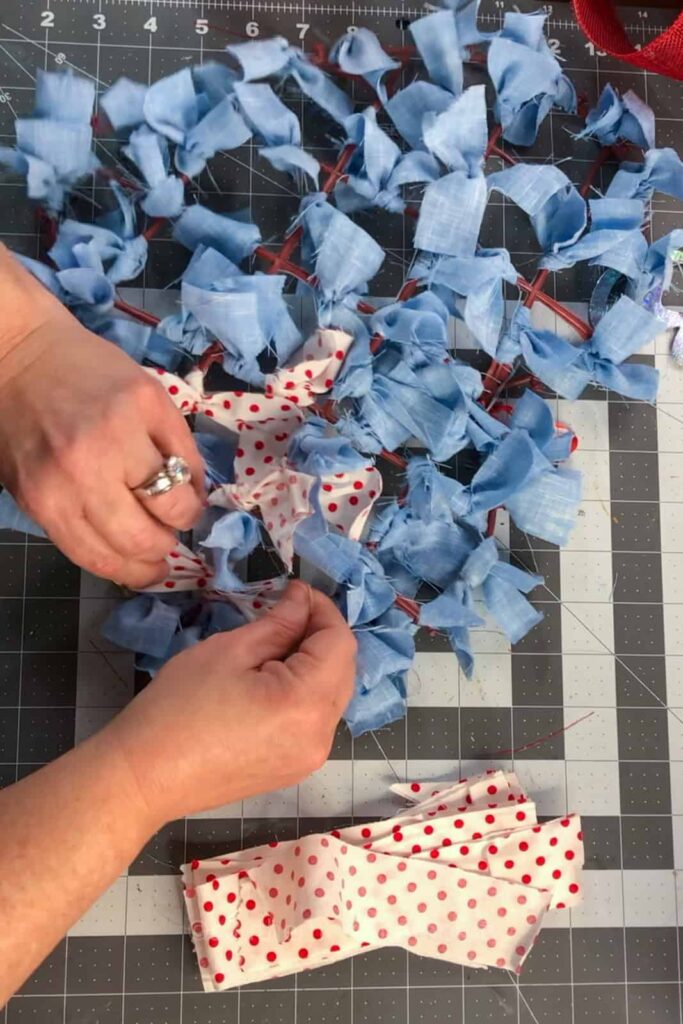
Step 3: Tie the Fabric Scraps to the Frame
Now for the fun part—adding the fabric strips!
- Take each fabric strip and tie it in a simple knot around the plastic frame.
- Continue this process, pushing the strips close together to create a full, fluffy wreath.
- If using multiple colors, alternate them as you go to create a balanced, visually appealing pattern.
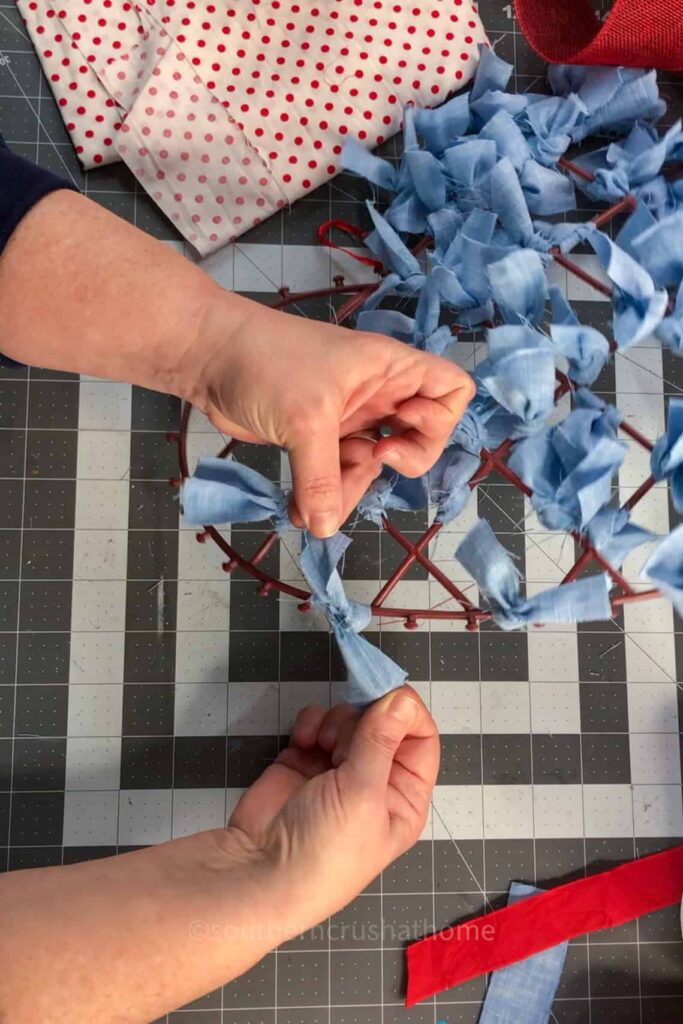
This step may take some time, but the result is worth it! Keep going until your wreath is full and fluffy.
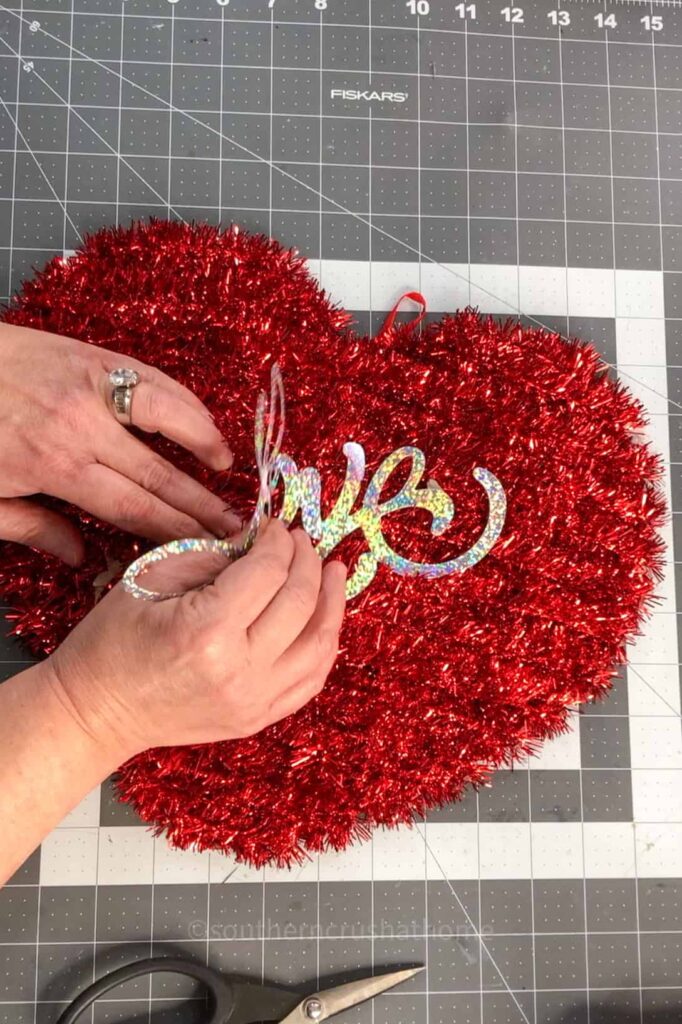
Step 4: Paint the Lettering
Set your wreath aside and grab the cardboard lettering you removed earlier. Using paint pens, give it a fresh new look!

Some fun ways to customize the letters:
- Classic & Simple: White or gold lettering for an elegant touch.
- Bold & Fun: Red or pink with glitter accents.
- Rustic & Farmhouse: Distressed paint with a vintage vibe.
Let the paint dry completely before moving on to the next step.
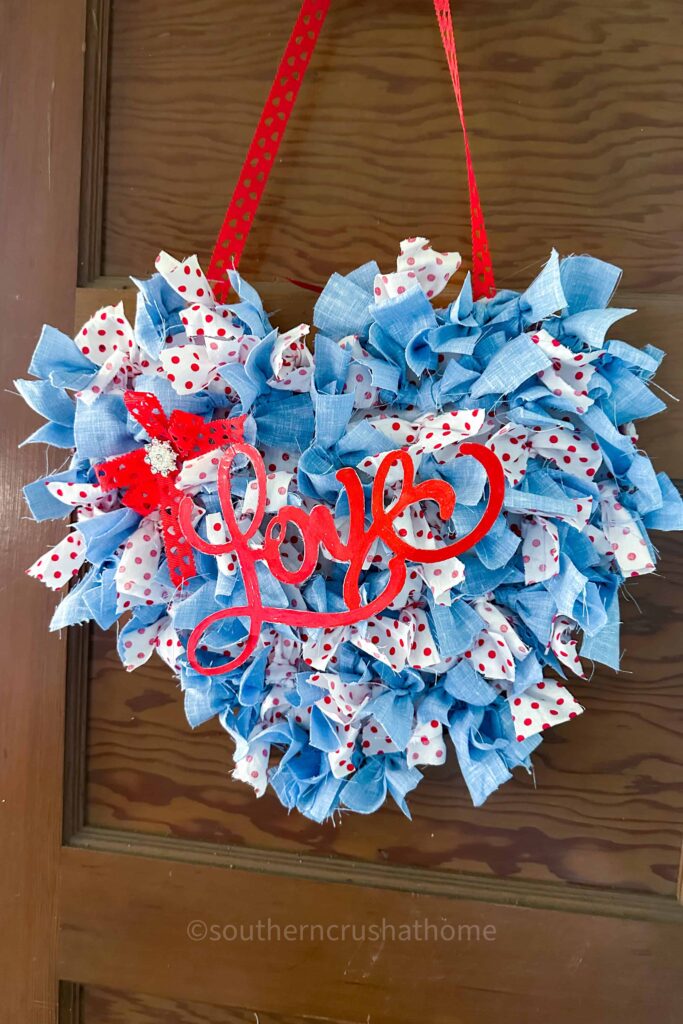
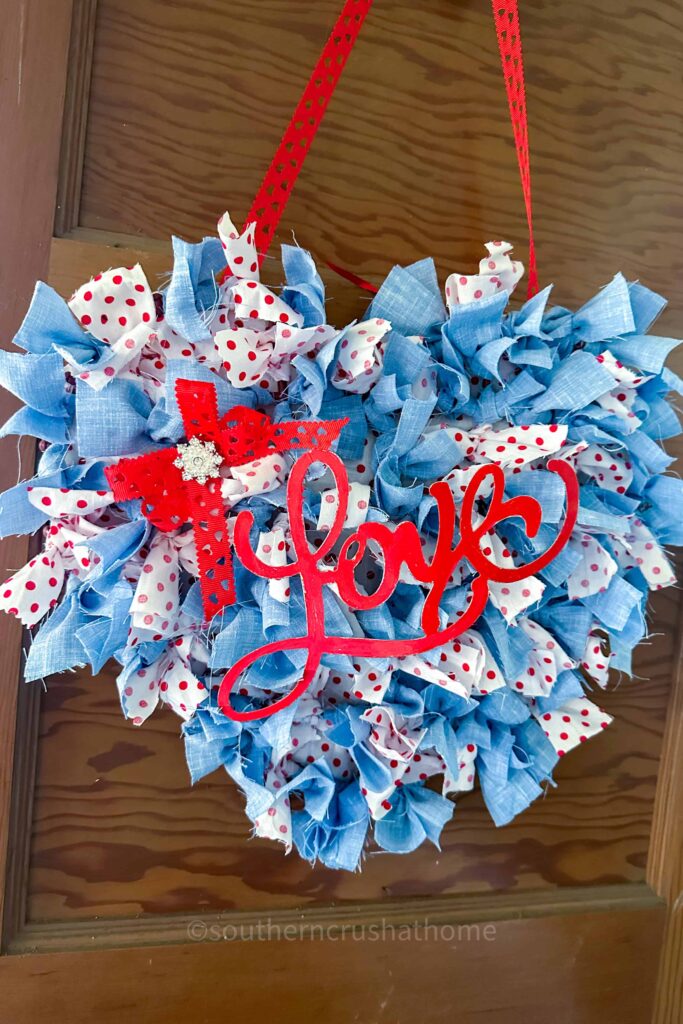
Step 5: Attach the Lettering
Once your painted lettering is dry, hot glue it onto the front of your wreath.
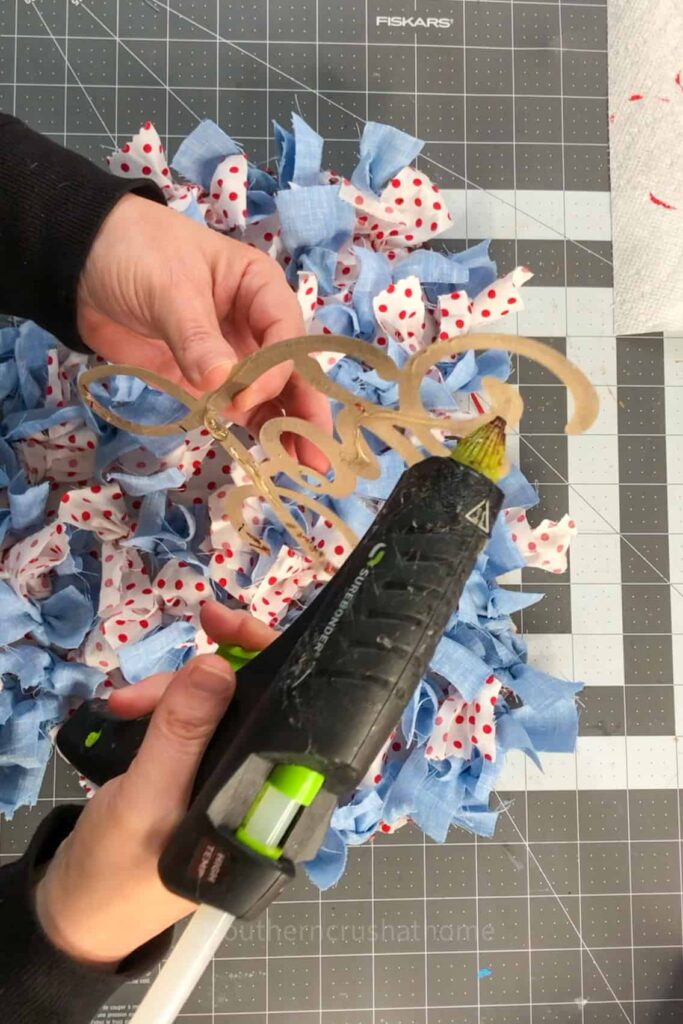
You can place it in the center for a traditional look or slightly off to one side for a more modern style.
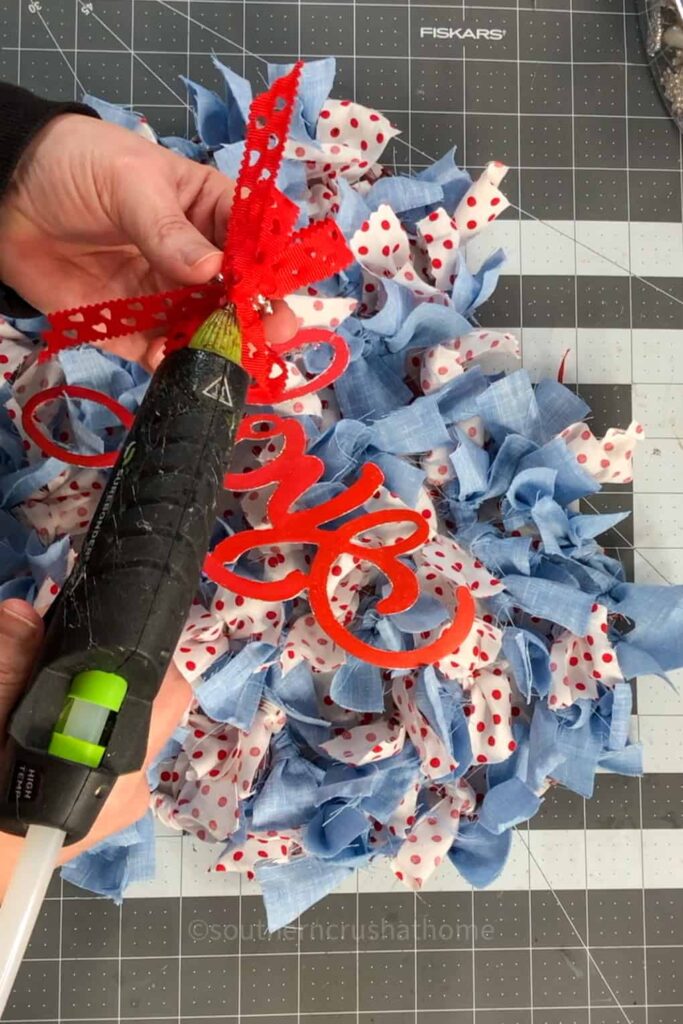
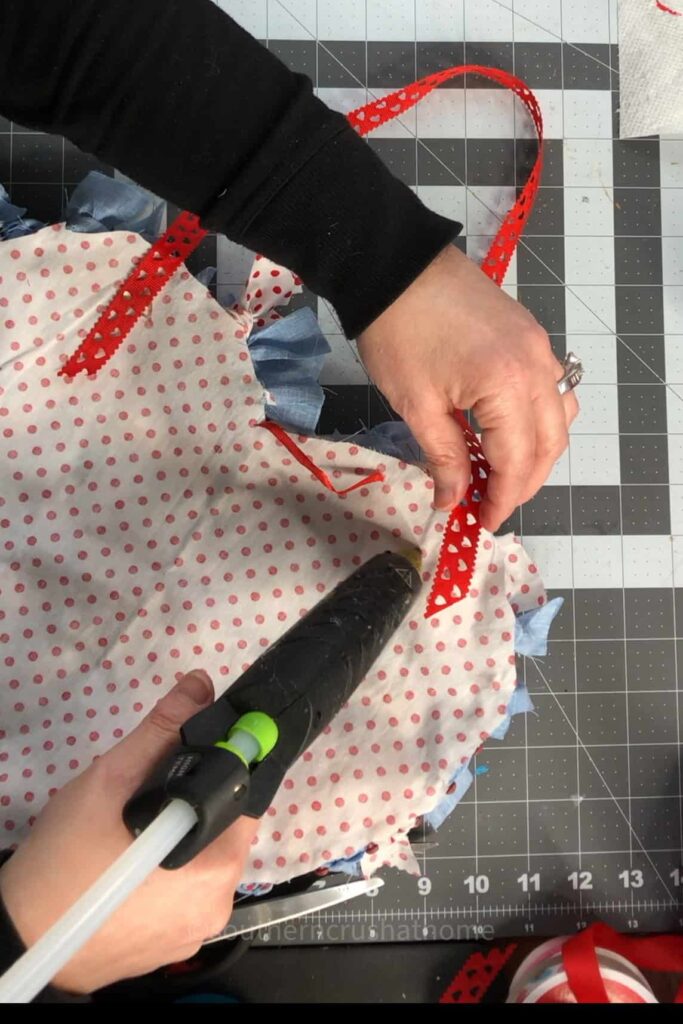
Step 6: Add a Bow (Optional)
If you want to add an extra decorative touch, now’s the time to attach a ribbon bow!
- Choose a ribbon that complements your fabric scraps.
- Tie a simple bow or use an EZ Bow Maker to create a multi-looped bow.
- Secure it to the wreath with hot glue or floral wire.
For a bit of sparkle, add a rhinestone embellishment to the center of the bow.
(I added a piece of fabric scrap to the back of my heart frame to fill in the holes where the knots left a space)
Step 7: Hang and Display Your Fabric Scraps Wreath!
Your fabric scraps wreath is now ready to hang! Use a ribbon loop, a wreath hanger, or even a simple command hook to display it on your:
- Front Door – A welcoming Valentine’s decoration.
- Fireplace Mantel – The perfect festive accent above your mantel.
- Gallery Wall – Mix it in with framed prints for a seasonal touch.
- Bookshelf or Hutch – Lean it against a stack of books or plates.
- Gift Idea – Attach it to a gift basket or present for a unique handmade touch.
Step-by-Step YouTube Video Tutorial
Want to see exactly how this wreath comes together? Check out my YouTube video tutorial, where I walk you through each step and share additional crafting tips. Click below to watch the full tutorial!
Embed YouTube Video Here
Why You’ll Love This DIY Fabric Scrap Wreath
- Budget-Friendly – Most supplies come from Dollar Tree or can be repurposed from fabric scraps you already have.
- No-Sew & Easy to Make – Just tie, glue, and enjoy!
- Customizable – Use any color scheme or embellishments to match your decor.
- Eco-Friendly – A great way to upcycle fabric remnants instead of throwing them away.
- Perfect for Gifting – A thoughtful, handmade Valentine’s gift idea.
This fabric scrap wreath is a fun and easy way to create a charming Valentine’s decoration without spending a lot of money. Whether you go for a classic red-and-pink theme, a neutral farmhouse style, or a colorful boho look, this DIY wreath can be completely personalized to fit your style.
It’s a great way to reuse fabric scraps, make something unique, and add a touch of handmade charm to your home. Plus, it’s a relaxing and rewarding craft project—perfect for an afternoon of creativity!
Don’t forget to check out my YouTube tutorial for a step-by-step guide and extra inspiration. Happy crafting! ❤️🎀

How to Make a Wreath with Fabric Scraps: Easy Dollar Tree Valentine’s Craft
Equipment
- Paint pens
- scissors
- Hot glue gun and glue sticks
Materials
- Dollar Tree heart-shaped decor with cardboard lettering and tinsel
- Fabric scraps cut into strips, 1.5″ x 6″
- Ribbon for bow optional
Instructions
- Step 1: Prepare the Wreath Base
- Start by removing the cardboard lettering and tinsel from the Dollar Tree heart-shaped decor. Dollar Tree often carries tinsel-covered decorations for every season, and while they may not look fancy at first, the plastic frames underneath are great for wreath-making!
- Once you’ve stripped the frame down to its basic structure, check for any rough edges. If needed, trim or smooth out any remaining bits of tinsel or glue.
- Step 2: Cut the Fabric Strips
- Using scissors, cut your fabric scraps into strips measuring 1.5 inches wide by 6 inches long. You can use a mix of patterns, colors, and textures for a fun and unique look.
- If you want a more cohesive design, stick to a specific color palette, such as:
- Traditional Valentine’s colors: red, pink, white
- Rustic farmhouse: neutral tones, soft florals, buffalo check
- Modern boho: pastels, mustard yellow, dusty rose
- Step 3: Tie the Fabric Scraps to the Frame
- Now for the fun part—adding the fabric strips!
- Take each fabric strip and tie it in a simple knot around the plastic frame.
- Continue this process, pushing the strips close together to create a full, fluffy wreath.
- If using multiple colors, alternate them as you go to create a balanced, visually appealing pattern.
- This step may take some time, but the result is worth it! Keep going until your wreath is full and fluffy.
- Step 4: Paint the Lettering
- Set your wreath aside and grab the cardboard lettering you removed earlier. Using paint pens, give it a fresh new look!
- Some fun ways to customize the letters:
- Classic & Simple: White or gold lettering for an elegant touch.
- Bold & Fun: Red or pink with glitter accents.
- Rustic & Farmhouse: Distressed paint with a vintage vibe.
- Let the paint dry completely before moving on to the next step.
- Step 5: Attach the Lettering
- Once your painted lettering is dry, hot glue it onto the front of your wreath. You can place it in the center for a traditional look or slightly off to one side for a more modern style.
- Step 6: Add a Bow (Optional)
- If you want to add an extra decorative touch, now’s the time to attach a ribbon bow!
- Choose a ribbon that complements your fabric scraps.
- Tie a simple bow or use an EZ Bow Maker to create a multi-looped bow.
- Secure it to the wreath with hot glue or floral wire.
- For a bit of sparkle, add a rhinestone embellishment to the center of the bow.
- Step 7: Hang and Display!
- Your fabric scrap wreath is now ready to hang! Use a ribbon loop, a wreath hanger, or even a simple command hook to display