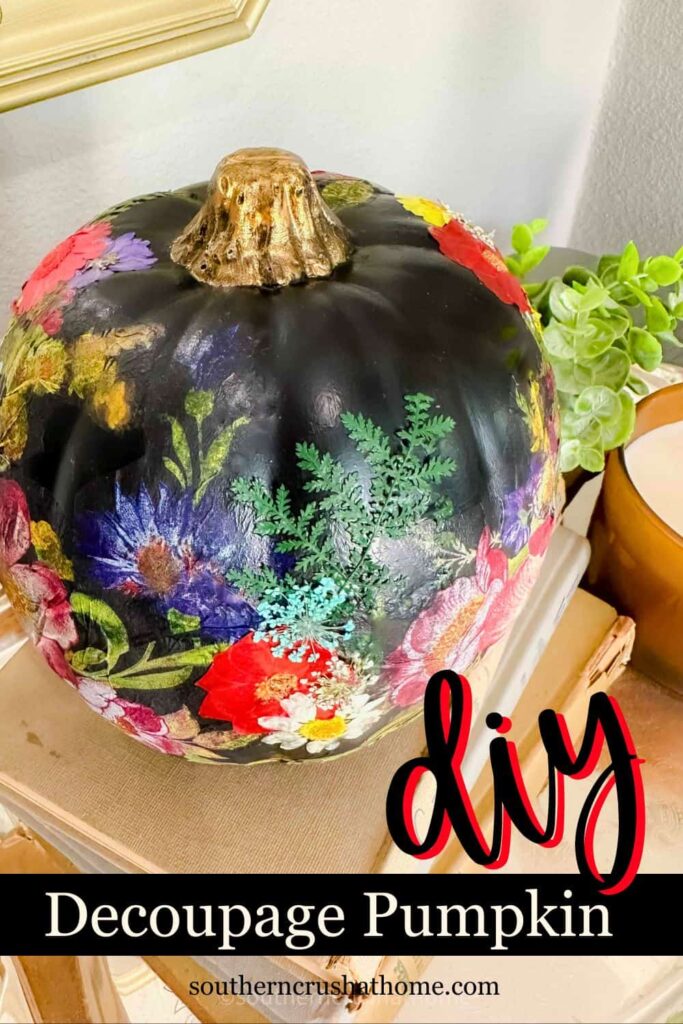
How to Decoupage a Pumpkin with Paper Napkins and Pressed Flowers
Looking for a beautiful and unique way to decorate your pumpkins this fall? This decoupage pumpkin with paper napkins and pressed flowers is a stunning, no-carve option that’s easy to create without all the mess of traditional pumpkin decorating.
PIN this for later!
Using a few simple supplies like Mod Podge, a hot glue gun, and metallic paint, you can transform a plain pumpkin into a gorgeous work of art perfect for your fall decor.
In this tutorial, I’ll show you how I used a 6″ black faux pumpkin, a MacKenzie Childs paper napkin, and pressed flowers to create an elegant pumpkin that’s sure to be the highlight of your autumn decorations.
This blog post contains affiliate links. The opinions are wholly my own from my own experience. I may earn a small commission from clicks through to the websites that end in a purchase.
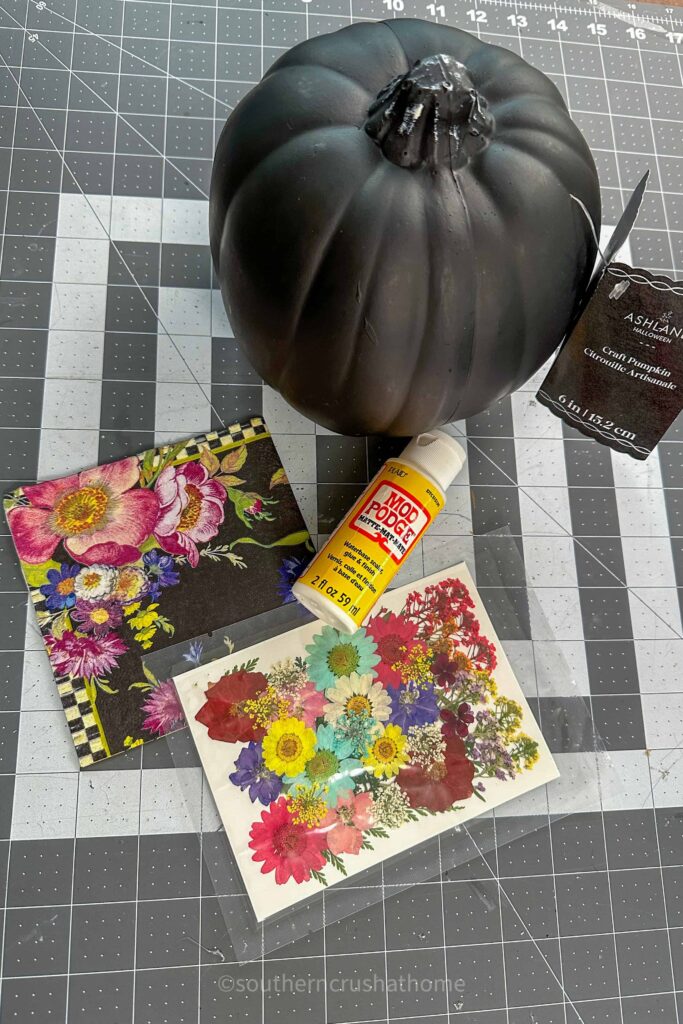
Materials You’ll Need to Decoupage a Pumpkin:
- 6″ black faux pumpkin
- Paper napkins (I used a MacKenzie Childs napkin, but any floral or patterned napkin will work)
- Pressed flowers
- Mod Podge
- Hot glue gun and glue sticks
- Scissors
- 24kt gold metallic paint
- Paintbrush
- Scotch tape
- Heat tool (optional, for faster drying)
Step-by-Step Tutorial: How to Decoupage a Pumpkin with Paper Napkins and Pressed Flowers
Step 1: Prepare the Napkins for Decoupage
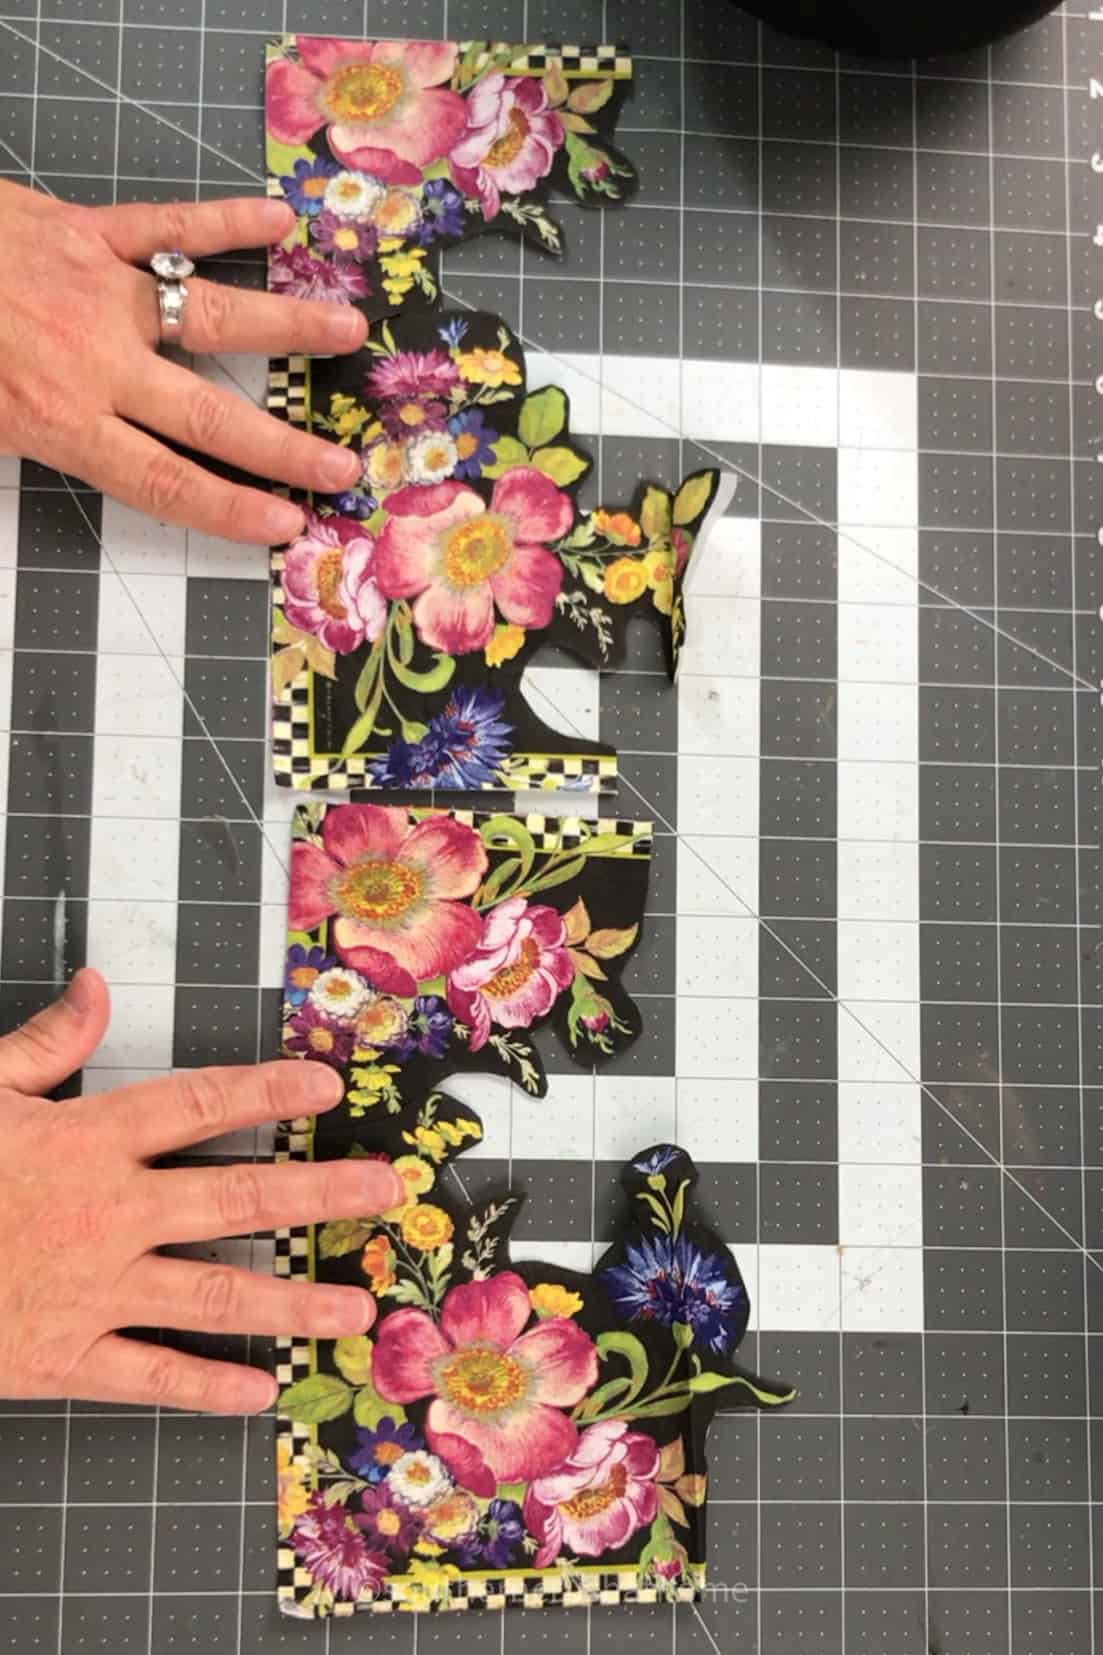
Start by choosing the design you want to use from the paper napkins. I went with a MacKenzie Childs napkin that featured a beautiful floral pattern.
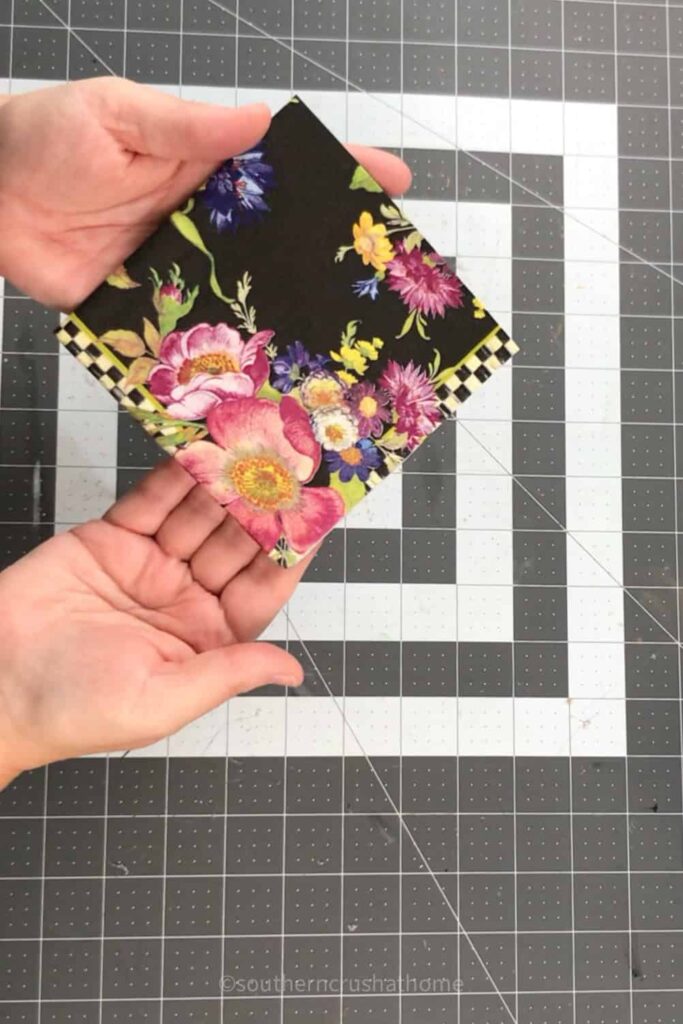
Carefully cut out the floral design from the napkins, trimming as close to the outline as possible.

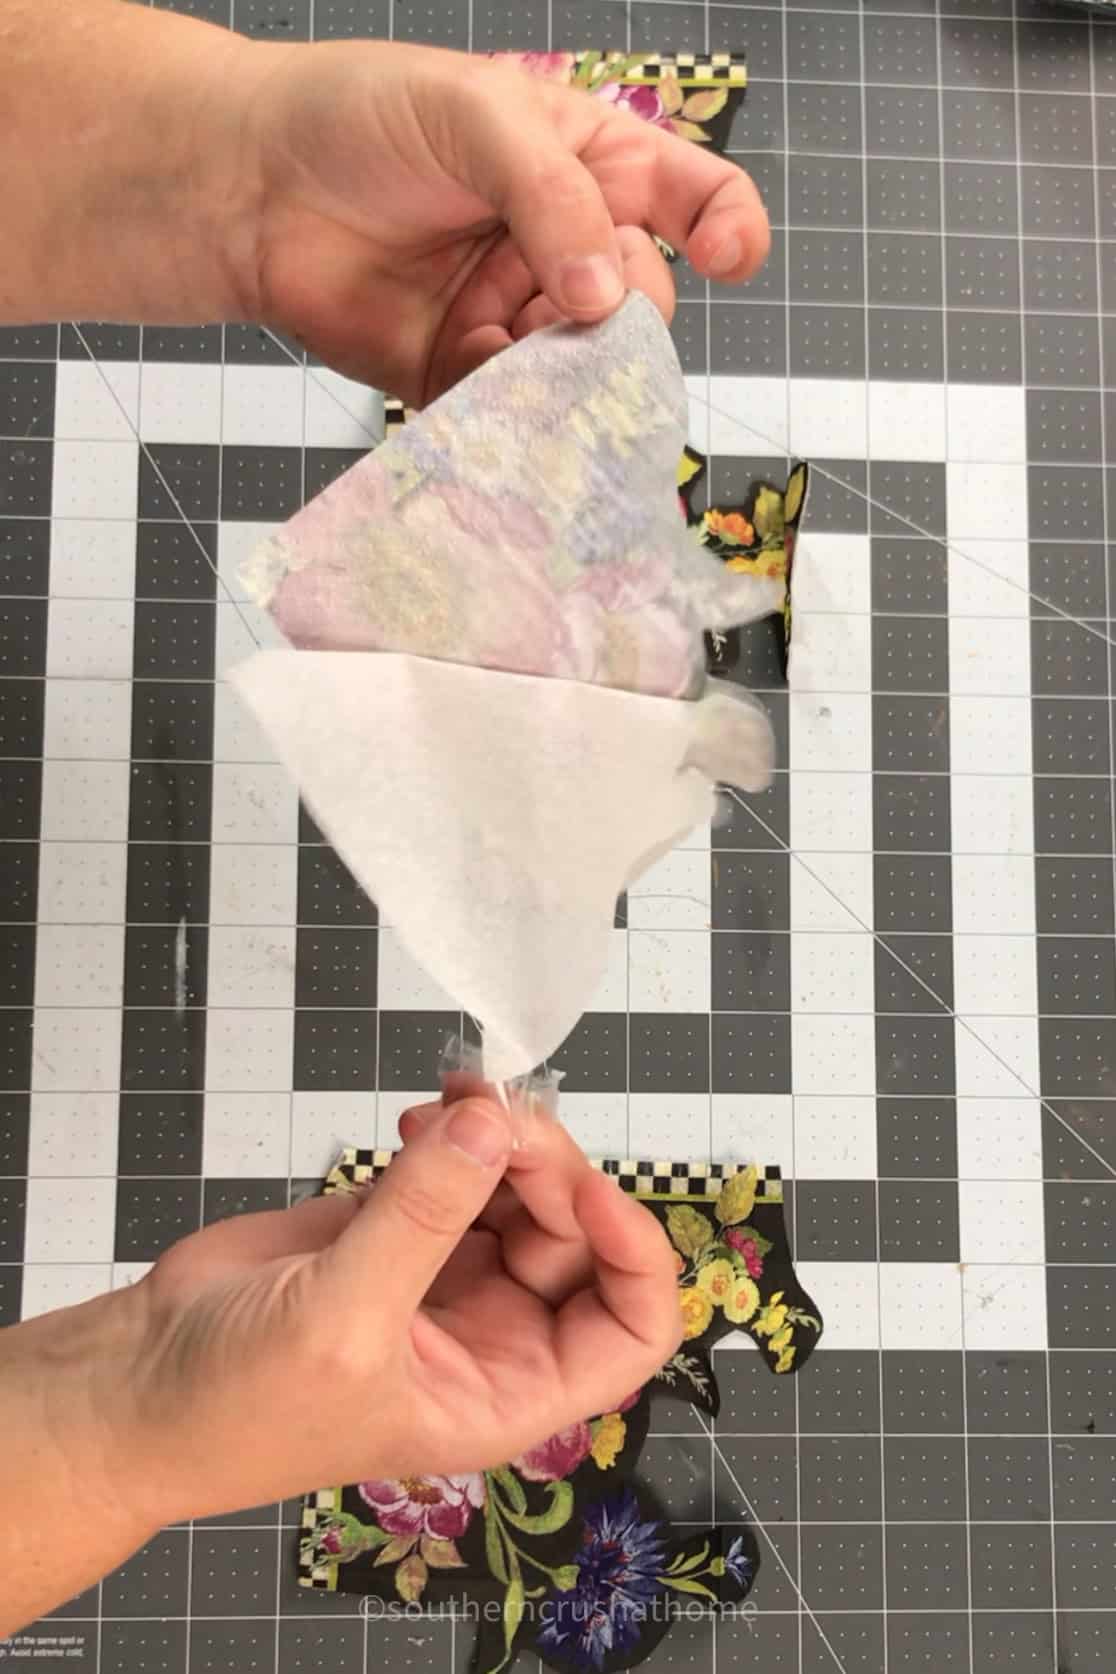
Pro Tip: Napkins usually have multiple layers, which can make them tricky to decoupage. Use a piece of Scotch tape to separate the layers easily. Gently press the tape to the back of the napkin, then pull it away to lift off the extra layers, leaving you with the thin, printed layer ready for decoupage.
Step 2: Apply Mod Podge and Attach the Paper Napkin
With your napkin pieces prepared, it’s time to start decoupaging. Using a paintbrush, apply a thin layer of Mod Podge to a small section of the pumpkin, starting at the base.
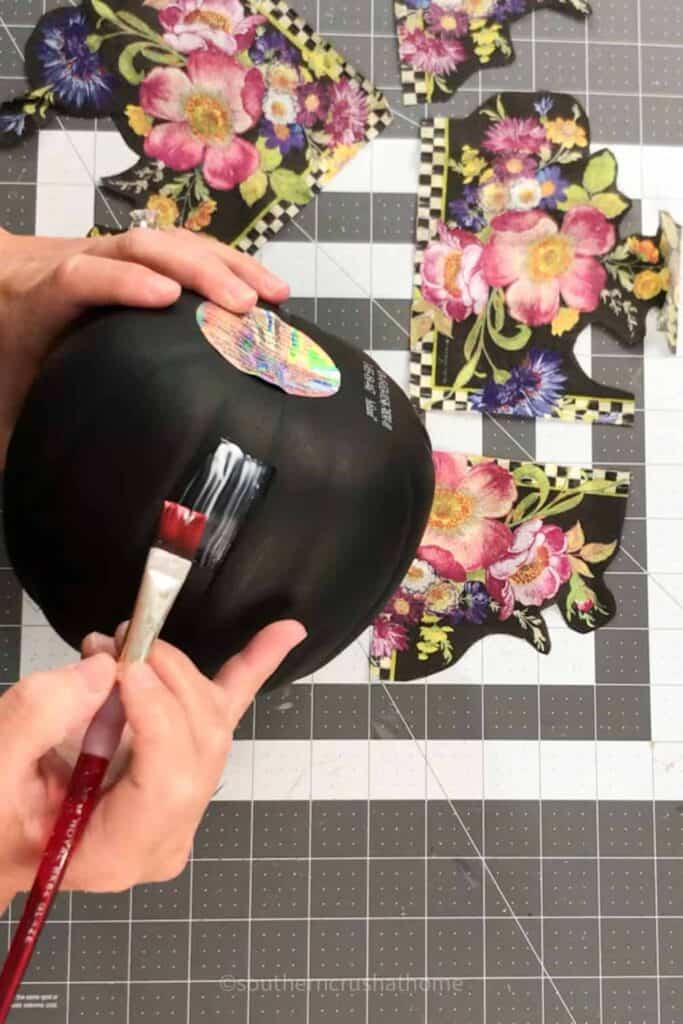
Carefully press a piece of the napkin onto the Mod Podge, smoothing it out with your fingers or the brush to remove any wrinkles or bubbles.
Pro Tip: Work slowly and in small sections to avoid tearing the delicate napkin. Use the brush to press the napkin into the creases and curves of the pumpkin for a seamless look.
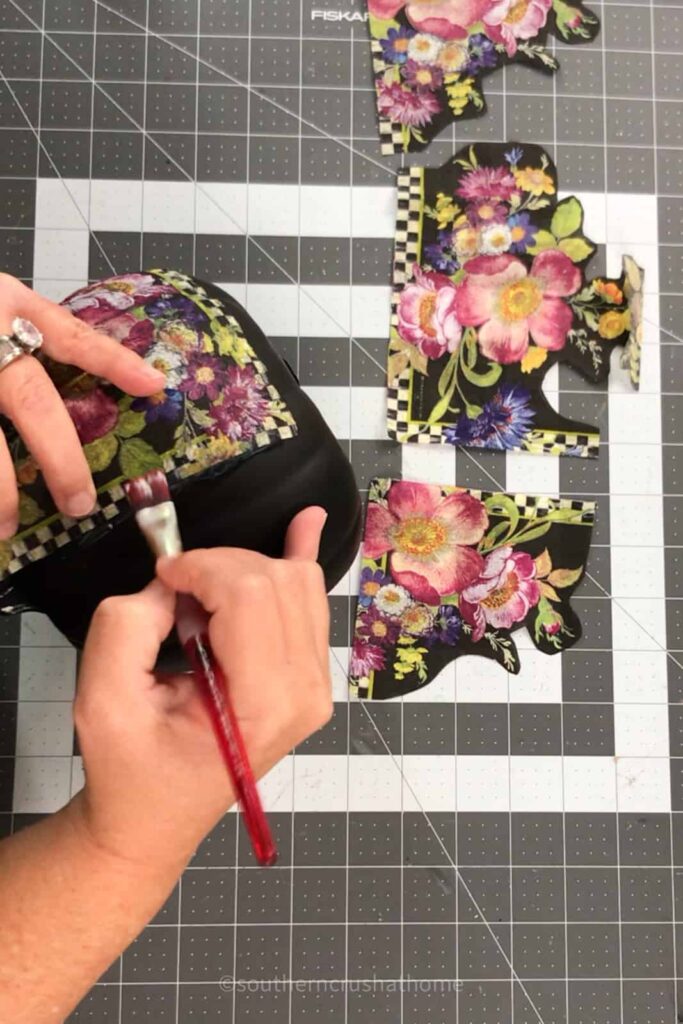
Continue this process around the pumpkin, layering the napkin pieces to create a beautiful, cohesive design. If you need to overlap pieces, apply a little more Mod Podge to help them adhere smoothly.
Step 3: Add the Pressed Flowers
Once the napkin design is fully applied and dry, it’s time to add the preserved flowers.
Use a hot glue gun to initially attach the pressed flowers to the pumpkin, placing them in areas that complement the napkin design. Use tweezers to position the pressed flowers.


After the flowers are glued in place, seal them with a thin layer of Mod Podge to protect them and give them a slight sheen.
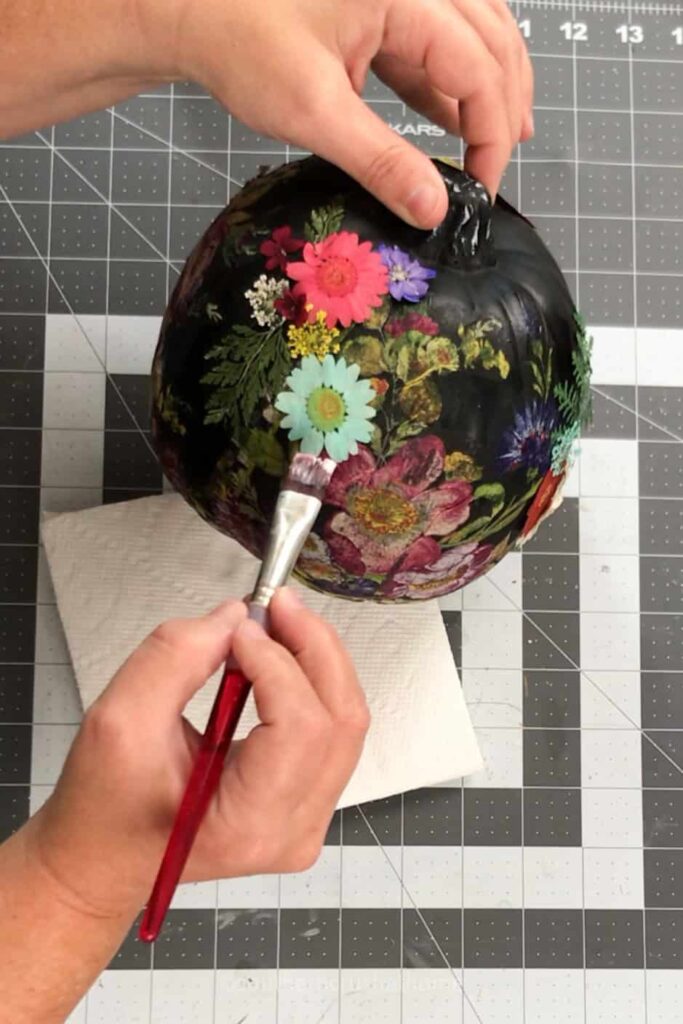
Let the Mod Podge dry completely before moving on to the next step.
Step 4: Paint the Stem and Add Gold Accents
For an elegant touch, use 24kt gold metallic paint to paint the pumpkin’s stem. This instantly adds a luxurious look and brings the whole design together.

To create a cohesive, high-end finish, use the same gold paint to highlight a few areas on the napkin design. Lightly brush the paint along some of the floral outlines or edges to give them a bit of sparkle and dimension.
Step 5: Dry and Set
Allow the pumpkin to dry completely. If you’re in a hurry, you can use a heat tool to speed up the drying process. Just be careful not to overheat the pumpkin, as it could cause the Mod Podge to bubble.
How to Display Your Decoupage Pumpkin
Your beautiful decoupage pumpkin is now ready to take center stage in your fall decor! Here are a few ways you can display it:
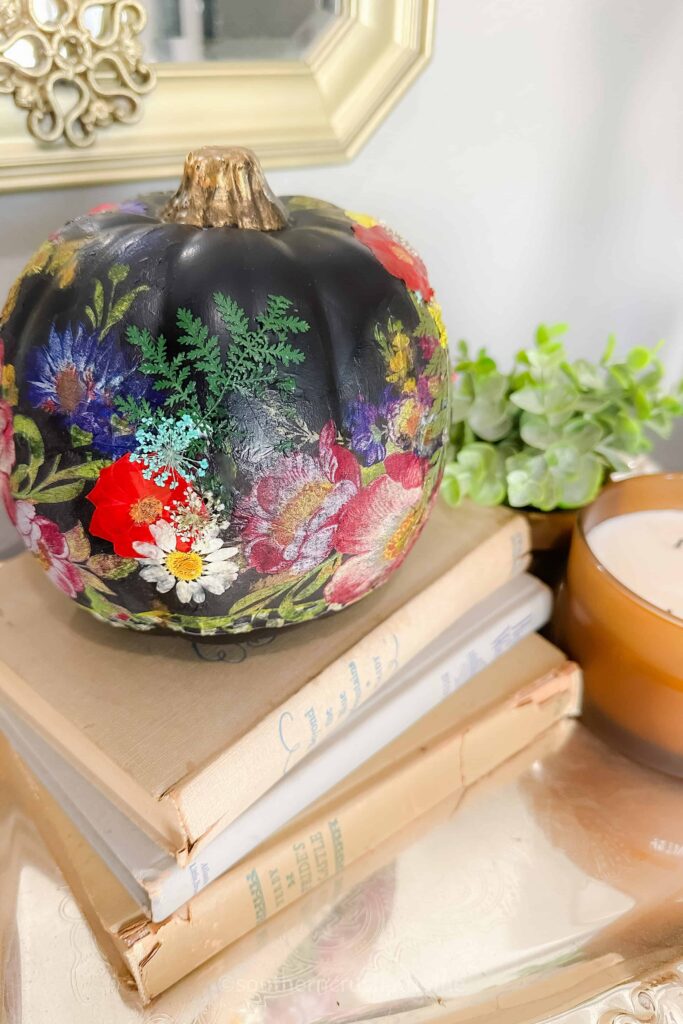
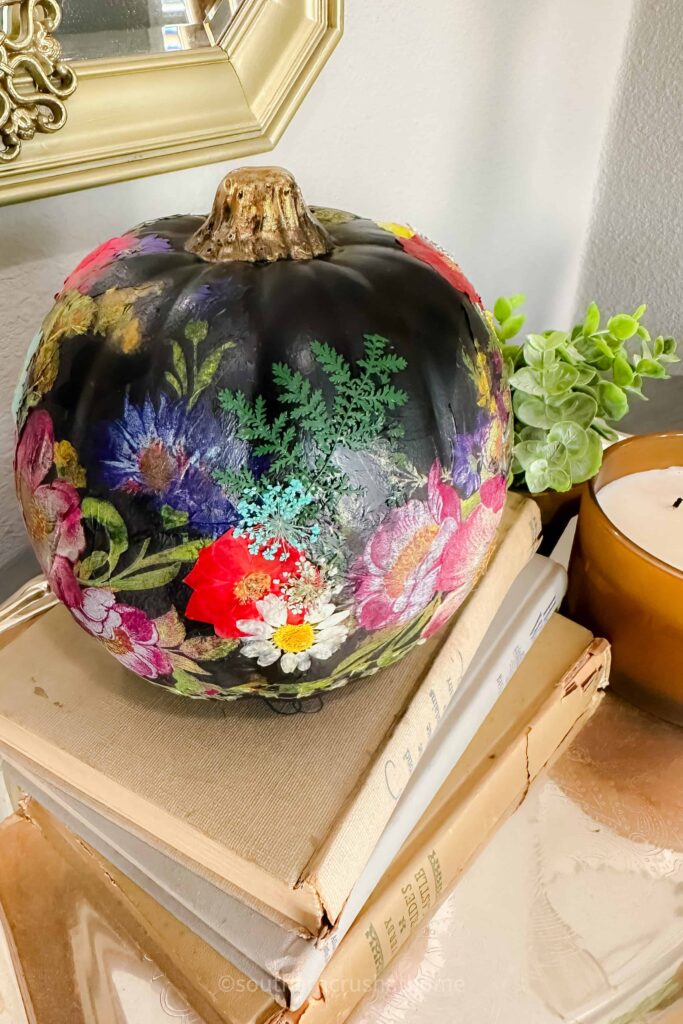
- On a Book Stack: Place the pumpkin on a stack of decorative books for an elegant, elevated look. Choose books with covers in complementary colors to make the pumpkin pop.
- On a Mantel: Add the pumpkin to your mantel display, surrounded by candles, faux leaves, and other fall accents for a cozy and inviting vibe.
- On a Tray: Create a stylish centerpiece by placing the pumpkin on a decorative tray along with other fall items like small gourds, pinecones, and mini candles.
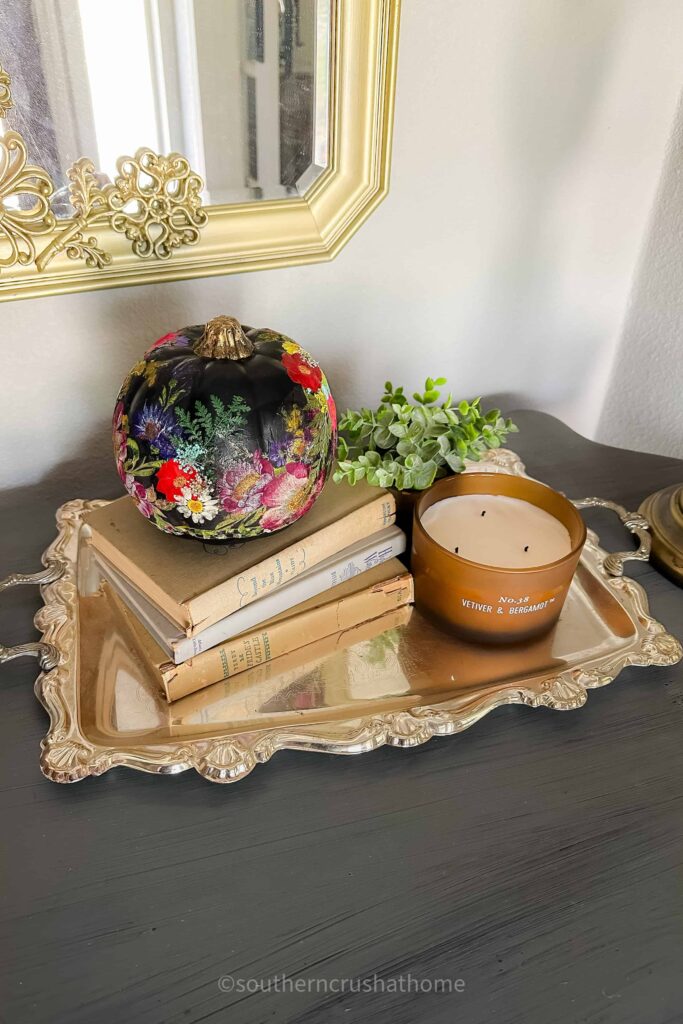
No matter how you choose to style it, this decoupage pumpkin will bring a touch of elegance and charm to your fall setup.

Why This is a Great No-Carve Option
This decoupage pumpkin project is an excellent no-carve decorating idea that’s mess-free and easy to make. Not only does it give you more control over the design, but it also allows for endless creativity with different napkin patterns and pressed flowers. Plus, using Mod Podge creates a smooth, professional finish that looks stunning as part of your fall or Halloween decor.
So, skip the carving mess this year and opt for a more sophisticated approach to pumpkin decorating with this decoupage technique!
This DIY decoupage pumpkin with paper napkins and pressed flowers is a quick and beautiful way to add a touch of elegance to your fall decor. With a few simple supplies, you can transform a basic faux pumpkin into a stunning seasonal centerpiece. The added gold accents and pressed flowers give it that extra bit of sophistication, making it a standout piece in any fall display.
Ready to get started? Gather your napkins, pressed flowers, and Mod Podge, and let your creativity shine this season! Happy crafting! 🎃🌼